Resin statues are beautiful, but they can crack, chip, or break when they fall or get exposed to heat or pressure. The good news is that most resin statue damage can be fixed at home with only a few tools.
Whether you want to fix a broken arm, reattach a piece, repair cracks, or restore missing details, the process is simple when you know what to do.
In this guide, we will teach you how to repair resin statues using four expert-approved methods. Whether you have a clean snap or a shattered mess with missing pieces, we will help you restore your art to its former glory.
Quick Takeaways:
- Use Cyanoacrylate (Super Glue Gel). It is fast and bonds tightly for small, lightweight pieces.
- Use Two-Part Epoxy Adhesive. It creates a structural bond strong enough to hold heavy heads or limbs.
- Use Epoxy Putty. You can mash it into gaps and sculpt it to replace missing toes or chips.
- Use UV Resin. It cures invisible and clear, making it perfect for transparent art.
- The Secret Step: The repair isn't done until you sand the seam and touch up the paint.
Epoxy Resins You May Want to Shop
Explore More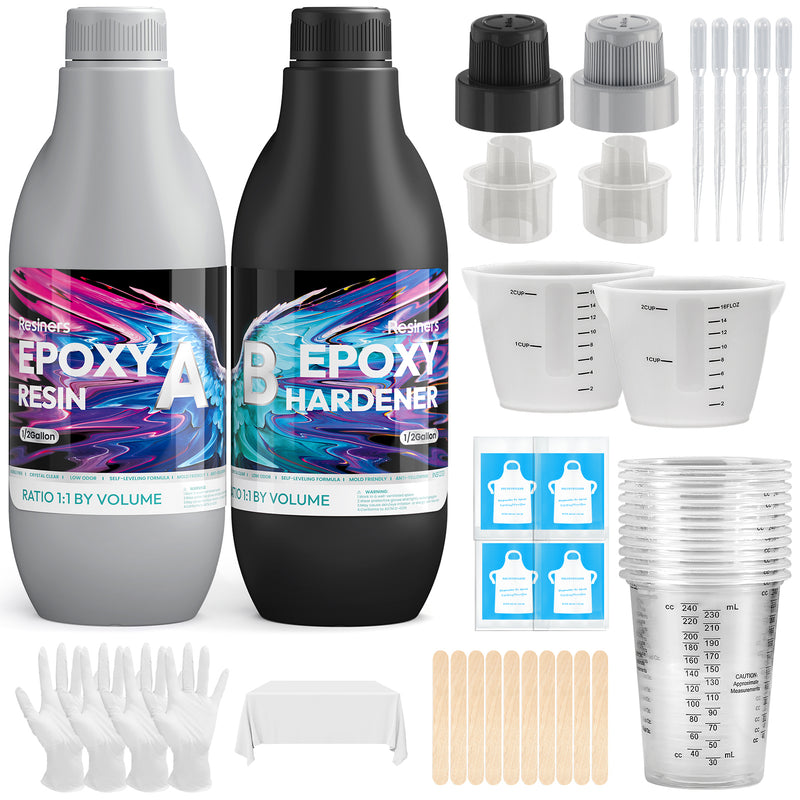


What You Need Before Repairing a Broken Resin Statue
Before you begin, gather the tools and materials that make the process easier.
Basic Materials:
- Epoxy glue or strong adhesive
- Epoxy resin or UV resin
- Sandpaper
- Isopropyl alcohol
- Small paintbrush
- Putty or sculpting clay
- Acrylic paint
- Protective gloves
Resin does not bond well to oils or dust. Cleaning and lightly sanding the damaged area helps the repair stay strong and smooth.
✨ Also read: 5 Common Epoxy Resin Problems and How to Fix Them
Method 1: The Super Glue Fix (For Small, Clean Breaks)

If you have a lightweight figurine or a small clean break (like a snapped finger or a sword), this is the fastest method.
What You Need:
- Cyanoacrylate Glue (CA Glue / Super Glue)
- Expert Tip: Use the Gel version. Liquid super glue runs everywhere. It will drip down your statue and ruin the paint. Gel stays exactly where you put it.
The Process:
- Apply a tiny dot of gel to one side of the break only. You do not need a lot. If it squeezes out when you press the pieces together, you used too much.
- Press the pieces together firmly. Hold it steady for 30 to 60 seconds. Do not twitch!
- Let it cure. Even though it says "instant," let it sit for an hour before handling it.
⚠️ Warning: Do not wipe wet super glue! If glue squishes out of the crack, do not try to wipe it with a cloth. It will smear a thin layer of glue all over the paint, which dries into a nasty white haze. Let it dry as a bead, then sand it off later.
✨ Also read: Types of Resin
Method 2: Two-Part Epoxy (For Heavy Structural Repairs)

If the head broke off a heavy garden statue, or an arm broke off a large 1/4 scale figure, super glue is not strong enough. It is brittle and will snap again. You need a structural adhesive.
What You Need:
- Two-Part Epoxy Adhesive (5-minute cure is usually best)
- A toothpick and a scrap piece of cardboard for mixing
The Process:
- Squeeze equal parts of Resin and Hardener onto your cardboard.
- Mix them thoroughly with the toothpick for 30 seconds.
- Apply a thin layer to both sides of the break. The chemical reaction creates heat and welds the pieces together.
- Press the pieces together. You might need to use masking tape or rubber bands to hold the heavy piece in place while the epoxy sets.
- Wait. Epoxy takes longer to cure. Leave it alone for 24 hours to reach full strength.
The "Pinning" Technique (Expert Level)
If the broken piece is heavy and long (like an outstretched arm), glue alone might not hold it against gravity. Experts use "pinning."
- Drill a tiny hole into the center of the break on the body.
- Drill a matching hole into the center of the break on the arm.
- Cut a small piece of metal wire (a paperclip works great).
- Glue the wire into the holes as you glue the arm back on. This metal pin acts like a skeleton, giving the repair massive strength.
Method 3: Epoxy Putty (Filling Gaps and Missing Pieces)
Sometimes, a statue does not just break; it shatters. If you glue it back together and find little chips missing, or a gap where the resin pulverized, glue won't fill that space. You need a filler.
What You Need:
- Two-Part Epoxy Putty (Modeling putty like Milliput or Green Stuff)
- Water
- Sculpting tools (or a toothpick)
The Process:
- Cut a slice of the putty log (it usually has a blue center and yellow outside, or two separate sticks).
- Knead it with your fingers until it is one uniform color. This activates the hardening process.
- Press the putty into the crack or gap.
- Wet your finger: Dip your finger in water and smooth the putty out. Water prevents the putty from sticking to your skin and allows you to feather the edges so they blend into the statue.
- Sculpt it. If a toe is missing, shape the putty to look like a toe.
- Let it cure. Once hard, it can be sanded and painted just like the original resin.
Method 4: UV Resin (The Invisible Fix for Clear Statues)
Modern resin art often uses clear or translucent resin. If you use yellow epoxy or white super glue on a clear statue, you will see a big ugly line. For these repairs, you need UV resin.
What You Need:
- Clear UV Resin
- A UV Flashlight or Lamp
The Process:
- Clean the break thoroughly.
- Apply a small amount of Clear UV Resin to the crack.
- Press the pieces together.
- While holding them, shine the UV light on the seam for 60 seconds. The light cures the resin instantly.
- If there is a chip on the surface, fill it with a drop of UV resin and cure it. It will act like liquid glass, filling the hole invisibly.
The Final Polish: Hiding the Repair Lines
Gluing the pieces together is only half the battle. Now you have a statue with a visible crack line. If you want it to look brand new, you have to finish the job.
1. Sanding Once your glue or putty is 100% dry, grab some fine-grit sandpaper (400 to 600 grit). Gently sand the repair area. Your goal is to make the surface flush. If you used putty, sand it until you can't feel the transition between the resin and the putty with your fingernail.
2. Painting You will need acrylic paints.
- Color Matching: This is the hardest part. Mix your paints on a palette until you match the statue's color. Remember, paint often dries slightly darker than it looks when wet.
- Dry Brushing: If your statue has texture (like fur, stone, or rust), use a "dry brush" technique. Put paint on your brush, wipe almost all of it off on a paper towel, and then lightly dust it over the repair. This catches the high points and blends the repair perfectly.
3. Sealing Paint patches often look duller or shinier than the rest of the statue. Fix this by spraying the whole figure (or just the repaired area) with a clear sealer. Choose "Matte" for a natural look or "Gloss" for a shiny look. This evens out the finish and protects your paint job.
Resiners Machines You May Want to Shop
Explore More


Conclusion
A broken statue feels like a tragedy, but it is really just a project. Resin is one of the best materials to work with because it wants to be fixed.
Whether you are using a simple dot of super glue or sculpting a new nose out of putty, learning how to repair resin statues is a valuable skill that saves you money and heartbreak.
The key is patience. Let the glue dry. Sand the seam smooth. Match the paint. If you take your time, you might find that the repaired statue means even more to you than the new one did because you are the one who saved it.
Ready to start your repair? Make sure you have the right tools in your kit before you begin.
- Best for invisible clear repairs: Grab a UV Resin Kit for instant, glass-like fixes.
- Strong adhesive for structural fixes: Use high-strength Epoxy Resin for heavy repairs.
- Tools for sanding and prep: Ensure a smooth finish with the Resiners Machine Collections.
FAQs About How to Repair Resin Statues
Can I use hot glue to repair a resin statue?
No. Please put the glue gun down. Hot glue is too thick, which creates a gap between the pieces. It is also very weak and temperature sensitive. It might hold for a day, but the pieces will eventually fall apart again. Stick to cyanoacrylate (super glue) or epoxy for a permanent bond.
How do I fix a garden statue that lives outside?
Outdoor statues face rain, sun, and temperature swings. You must use a waterproof two-part epoxy. Standard super glue can become brittle and snap after a few months of sunlight. After the repair, seal the area with a UV-resistant outdoor spray sealer to protect the paint from fading.
What paint works best on resin statues?
Water-based acrylic paints are the industry standard. They bond well to resin (especially if you sand or prime the spot first) and are easy to clean up. You can find them at any craft store. Avoid oil-based paints as they take forever to dry and can sometimes react with the resin.
How do I remove excess dried glue from the statue?
If you accidentally let super glue dry on the surface, do not try to scrape it off with a knife; you might gouge the resin. If the statue is unpainted, you can use a little acetone (nail polish remover) on a Q-tip. If it is painted, acetone will strip the paint! The safest method is to gently sand the glue down with fine-grit sandpaper until it is flush with the surface.


Dejar un comentario
Este sitio está protegido por hCaptcha y se aplican la Política de privacidad de hCaptcha y los Términos del servicio.