If you’re looking for a project that’s both creative and practical, learning how to make resin dog tags is a solid place to start. Resin lets you design tags that are strong, waterproof, and totally customizable.
You control the look with resin. Add glitter, dried flowers, small charms, or even glow-in-the-dark powder for something unique.
Unlike plain metal tags, resin tags let you play with color and style while still being practical. Once they cure, these tags hold up to daily wear and give your pet a one-of-a-kind accessory.
You don’t need fancy skills to get started. Grab a few simple tools, a mold, and some resin, and you’ll make tags that look polished and professional.
- Learn the basics of making resin dog tags at home
- Gather the right tools and materials before starting
- Personalize each tag with colors, designs, and details
Materials and Tools You'll Need
You’ll need the right materials to make resin dog tags that last and look good. The resin type, mold shape, and decorative extras all affect how your finished tag turns out.
Choosing the Right Resin and Molds
Start with epoxy resin or UV resin. Epoxy cures slowly, so you get more time for details, while UV resin hardens fast under a lamp—handy for small tags.
Pick a silicone mold made for dog tags. Silicone’s flexible, so you can pop out the tag without breaking it. Look for molds with smooth edges and a few size options.
Keep a heat gun or small torch nearby. These tools pop bubbles from fresh resin and leave a smooth surface. Bubbles can make tags cloudy or weak if you skip this step.
Not sure which resin is right for your crafts? Read our article, Epoxy Resin vs UV Resin: What's the Difference? to find out.
Selecting Decorative Additives
Decorative powders and inks give resin dog tags their style. Mica powders add a pearly shimmer, and pigment inks bring bold, flowing color.
Mix in fine glitter or chunky glitter for sparkle. Want designs that really stand out? Try transparency sheets or heat-activated foil. Cut out shapes or words and embed them in the resin before it cures.
Layering colors works best if you pour resin in stages. Add glitter in one layer, let it cure, then pour a clear layer on top for depth.
Love using glitter but worry about safety? Check our article: Is Glitter Toxic? What You Need to Know Before Crafting.
Personalization Supplies
To turn a resin piece into a working resin dog tag, you’ll need some hardware. Jump rings and keychain rings connect the tag to a collar, and stainless steel or plated metal resist rust.
Add charms, small decals, or a name printed on a transparency sheet. Press these in before the resin sets for a tag that’s both decorative and functional.
If your mold doesn’t include a hole, keep a small drill or hand tool ready. Drill a clean hole for the jump ring after the resin cures.
Step-by-Step Process for Making Resin Dog Tags

Making resin dog tags takes a bit of setup, mixing, and patience. You’ll want the right tools and safe handling for a smooth, durable finish.
Preparing Your Workspace and Safety Precautions
Work in a clean, dust-free spot with decent airflow. Epoxy resin can give off fumes, so crack a window or use a fan. Cover your table with parchment, silicone mats, or plastic sheets.
Wear nitrile gloves and safety glasses. A mask or respirator for organic vapors is smart if you’re working indoors.
Set out your tools before you mix anything—molds, mixing cups, stir sticks, and colors. Having everything ready keeps you from scrambling once the resin starts to set.
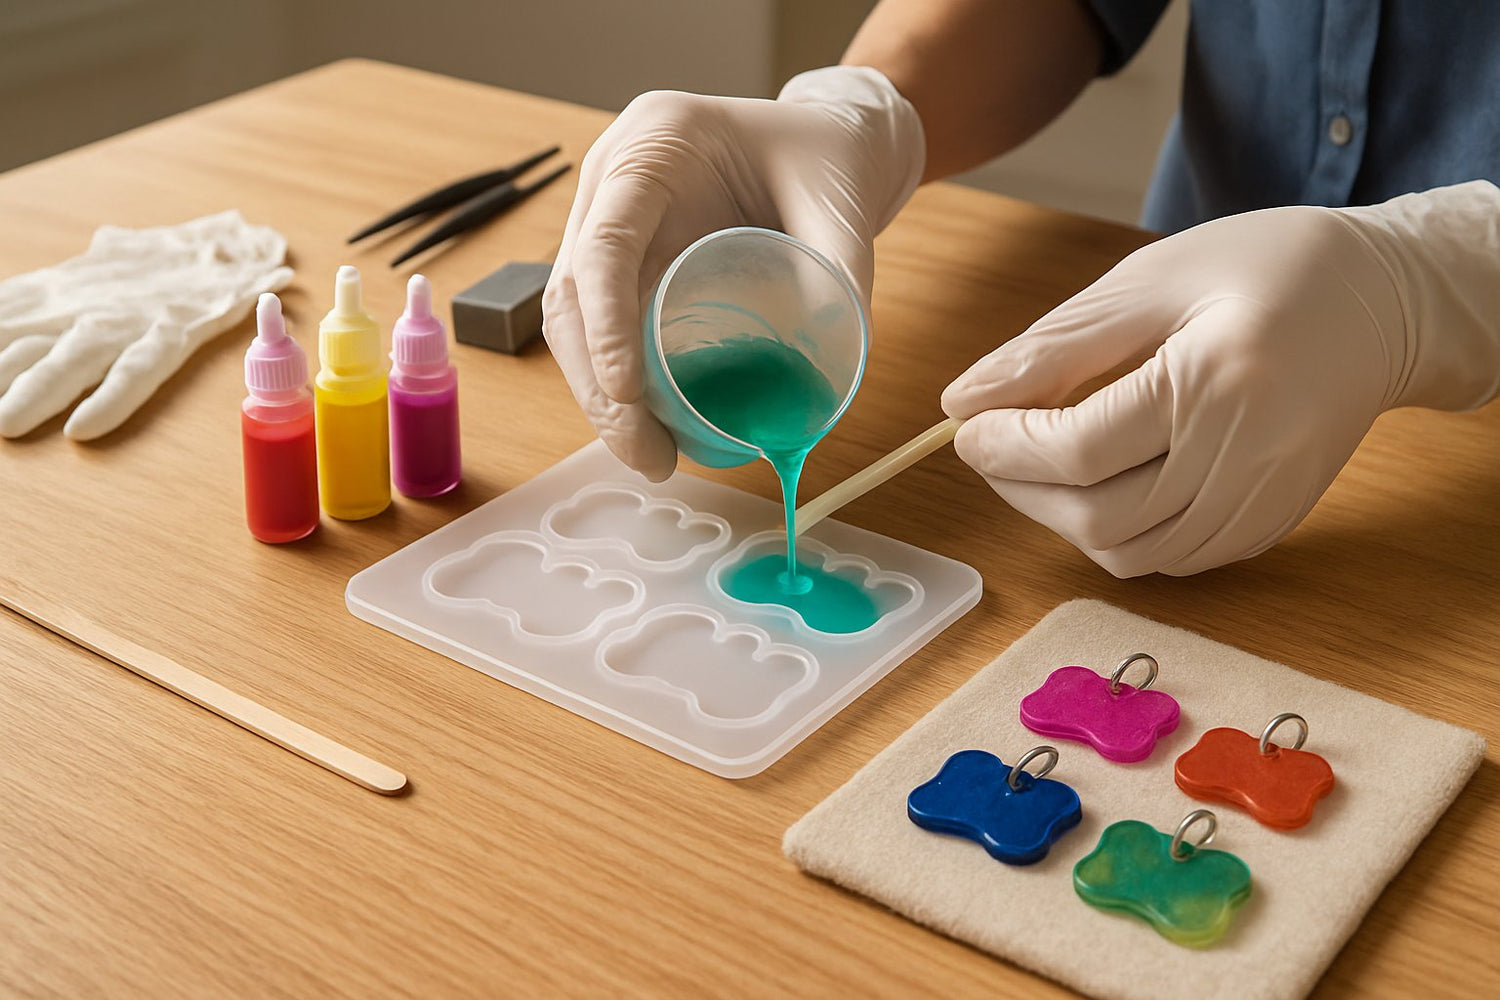
Mixing and Coloring the Resin
Measure out resin and hardener as the bottle says. Most brands use a 1:1 ratio by volume, but double-check. Use two cups to measure, then combine and stir slowly for a couple minutes to avoid bubbles.
Add color next. Mica powders shimmer, alcohol inks create bold designs, and glitter adds sparkle. Stir gently so everything mixes evenly.
For layered looks, split the resin into smaller cups and tint each one. Pour them in steps to create patterns inside the mold.
Pouring and Layering Techniques
Pour a thin base layer of clear or lightly tinted resin into the mold. This captures details and helps prevent air bubbles.
Use a heat gun or torch to pop bubbles on top. Hold it a few inches away to avoid overheating the mold.
Let the first layer thicken for 20–30 minutes before adding another. Swirl colors with a toothpick or sprinkle glitter between layers for depth. Don’t overfill; leave a gap at the top so resin doesn’t spill over.
Curing and Demolding
Epoxy resin usually takes 24–48 hours to cure at room temperature. Cover molds with a box to keep dust out while they set.
Once hardened, flex the mold gently to release the tags. If you find sharp edges, sand them with fine-grit sandpaper.
At this point, drill a small hole for a keyring if needed. Some folks add a clear topcoat for extra shine and durability.
Frustrated with bubbles in your resin? Learn why they happen by reading: Why Are There Air Bubbles In My Resin Project?
Personalizing and Assembling Your Dog Tags

DIY resin dog tags let you add names, phone numbers, and small accents. Each step makes the tag more useful and unique.
Adding Names and Contact Information
Print names and numbers on transparency sheets—the clear film blends right into resin. Cut the text to fit neatly in the mold.
You can use heat-activated foil or metallic vinyl for a sharp look. Foil letters catch the light and are easy to read.
Seal any printed material before embedding it in resin to stop ink from bleeding. Place the text in the mold, press out bubbles, and cover it with resin.
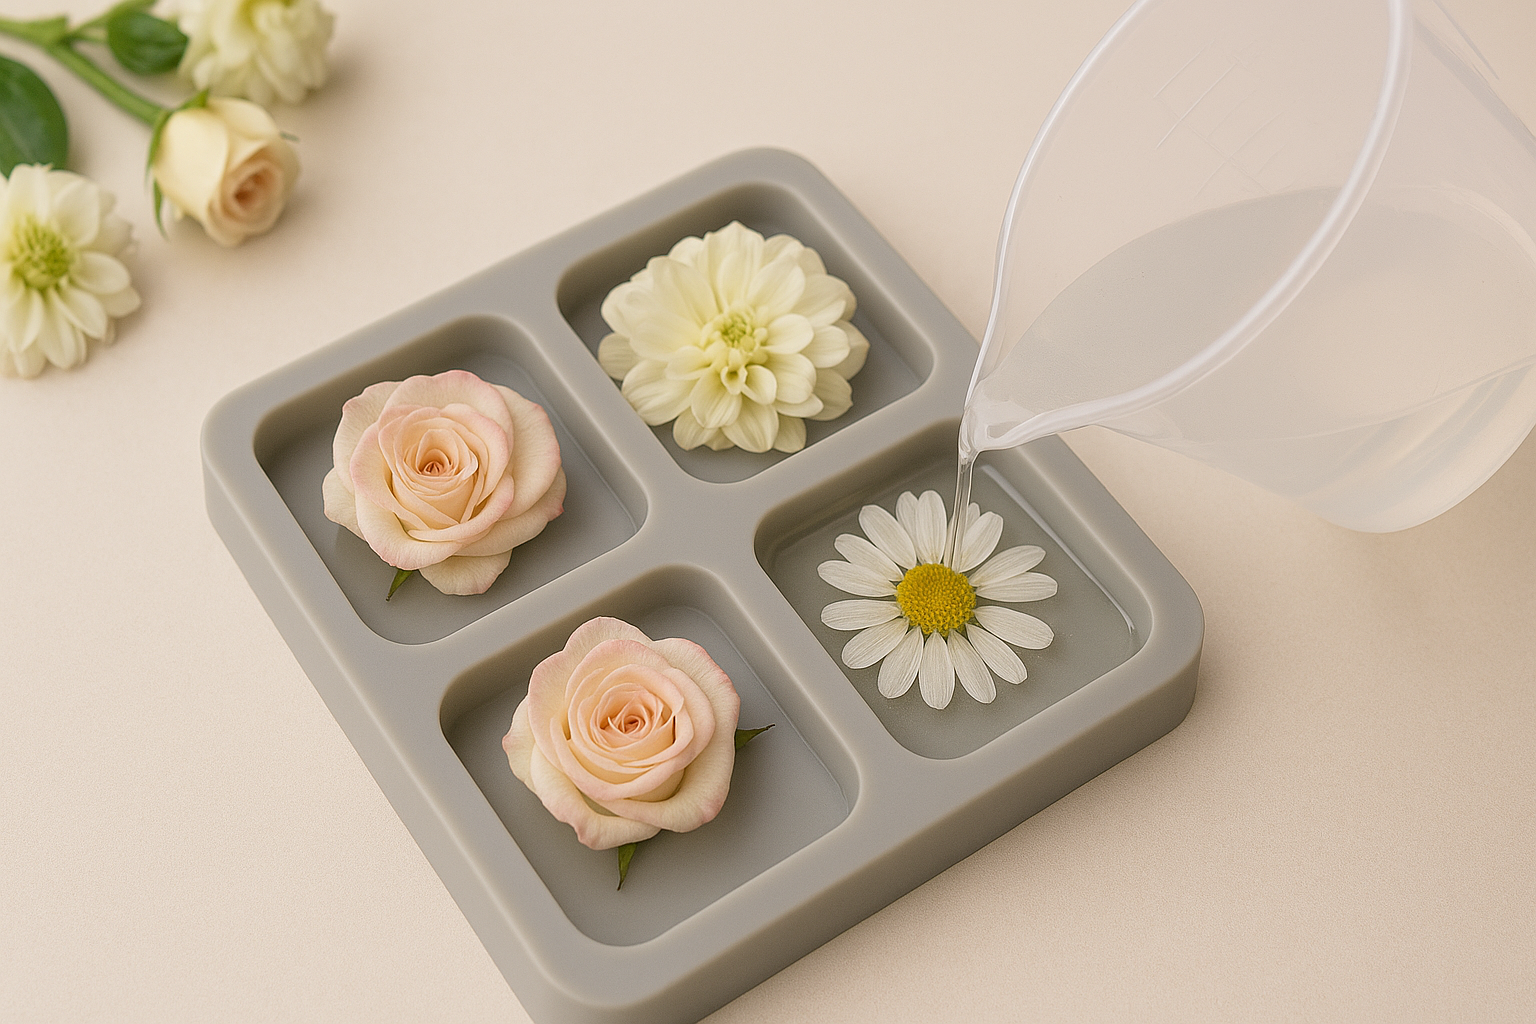
Incorporating Decorative Elements
Personal touches really make your tags pop. Small charms, glitter, or pressed flowers add style without making the tag bulky.
Decals work too. Stickers made for resin or DIY transparency decals both do the trick. Apply them carefully to avoid air bubbles.
For depth, pour resin in thin layers. Add your decoration, then seal with another coat. Heavy items don’t work well—they can weaken the tag or make it uncomfortable for your dog.
Attaching Hardware and Finishing Touches
When the resin’s cured, drill a hole at the top and insert a jump ring. Use pliers to close it tight so it won’t slip off.
Attach the jump ring to a keychain ring or right to the collar’s D-ring. Keychain rings make it easy to swap out tags.
Check the edges for rough spots and sand them down. A thin coat of clear resin or UV resin gives a polished, glassy finish and keeps the tag looking fresh.
Want your resin projects to shine their best? By reading our guide How to Polish Epoxy Resin: A Step-by-Step Guide to a Shiny Finish, you’ll learn how.
Final Thoughts
Now you know the basics of how to make resin dog tags, and the rest is all about letting your creativity shine. With a mold, resin, and a few personal touches, you can design tags that are strong, stylish, and totally unique to your pet.
Whether you keep it simple or add sparkle, the process is fun and rewarding. Plus, handmade tags make thoughtful gifts for fellow pet lovers. So gather your supplies, mix up some resin, and start crafting. Your pet’s next favorite accessory is just a pour away.
Ready to make yours? Start your project today.
Crafting with resin means thinking about safety too. Stay protected by reading our article: Do I Need a Mask When Working With Epoxy Resin?
Frequently Asked Questions
Do resin dog tags last?
Resin dog tags last a long time if you cure and seal them well. Epoxy resin is waterproof and scratch-resistant, so tags stay clear and shiny.
If your dog’s rough on gear, the tag might show wear sooner, especially from bumping into metal rings or chewing. A protective topcoat helps them last longer.
Is epoxy resin toxic to dogs?
Liquid epoxy resin is toxic before it cures. Always wear gloves and keep pets away while you work.
Once resin cures, it’s hard plastic and generally considered non-toxic. Still, don’t let your dog chew or swallow it.
What material is best for a dog tag?
Metal tags—like stainless steel or aluminum—are the toughest for dogs that are hard on their stuff. They resist breaking and last for years.
Resin tags are great for custom designs with color and fun shapes. Many crafters add a clear coat to keep resin tags strong.
What should you not put on a dog tag?
If you worry about strangers calling your dog by name, skip putting the name on the front. Focus on your phone number and address.
Don’t add small decorations that could fall off and become a choking hazard. Stick to smooth, sealed designs.
What happens if a dog licks resin?
If your dog licks uncured resin, you might notice drooling or an upset stomach. Sometimes, things can get worse, so it's best to keep resin projects out of reach while they're drying.
Cured resin is a bit safer but still shouldn't be chewed or licked. If your dog bites the tag, swap it out—broken pieces can get swallowed, and that's just not worth the risk.


Laisser un commentaire
Ce site est protégé par hCaptcha, et la Politique de confidentialité et les Conditions de service de hCaptcha s’appliquent.