
Resin crafting is a popular hobby and profession, creating stunning, glossy masterpieces involves more than just pouring resin onto your resin projects.
One crucial step that can make or break your artwork is the meticulous process of removing bubbles. So, do you have to remove bubbles from the resin?
The answer is a resounding yes, and let's delve into the why and how of this essential practice.
Why Remove Bubbles?
Bubbles in resin can significantly detract from the aesthetic appeal of your finished pieces. They can create a hazy, murky effect, obscuring the beautiful details and colors beneath.
In extreme cases, they can even cause structural weaknesses, leading to cracks or breaks. Therefore, removing bubbles is a crucial step in achieving a professional, high-quality finish.
Aesthetics
Bubbles can distort the clarity of your resin, affecting the overall visual appeal of your artwork. Imagine this: You've spent hours meticulously crafting a beautiful resin pendant.
You've carefully selected the colors, painstakingly arranged the elements, and patiently waited for the resin to cure. But when you finally unveil your creation, your heart sinks.
The surface of your pendant is marred by tiny bubbles, creating a cloudy, distorted effect.
The intricate details you worked so hard on are obscured, and the overall appearance is far from the crystal-clear, glass-like finish you envisioned.
Clarity
Resin is known for its ability to create a crystal-clear finish. However, bubbles can disrupt this clarity, causing a cloudy or hazy appearance. By removing bubbles, you maintain the transparency and luminosity of the resin, allowing the true beauty of your artwork to shine through.
Durability
Bubbles trapped within the resin can weaken its structural integrity over time. As the resin cures and hardens, these bubbles can create weak spots that may lead to cracks or breakage. By eliminating bubbles, you enhance the durability and longevity of your artwork, ensuring it stands the test of time.
Professionalism
If you are creating resin products for sale or display, it is crucial to present a professional finish. Bubble-free resin pieces demonstrate your attention to detail and commitment to quality craftsmanship.
How to Get Bubbles Out of Resin: A Step-by-Step Guide
Now that we understand the significance of bubble removal, let's walk through the process in a way that guarantees a flawless result:
1) Warm Your Resin
Warming your resin before use can make it thinner, allowing bubbles to rise and escape more easily. A warm water bath for a few minutes before mixing can do the trick.
2) Mixing Resin Properly
Accurate measurement and meticulous adherence to the manufacturer's instructions are paramount for proper resin mixing. Additionally, adopt a slow and careful mixing approach to prevent the introduction of excess air and minimize the formation of bubbles.
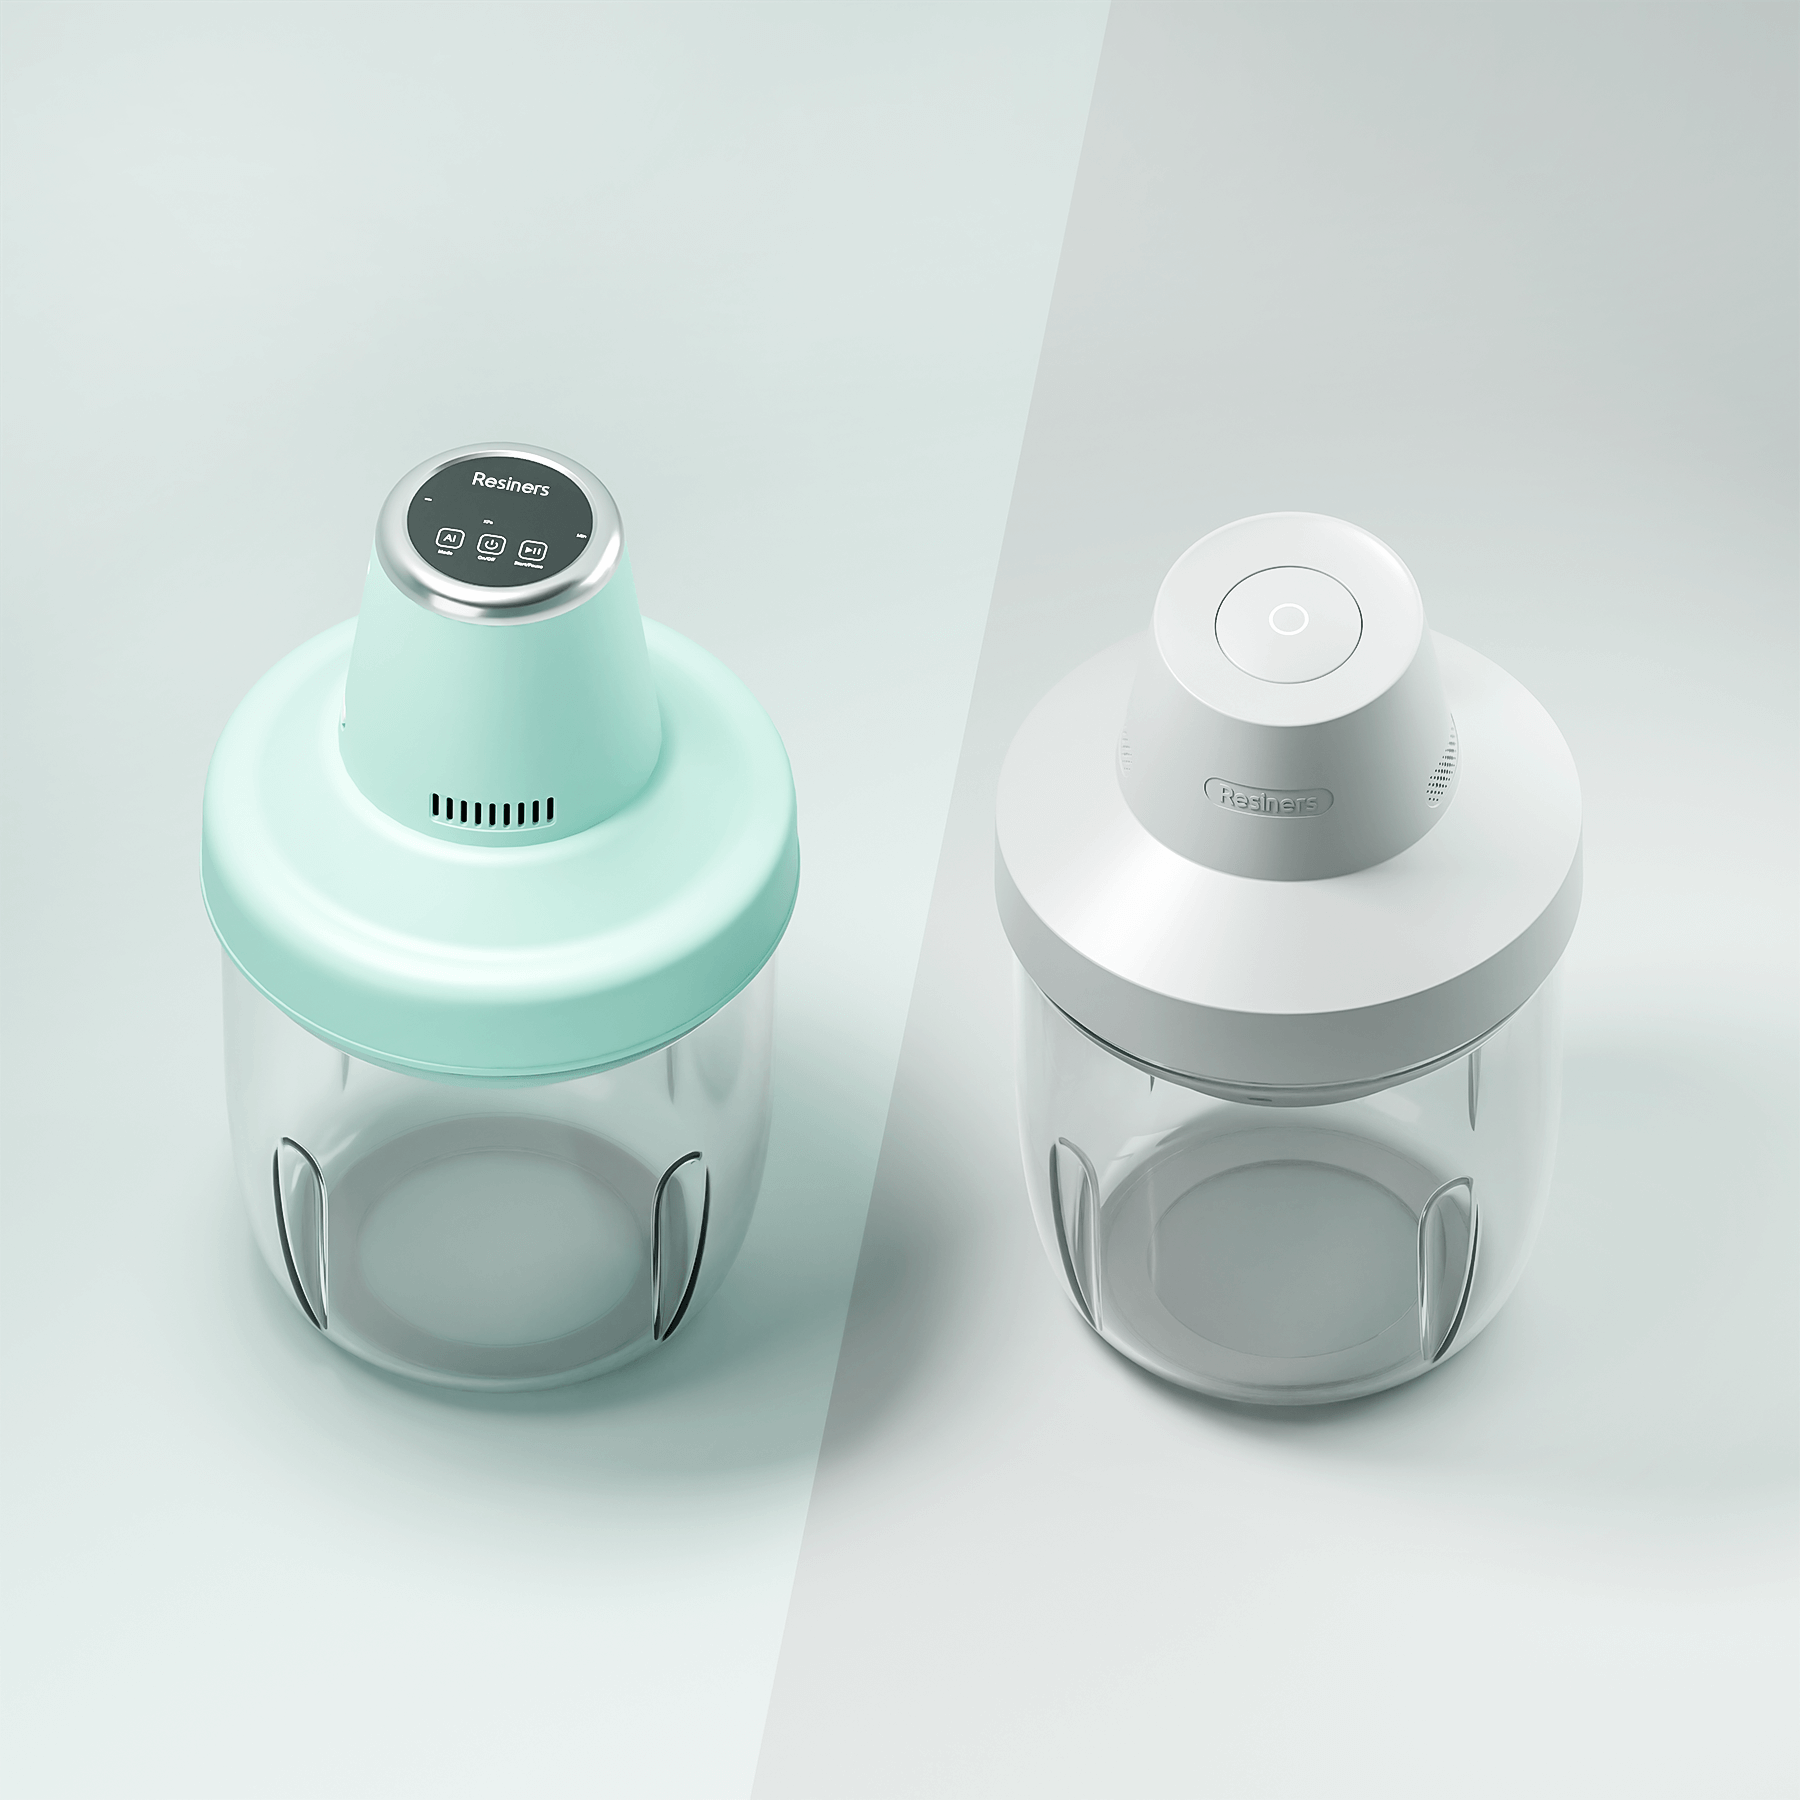
3) Using Bubble Removal Machine
Resiners Degasser offers a quick and efficient way to remove bubbles from resin. The resin piece is placed inside the chamber, and the machine creates a vacuum and changes the pressure around the resin, forcing the bubbles to rise and pop.
AirLess Lite Bubble Removal Machine: A user-friendly vacuum machine suitable for beginners.
AirLess Bubble Removal Machine: A high-performance vacuum machine designed for hobbyists and professionals, providing advanced bubble removal capabilities.

4) Pouring Techniques
Pour the resin gently and evenly onto your surface. Avoid aggressive pouring, as it can introduce air into the mixture.

5) Eliminate Surface Bubbles
A quick pass of a torch or heat gun helps to release trapped air, leaving your resin surface bubble-free. Just remember to keep the heat source moving to avoid burning or warping the resin.

6) Covering and Waiting
Cover your project to prevent dust and debris from settling on the resin as it cures, ensuring a flawless finish.
Allow ample curing time as per the resin manufacturer's guidelines. Resiners Curing Machine not only acts as a shield against dust but also accelerates the curing process.
However, its benefits extend beyond mere protection; the curing chamber ensures a controlled environment, enhancing the overall integrity and durability of the cured resin.

Remember, practice makes perfect. So, don't be disheartened if you don't nail it on your first attempt. Keep experimenting, keep learning, and before you know it, you'll become a pro at banishing bubbles from resin.
Conclusion
Removing bubbles from resin is essential for achieving a professional and visually appealing result. By prioritizing bubble removal, you enhance the aesthetics, clarity, and longevity of your artwork. So, don't overlook this crucial step in your resin art journey!
Frequently Asked Questions
Why do bubbles form in resin, and how can I prevent them?
Bubbles in resin usually form when air gets trapped during mixing or pouring. Stirring too quickly or pouring too fast can increase the amount of air introduced. To prevent bubbles, mix your resin slowly and steadily, and pour it gently into your mold or surface. Allowing the mixture to sit for a few minutes before pouring can also help trapped air escape.
How can I remove bubbles from resin after pouring?
After pouring, you can remove bubbles from the surface of resin by gently blowing on them with a straw or using a heat gun or torch. The heat causes the bubbles to rise and pop, leaving a smoother finish. Be careful not to overheat the resin, as this can cause other issues like yellowing or burning. Always follow safety guidelines when using heat tools.
Are there additives or techniques to minimize bubbles in resin projects?
Yes, some resins are formulated with additives that help reduce bubbles. You can also use techniques like warming the resin and hardener slightly before mixing, which makes the mixture thinner and allows bubbles to escape more easily. Using a vacuum chamber or pressure pot is another professional method to remove or minimize bubbles, especially for deep pours or intricate molds. Always check your resin’s instructions for compatibility with these methods.
What should I do if I find bubbles in cured resin?
If you notice bubbles after the resin has fully cured, you can sand the surface to remove them, then apply a thin layer of fresh resin as a topcoat for a smooth finish. For deeper bubbles, drilling them out and filling with new resin may be necessary. Prevention is best, but these repair techniques can help salvage your project. Always wear a mask when sanding resin to avoid inhaling dust.


Leave a comment
This site is protected by hCaptcha and the hCaptcha Privacy Policy and Terms of Service apply.