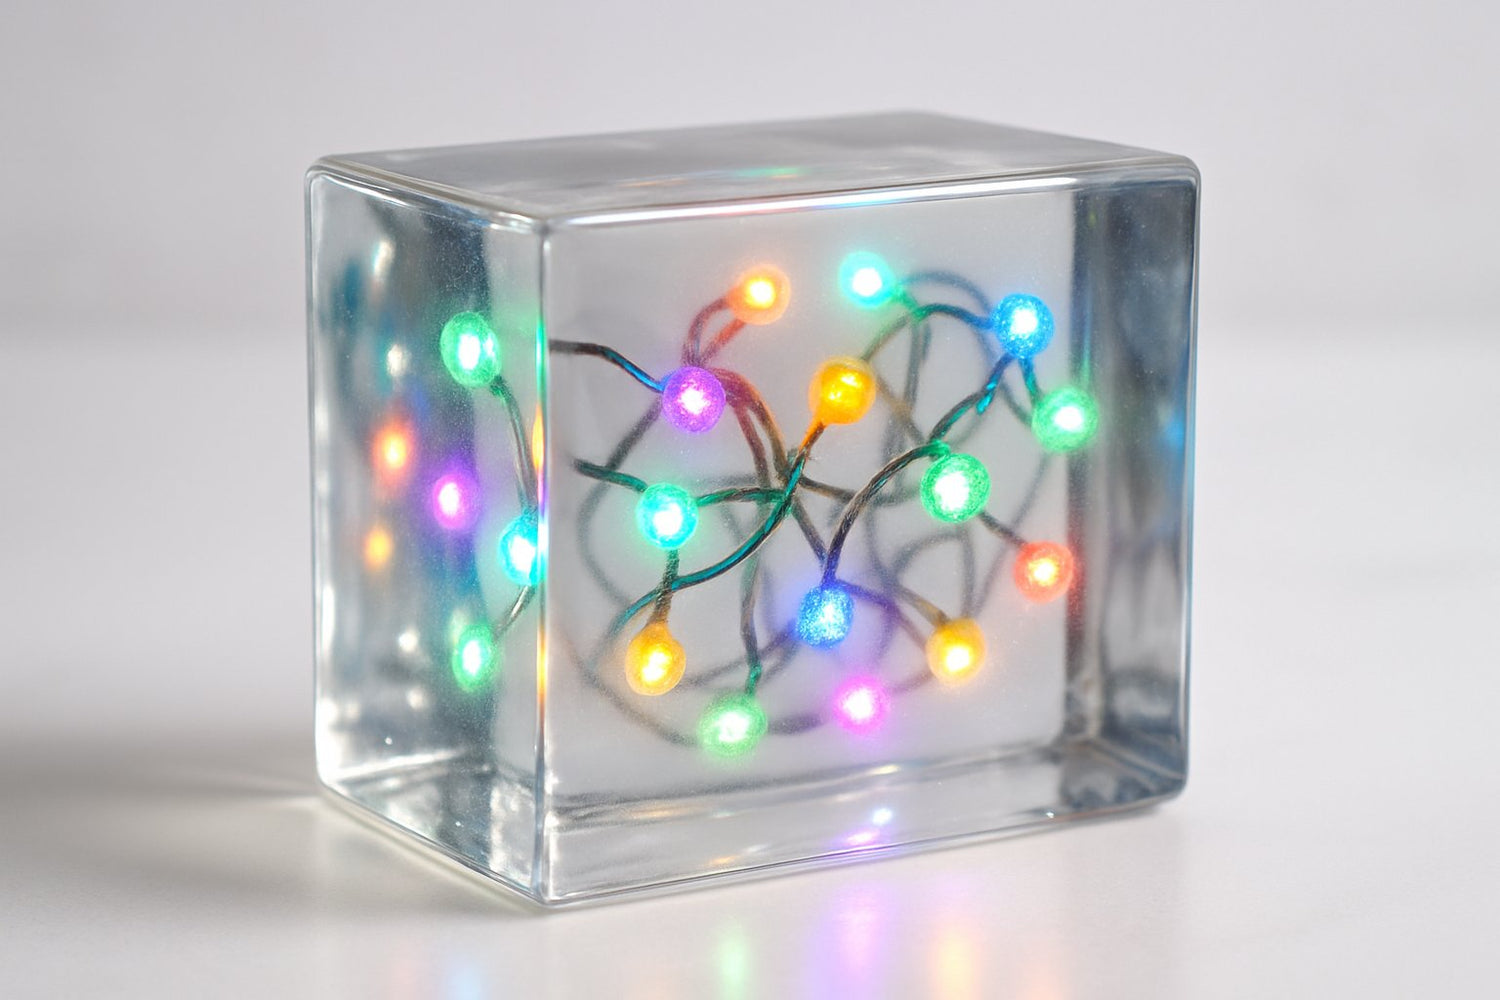
Can you put LED lights in epoxy resin? The short answer is yes, you can embed LED lights in epoxy resin, and it’s a popular way to add both glow and style to resin creations.
Many makers use this technique to enhance the look of tables, lamps, and art pieces. Still, it’s important to be mindful of the heat that certain LEDs might produce and to take the right precautions while the resin cures. With the right setup, your project can stay safe, durable, and beautifully lit.
Keep reading to discover the steps, tips, and creative ideas you’ll love!
Key Takeaways
- You can embed LED lights in epoxy resin with the right materials and care
- Heat management and proper curing matter for lasting results
- Creative resin + LED designs can add style and function
Can You Put LED Lights in Epoxy Resin?

You can absolutely embed LED lights into epoxy resin. But you have to think about how the resin cures and how heat might affect the lights. The type of LED you use makes a difference. Not every LED handles the same conditions.
How LED Lights React with Epoxy Resin
When you pour epoxy resin around LEDs, the resin hardens into a clear shell that protects the lights. This gives your project a sleek, finished look.
But here’s the catch: curing resin creates heat, and too much can fry delicate parts inside the LEDs.
LED strip lights usually spread out heat better than single bulbs. Still, don’t cover power connections or resistors—those need ventilation.
Pouring thinner layers of resin helps keep heat down during curing. Thicker blocks trap more heat, so they’re riskier for your LEDs.
Yellowing is another thing to watch for. Some epoxies go a bit yellow over time, especially in sunlight. UV-stable epoxy stays clearer, so your lights don’t look dingy.
Types of LEDs Suitable for Embedding
Not all LED lights work well inside resin. Small diodes and LED strip lights are the usual picks.
Strips are flexible, easy to cut, and don’t lose brightness when sealed in resin layers. That’s handy.
The electronics industry uses epoxy resin to encapsulate LEDs for protection, like in epoxy nanocomposites for solid state lighting. So, it’s a proven approach if you use the right materials.
For crafts, waterproof LED strips work best. They already have a protective coating, which is an extra safety net once sealed in resin.
Individual LEDs are an option, but you’ll need to solder wires carefully and keep connectors out of the resin pour.
If you want color effects, RGB LED strips are way more flexible than single-color diodes. You can program them to change colors, which is awesome for resin lamps, coasters, or art pieces.
Step-by-Step Guide to Embedding LED Lights in Resin

You can put LED strip lights inside epoxy resin if you set things up right. The main steps: gather your supplies, secure the lights, and pour resin in thin layers to avoid bubbles or overheating.
1. Preparing Your Materials and Workspace
Start with a clean, level work surface. Dust or bumps mess up your resin mold.
Cover your table with plastic or silicone mats so resin doesn’t stick. Good airflow helps with fumes, but don’t aim a fan at your work—dust is the enemy.
Grab your supplies before you mix anything:
- Epoxy resin and hardener
- Resin mold or frame
- LED strip lights (waterproof is better)
- Mixing cups and stir sticks
- Heat gun or torch for bubbles
Measure resin and hardener carefully. Most need a 1:1 or 2:1 ratio. If you mess that up, you’ll get sticky spots that never cure. Always follow the instructions.
The right tools make crafting easier and more fun. Explore our resin craft supplies collection and stock up on everything you need for your next project.
If you’re embedding electronics, check that your resin is non-conductive and rated for casting. Some epoxy resins for electronics are made to protect circuits, which is safer for LED strips.
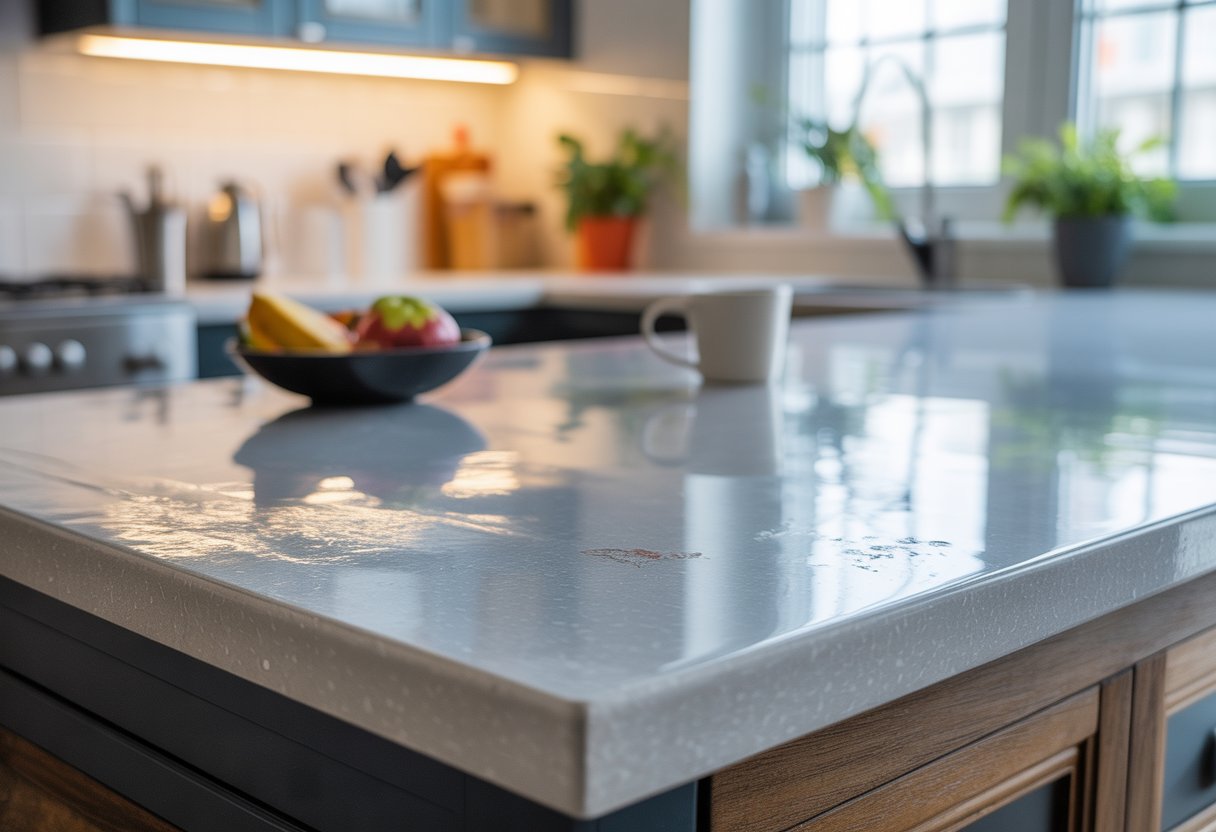
Choosing the right resin makes all the difference. By reading our guide, Types of Resin: A Crafter's Guide to Finding the Perfect Pour, you’ll discover which type works best for your projects.
2. Positioning and Securing LED Strip Lights
Cut your LED strips to the right size before dropping them in the mold. Most have marked places where you can trim safely.
Test the lights first. Nothing worse than sealing a dud inside resin.
Stick the strip inside the mold with a dab of hot glue or double-sided tape. This keeps the lights from floating when you pour resin.
Keep the wiring outside the mold so you can hook up power later. If you want even lighting, run the strip along the center or edge of the mold.
Don’t bend the strip too tightly. That’ll break the circuit. For waterproof projects, use a silicone-coated strip or cover solder points with heat-shrink tubing.
Check spacing. Resin magnifies light, so uneven placement looks weird once cured. Do a dry run before pouring resin to see how it’ll look.
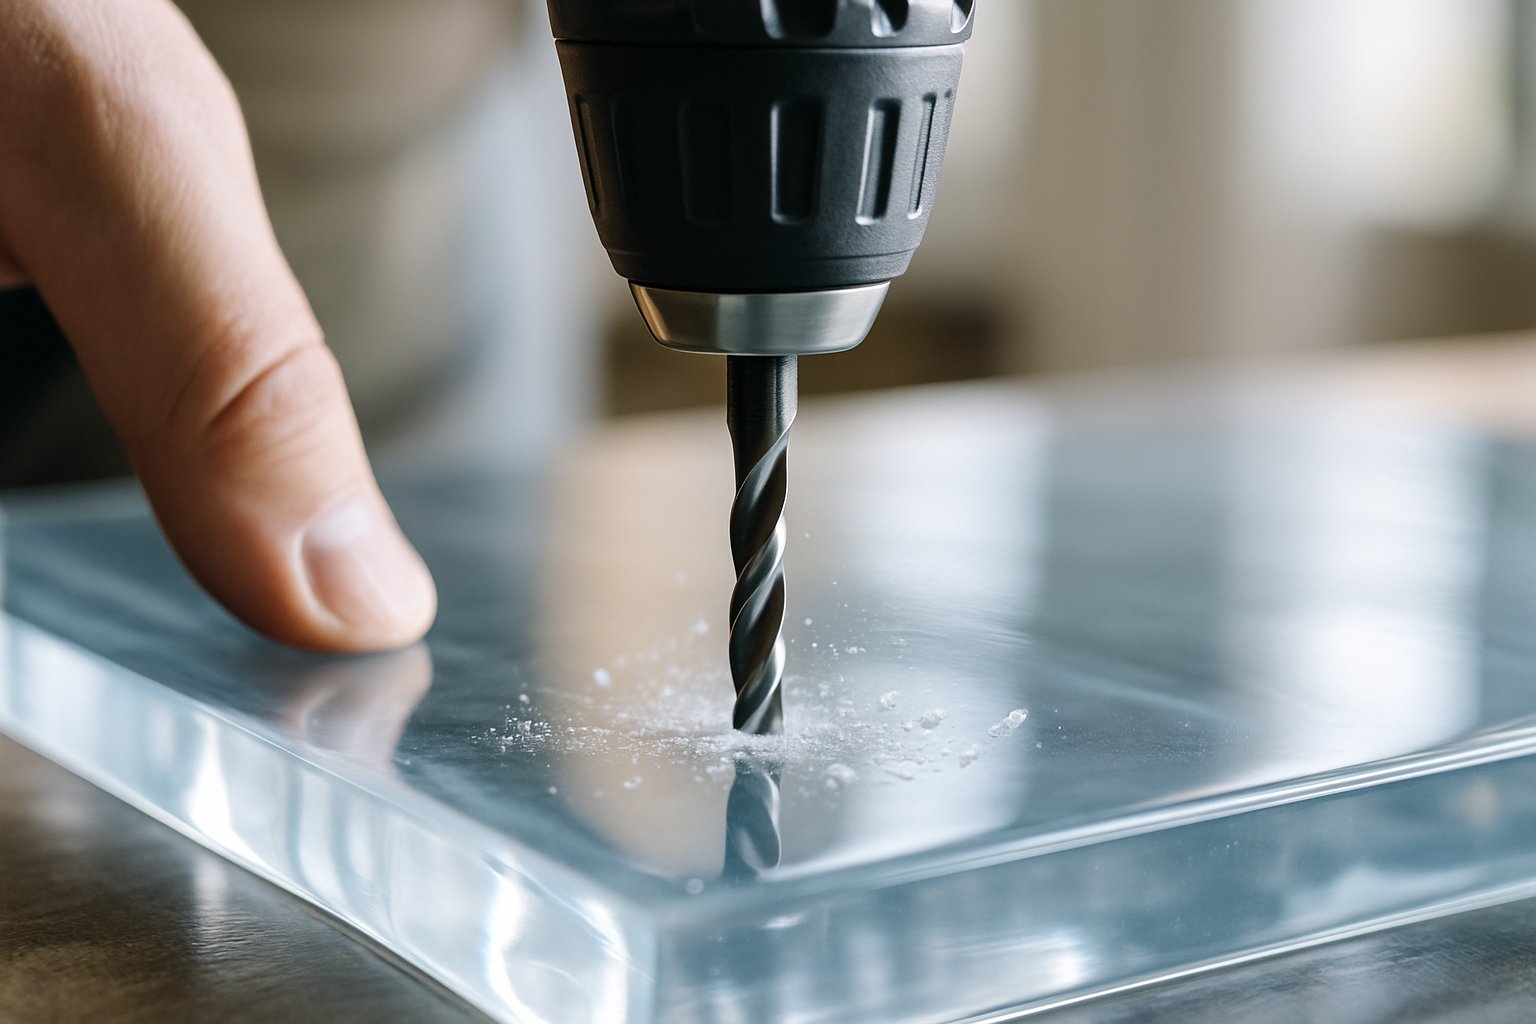
3. Pouring and Curing Epoxy Resin
Mix epoxy resin slowly to keep bubbles to a minimum. Pour a thin base layer first and let it sit a few minutes. This anchors the strip before you add more resin.
After the base settles, pour the rest in layers about ¼ inch thick. Thick pours trap heat and can wreck your LEDs. Thin layers are easier for bubble removal with a heat gun, too.
Keep the mold level while it cures. Most resins need 24–48 hours to fully harden. Some fast-curing types set in just a few hours, but check the label.
Don’t move the mold while curing—shifting causes uneven surfaces. For lamps or displays, clear resin works best. Some resin-embedding methods use UV curing, but standard two-part epoxy is more common for LED strips.
Once cured, test the lights before trimming or sanding edges. That way, you know the LEDs work and connections are sealed.
Safer resin means safer crafting. Discover our VOC free epoxy resin collection and enjoy creating with low-tox, eco-friendly options.
Common Challenges and Solutions
Heat is a big issue when you put LED lights in epoxy resin. LEDs generate heat, and resin traps it. Too much heat yellows the resin or kills the LED. Using low‑power LEDs or adding ventilation helps.
Resin clarity matters. Regular epoxy sometimes turns cloudy or yellow. If you want clear light, pick resins made for optical use, like those in LED encapsulation. These keep your project bright and clear.
Moisture can sneak in and cause bubbles or weak spots. Work in a dry space and measure carefully. Pouring slowly lets air escape and helps avoid bubbles.
Here’s a quick cheat sheet for common problems:
|
Challenge |
Solution |
|
Heat buildup |
Use low‑power LEDs, add airflow |
|
Resin yellowing |
Pick UV‑resistant or optical‑grade resin |
|
Bubbles or moisture |
Pour slowly, work in dry conditions |
|
Weak curing |
Use proper UV or LED curing methods |
Some resins cure with UV light, which works well with LEDs. UV‑curable epoxy resins harden faster and handle light better. Picking the right curing method makes a difference in how long your project lasts.
Design Tips and Creative Applications

You can put LED lights in epoxy resin and get great results if you plan your design. Placement, color, and mold choice all matter for a polished project that actually works.
Incorporating LED Lights in Resin Art
When adding LED lights to resin art, think about how the light will shine through. Small LED light strips suit bigger pieces, while single bulbs fit jewelry or coasters.
Set the lights in place before pouring resin. That way, they stay put.
Make sure the LEDs are fully sealed. Resin insulates them, but don’t cover wires that need ventilation.
Lots of LEDs come encapsulated in epoxy already, which makes them durable and moisture-proof, as noted in LED packaging for lighting applications.
For a clean look, hide wires under resin layers or inside mold channels. That way, the glowing effect takes center stage—not the hardware.
Choosing Colors and Effects
LEDs come in a bunch of colors, and you can mix them with resin pigments or glitter for all sorts of effects. Clear resin gives you the brightest light, while tinted resin softens the glow a bit.
If you want a cozy look, try warm white LEDs with gold flakes. For a water-like feel, blue LEDs in transparent resin work nicely.
Color-changing LEDs add a dynamic vibe without extra hassle. They’re a fun shortcut if you want something that shifts and surprises.
Want sharper light? Use a thinner layer of resin above the LED. For a softer, diffused look, pour thicker resin or add a little mica powder.
Epoxy already softens light a bit, according to Introduction to light emitting diode technology and applications. Layering resin just boosts this natural diffusion.
Innovative Resin Mold Techniques
The mold you pick shapes how your LEDs interact with the resin. Deep molds let you tuck in full LED strips, while shallow ones are better for single diodes.
Carve tiny grooves into silicone molds to guide wires and keep them hidden. Or, try layering resin in stages and sandwich the LEDs in the middle so they look like they’re floating.
For lamp bases or night-lights, geometric molds bounce light around in cool ways. Some folks even make custom molds to fit LEDs snugly, which helps keep them from shifting while the resin cures.
Epoxy and silicone structures protect and stabilize LEDs. You can borrow those ideas for your crafts.
Looking for inspiration? Read our article 15+ Stunning Resin Art Ideas (Beginner to Expert) and spark your creativity with projects for every skill level.
Safety, Durability, and Heat Dissipation

When you put LED lights inside epoxy resin, you’ve got to think about wiring safety, heat buildup, and what keeps the LEDs glowing for years. These details really affect how your project looks and lasts.
Ensuring Safe Wiring and Insulation
Always insulate wires before you seal them in resin. Bare wires can short out or corrode over time.
Heat-shrink tubing or silicone-coated wires are your best bets—they fight off moisture and protect the copper inside.
Stick with low-voltage LEDs, like 5V or 12V. They’re safer and less likely to overheat the resin.
If you’re using a power supply, double-check that it matches your LED specs. Otherwise, you risk overheating.
Epoxy can trap heat and moisture, so cover solder joints before casting. A quick dab of clear silicone on the joints adds a safety layer and helps prevent cracks in the resin.
Plugging into a wall? Use a certified adapter to lower the risk of shocks or resin fires from sketchy wiring.
Managing Heat Dissipation in Resin Projects
LEDs don’t get as hot as old-school bulbs, but they still need to dump some heat. If you seal them up tight in resin, heat can build up and shorten their life.
Use low-wattage LEDs and space them out a bit. That helps keep things cooler.
Try adding a heat sink or a strip of aluminum under the lights before pouring resin. This trick, borrowed from commercial LED packaging (heat dissipation), pulls heat away from the LEDs.
Clear epoxy resins can yellow if they get too hot or sit in the sun. Pick resins made for LED projects—they’re tested to resist yellowing and keep the light crisp.
If your piece is big, think about airflow. Leave little gaps for ventilation or use open designs instead of solid resin blocks to help with cooling.
Maximizing the Lifespan of Embedded LEDs
How you prep your LEDs before casting really matters. Go for LEDs rated for long hours, and skip the bargain strips that fail fast.
LEDs in resin deal with more stress, so quality counts. Moisture sneaks in over time—epoxy isn’t always a perfect seal.
Pick waterproof LED strips (IP65 or IP67) for extra protection before embedding. That way, you’re not relying on the resin alone.
Heat’s the main LED killer. Studies show epoxy lens degradation often causes LEDs to fail. Keeping things cool helps avoid dimming and weird color shifts.
Don’t run your LEDs at full blast all the time. Dimming them just a bit eases the stress and keeps them cooler, which can add thousands of hours to their life.
Test your setup before sealing everything in resin. Let the LEDs run for a few hours outside the mold to make sure they stay cool and stable. Once you’re happy, go ahead and embed them.
Final Thoughts
So, can you put LED lights in epoxy resin? Absolutely! It’s a fun way to make crafts, art, or even furniture glow with style. Just choose the right LEDs, watch out for heat, and follow safety steps when curing. With a little planning, your project will shine—literally!
Ready to try it yourself? Check out Resiners’ collection of products and start creating glowing resin art today.
Frequently Asked Questions
What kind of lights are best for epoxy resin?
Small, low-heat LEDs are your safest bet—they don’t get hot enough to mess up the resin. Standard LEDs already come encapsulated in epoxy from the factory, so they’re a natural fit for resin crafts.
High-power LEDs, though, can get too hot and cause yellowing or cracks. I’d skip those for most projects.
What can you not put in epoxy resin?
Don’t use anything that holds moisture, like fresh flowers, food, or stuff that might rot. These things can bubble, cloud up, or decay inside the resin.
Avoid materials that melt or give off fumes when sealed up—those can mess with clarity and safety.
Can you put string lights in resin?
You can embed string lights in resin, as long as they’re low-voltage LEDs. The resin protects the lights, but make sure the wires are flexible and coated.
Stay away from string lights that heat up. Trapped heat will damage the resin and burn out the lights faster.
What kind of light hardens resin?
Epoxy resin hardens through a chemical reaction between resin and hardener, not light. UV resin, on the other hand, cures when you hit it with ultraviolet light.
UV curing lamps or sunlight can set UV resin quick, but epoxy resin just needs time and the right temperature to do its thing.
Does LED light harden resin?
LED light doesn’t cure regular epoxy resin. But if you’ve got UV resin and the LEDs emit the right ultraviolet wavelength, they can do the trick.
Research on LED curing lights shows blue-violet LEDs can harden dental resins, but this only works with UV-sensitive formulas—not your average epoxy.
What materials work well as an LED diffuser when used with epoxy resin?
Frosted acrylic, silicone, or light-diffusing films soften those harsh LED points when you cast them in resin. Some LED packaging already uses epoxy encapsulation to spread light more evenly.
You can also add a thin, cloudy layer of resin or just mix in a pinch of white pigment. That usually helps the glow look smoother, less like a bunch of tiny dots.


Leave a comment
This site is protected by hCaptcha and the hCaptcha Privacy Policy and Terms of Service apply.