Resin casting is a fun way to make copies of small items you love. This craft lets you create perfect duplicates using special liquid that hardens in silicone molds.
Make your own jewelry, game pieces, decorations, or tiny figures with this simple technique! You'll only need a few things to start: silicone for molds, resin, and maybe a pressure pot to get rid of bubbles.
The best part? You can add colors, mix in small objects, or blend different resins to make truly unique creations.
Many people try one simple project and quickly get hooked on all the possibilities. Ready to dive into this exciting hobby? Keep reading to learn how!
What Is Resin Casting?
Resin casting is a creative process where you pour liquid synthetic resin into a mold to create solid objects. Once the resin cures, you're left with a beautiful, durable finished piece that can be used for all sorts of crafts and projects.
Types of Resin for Casting Projects
Casting resin and epoxy resin are the two main types you'll encounter in your crafting adventures.
Casting resin is specially made for deeper pours. It has a thinner consistency that lets air bubbles rise to the surface and pop on their own. This makes it perfect for creating solid objects like figurines, jewelry, and paperweights.
Epoxy resin, on the other hand, works better as a coating. It's thicker and sets up faster, which is great for thin layers but can trap bubbles in thick pours.
When choosing your resin, think about your project needs. Will you be making a thick, solid object? Go with casting resin! Need a protective coating? Epoxy might be your best friend.
Both types come with hardeners that trigger the chemical reaction that turns your liquid into a solid treasure.
Resin Casting Materials and Equipment

Getting started with resin casting requires the right materials and tools. The success of your projects depends on choosing the correct resin type and having proper equipment on hand.
Different Resin Types: Epoxy, Polyurethane, and Polyester
Polyester Epoxy resin is great for beginners. It's clear, has low odor, and gives you plenty of working time.
You can find it at craft stores or online suppliers like Resiners, which offers both epoxy and UV resin kits.
UV resin cures quickly under ultraviolet light. This makes it perfect for small jewelry projects and quick fixes. No need to wait hours for it to dry!
Polyurethane resin works well for detailed castings. It captures fine details and is more durable than other types.
Remember to work in a well-ventilated area if you choose this type!
Tools and Supplies for Successful Resin Casting
Essential mixing tools:
- Plastic cups (never paper)
- Stir sticks
- Digital scale for measuring
- X-acto blade for trimming finished pieces
Mold options:
- Silicone rubber molds (most popular)
- Plastic molds
- DIY molds made with silicone putty
You'll need protective gear too!
Nitrile gloves keep liquid resin off your skin. Don't use latex—resin can break through it.
Mold release spray helps your castings pop out easily. This saves your molds from damage and keeps your projects looking clean.
Colorants add personality to your work. Try Mica powders that work great for metallic effects.
Workspace Setup and Safety Precautions
Set up in a level, dust-free space. Cover your work area with plastic sheeting or a silicone mat. Resin drips are nearly impossible to remove from wood or fabric!
Good lighting helps you spot bubbles and mix colors correctly. A small desk lamp can make a big difference.
Safety comes first! Always work in a well-ventilated area. Open windows or use a fan to move air away from your breathing zone.
Keep these safety items handy:
- Eye protection
- Nitrile gloves
- Respirator mask (for polyester or polyurethane resins)
- Paper towels for spills
Store your supplies away from children and pets.
Keep resin components in their original containers at room temperature. Extreme temperatures can ruin liquid resin before you even use it!
The Resin Casting Process: Step-by-Step

Resin casting is a versatile craft technique that transforms liquid resin into solid creations. This guide will walk you through the entire process from start to finish.
1. Choosing the Right Resin
- Select the appropriate resin type for your project —epoxy casting resin is common for beginners.
- Consider factors like cure time, hardness, and clarity based on your project needs.
- For beginners, a slower-curing resin gives you more working time.
2. Creating or Selecting Your Mold
- Silicone molds work best as they're flexible and release castings easily.
- Purchase pre-made molds or create your own by making an original and pouring silicone over it.
- Always use mold release spray before pouring to prevent sticking.
- Clean molds with mild soap between uses to maintain quality.
3. Preparing Your Workspace
- Work in a well-ventilated area.
- Cover your workspace with plastic or silicone mat.
- Ensure your work surface is level for even curing.
- Maintain room temperature between 70-75°F for optimal results.
4. Measuring and Mixing the Resin
- Most resins come in two parts (resin and hardener) that must be precisely measured.
- Use separate measuring cups for each component.
- Mix thoroughly, scraping sides and bottom of your container multiple times.
- Stir slowly to minimize bubbles.
- Mix until completely clear and streak-free (usually 3-5 minutes).
5. Adding Colors and Additives
- Add resin-specific dyes, mica powders, or alcohol inks for color.
- Start with small amounts of colorant (less than 10% of total volume).
- Mix thoroughly to prevent streaking.
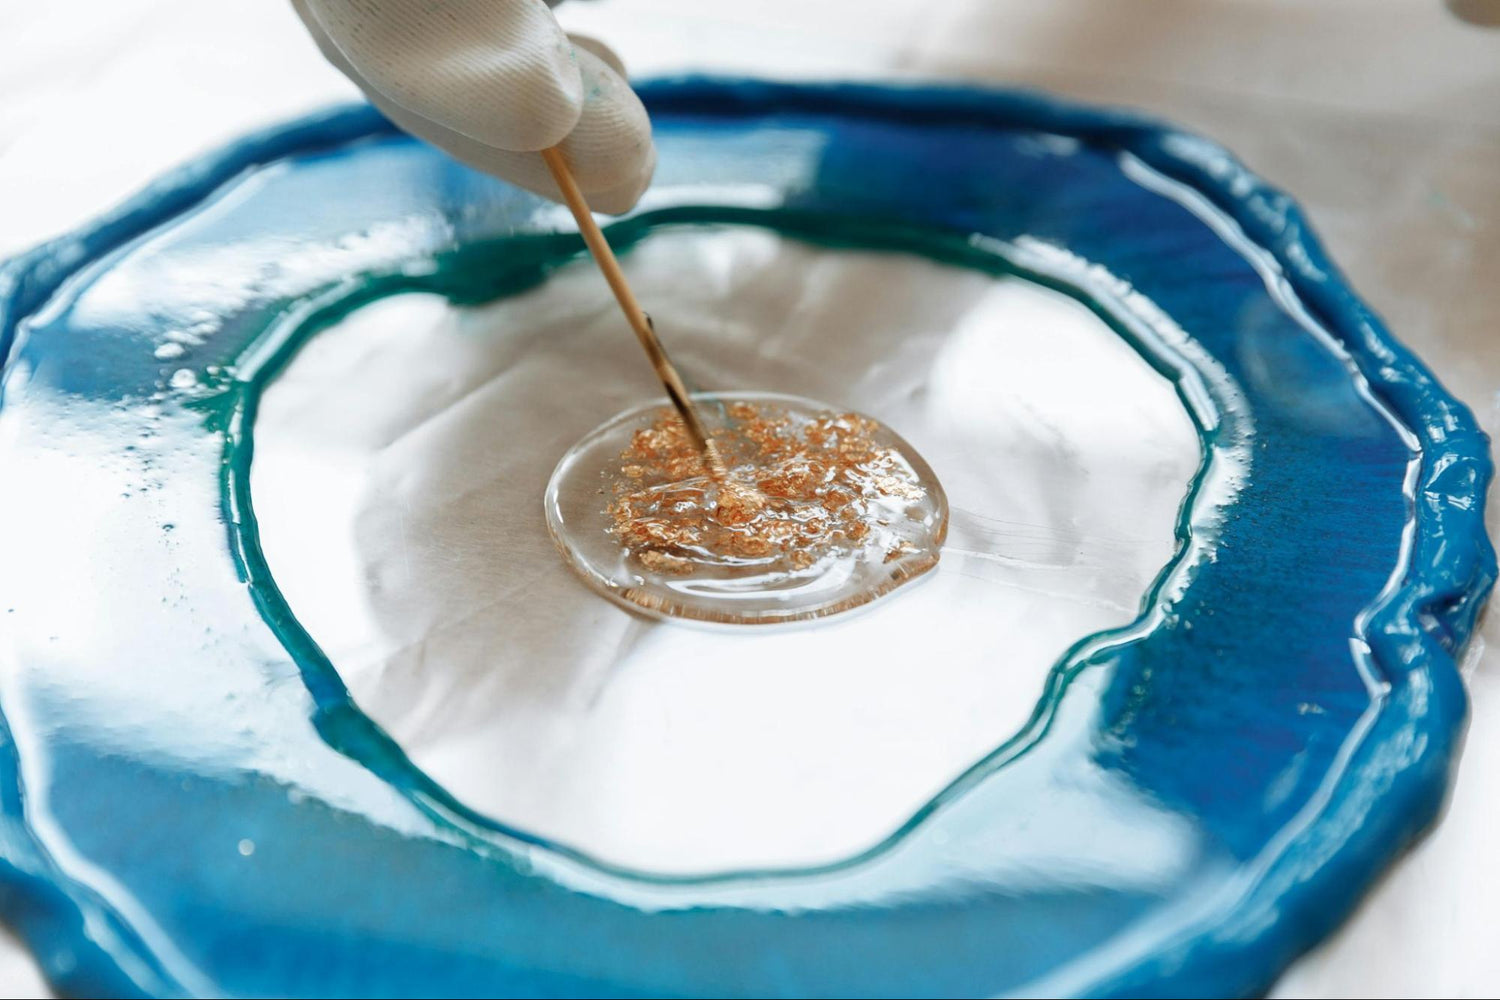
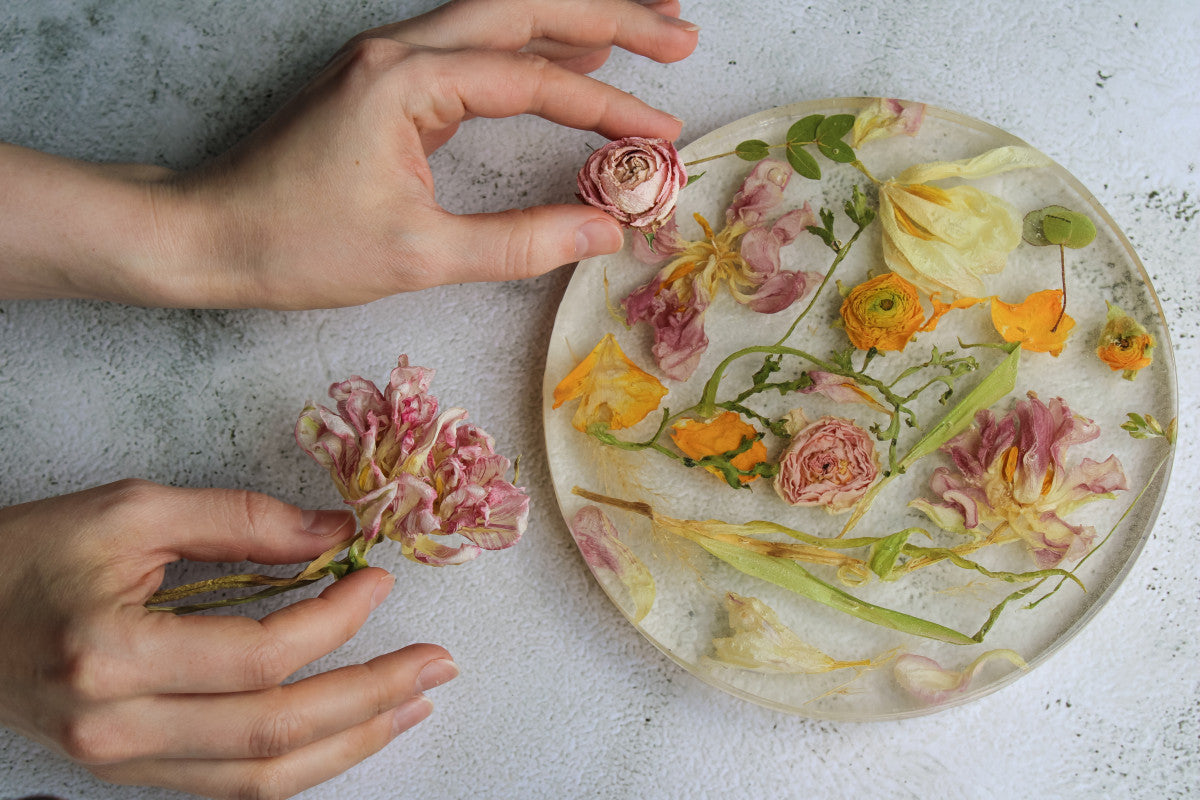
- Optional additives include glitter, dried flowers, or UV stabilizers.
6. Pouring Techniques
- Pour slowly to minimize bubbles.
- For detailed molds, use a popsicle stick to guide resin into corners.
- Fill molds in one pour when possible for best results.
- For layered effects, allow each layer to become tacky before adding the next.
7. Bubble Removal
- After pouring, bubbles often rise to the surface.
- Use a heat gun or torch BRIEFLY by passing quickly over the surface.
- Alternatively, exhale gently through a straw onto the surface.
- A toothpick can pop stubborn bubbles in detailed areas.
8. Curing Process
- Place filled molds on a level surface where they won't be disturbed.
- Cover with a box or container to prevent dust contamination.
- Allow to cure according to manufacturer's instructions (typically 24-48 hours).
- Temperature affects cure time - warmer temperatures speed curing.
9. Demolding Your Castings
- Wait until fully cured before attempting to remove from molds.
- Gently flex the sides of silicone molds and slowly peel away from your casting.
- For stubborn pieces, briefly place in freezer to contract the resin slightly.
- Remove any flash or excess with fine sandpaper.
10. Finishing Touches
- Sand any rough edges with progressively finer grits (starting around 400 and working up to 2000+).
- Sand underwater to prevent dust and achieve a smoother finish.
- Polish with specialized resin polish or clear coat for extra shine.
- Add findings for jewelry or other embellishments as needed.
Remember that resin casting involves a learning curve, and each project helps build your skills. Start with simple projects before attempting more complex designs.
Common Resin Casting Problems
Resin casting can be tricky, especially when you're just starting out. Many crafters face similar issues that can ruin an otherwise perfect project, but most of these problems have simple solutions.
Dealing with Bubbles in Resin Castings
Bubbles are probably the most common problem in resin casting. They form when air gets trapped during mixing or pouring.
To prevent bubbles, warm your resin bottles in warm water before using them. This makes the resin thinner and bubbles can escape more easily.
Always mix your resin slowly and gently. Think of it like folding cake batter, not whipping cream! After mixing, let the resin sit for 5-10 minutes to allow bubbles to rise.
For stubborn bubbles, you can:
- Use a heat gun or torch briefly over the surface (don't get too close!)
- Poke bubbles with a toothpick
- Tap the sides of your mold gently
- Use a pressure pot for bubble-free results
Higher ambient temperature (around 75°F) helps bubbles rise faster too.
Read our guide: Tested Tips & Best Practices for Perfect Bubble Removal to take your resin casting to the next level!
Fixing Tacky or Uncured Resin
When resin stays sticky or doesn't harden properly, it's usually because:
- You didn't mix the parts in the correct ratio
- The components weren't mixed thoroughly enough
- The ambient temperature was too low
Always measure precisely! Many resins need exact 1:1 ratios. Mix for at least 3-5 minutes, scraping the sides and bottom of your container.
Resin cures best between 70-75°F. If your workspace is colder, try:
- Using a space heater or heat lamp
- Creating a curing box with a lamp inside
- Placing projects on a heating pad on low setting
For already tacky pieces, try exposing them to UV light if your resin is UV-curable. Sometimes a thin new topcoat of properly mixed resin can fix sticky surfaces too.
Preventing Shrinkage and Warping
Resin can shrink or warp during curing, especially in large or thick pours. This happens because of heat generated during the curing process or improper curing conditions.
To prevent these issues:
- Pour in thin layers (no more than 1/4 inch at a time)
- Allow each layer to partially cure before adding the next
- Avoid pouring in extreme temperatures
- Use resin designed for deep pours when making thick items
Proper mold selection matters too! Flexible silicone molds allow for some shrinkage without warping your piece. Rigid molds might cause stress points in your casting.
Keep your workspace at a stable temperature. Big temperature swings during curing can cause uneven shrinkage and warping.
Color Mixing Challenges and Solutions
Getting colors right in resin can be frustrating! Colors can look different in liquid resin versus the final cured piece.
Start with a tiny amount of colorant. You can always add more, but you can't take it out once it's mixed in! For consistent results:
- Use colorants made specifically for resin
- Keep a "recipe book" with exact measurements
- Mix colors on a mixing tile before adding to resin
- Test new colors in small batches first
Some pigments may affect curing time or cause cloudiness. Powder pigments need to be mixed thoroughly to avoid specks or streaks.
Try using clear silicone cups for mixing colors. This helps you see the true color before pouring. Remember that colors often appear deeper in thicker castings!
Health and Safety in Resin Casting

Working with resin can be fun, but you need to be careful! Resin contains chemicals that can harm your body if you're not safe.
Good ventilation is a must. Always work in a room with fresh air or use fans to blow fumes away from you. Open windows help too!
Protect your skin by wearing disposable gloves every time you handle resin. The chemicals can cause sensitivity over time, leading to nasty allergic reactions later.
Don't forget to cover up! Wear old clothes or an apron that covers your arms. Resin stains don't come out easily, and you don't want it on your skin.
🛑 Never use your regular kitchen tools with resin. Mark all your resin tools clearly so they don't get mixed up with food items.
Some crafters use respirators for extra protection, especially during long projects. This helps keep the harmful fumes out of your lungs.
Here's a quick safety checklist:
- ✅ Work in well-ventilated area
- ✅ Wear nitrile gloves
- ✅ Use protective clothing
- ✅ Label all resin tools
- ✅ Consider a respirator for lengthy projects
Clean any spills right away with isopropyl alcohol. If resin touches your skin, wash immediately with soap and water.
Your crafting space should be away from kids and pets. Uncured resin is toxic, so keep it far from curious hands and paws!
Conclusion
Resin casting is a versatile craft that transforms liquid resin into durable, customized creations. This accessible hobby requires minimal investment to begin while offering endless creative possibilities.
Start with simple projects to build confidence before attempting complex designs. Remember that proper safety precautions are essential, as UV resin contains irritants that require ventilation and protective gear.
With practice, you'll develop techniques to eliminate bubbles, incorporate colors, and achieve professional results. Ensure your workspace is level before pouring to prevent uneven curing. The satisfaction of demolding a perfectly cast piece makes the learning process worthwhile.
Whether creating jewelry, home decor, or functional art, uv resin casting rewards patience with beautiful, personalized creations.
Frequently Asked Questions
What materials do you need to get started with resin casting?
To begin resin casting, you'll need epoxy or polyurethane resin with its hardener. These come as two parts you mix together.
You'll also need measuring cups, stirring sticks, and molds to pour the resin into. Don't forget protective gear like nitrile gloves and a mask.
A heat gun or torch helps remove bubbles. Other helpful items include colorants, silicone for making molds, and a level work surface.
How can you create molds for resin casting at home?
Making molds at home is simple with silicone mold-making material. Mix the silicone according to package directions and pour it over your object.
You can use objects from around your house like toys, buttons, or jewelry. Let the silicone cure completely before removing your item.
For flat molds, build a small box around your object before pouring the silicone. This creates walls to contain the material.
What are some common mistakes to avoid when working with resin?
Not measuring your resin and hardener exactly can lead to sticky or soft castings. Always follow the ratios on the package.
Working in a cold room slows curing and causes cloudiness. Keep your workspace between 70-75°F for best results.
Rushing the process often creates bubbles or uneven curing. Take your time mixing gently to reduce air bubbles.
How long does it take for resin to fully cure?
Most resins become solid within 24 hours, but full curing takes longer. The complete curing process typically takes 3-7 days.
Different brands and types of resin have different curing times. Check your product's instructions for specific guidance.
Temperature affects curing time too. Warmer rooms speed up the process, while cooler environments slow it down.


Leave a comment
This site is protected by hCaptcha and the hCaptcha Privacy Policy and Terms of Service apply.