Resin charms are a fun way to turn clear resin into tiny pieces of art. You can add color, glitter, photos, or tiny objects to make each charm special.
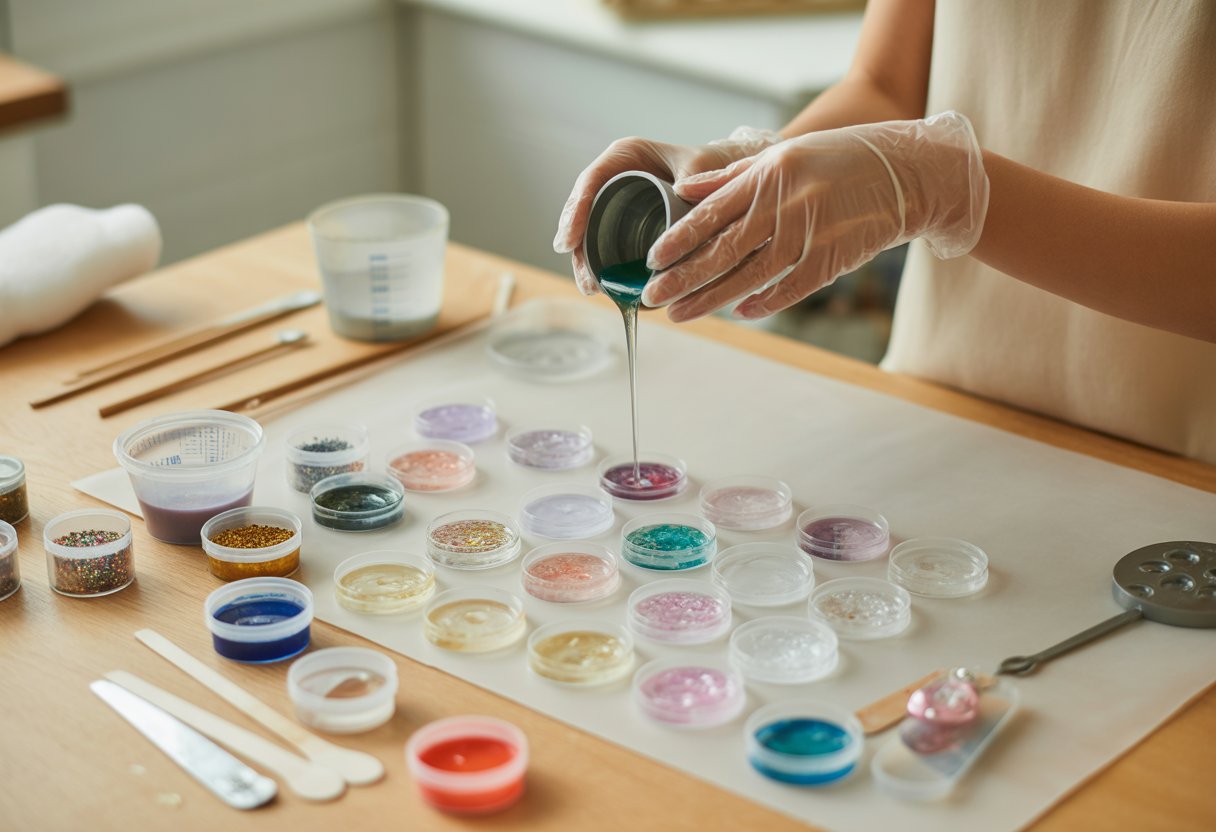
To create resin charms, begin by mixing equal parts of epoxy resin and hardener carefully to avoid air bubbles.
Add your choice of glitter, pigments, or other decorations, then pour the mixture into silicone molds. Use a heat gun or torch to remove surface bubbles, and allow the resin to cure fully.
Once hardened, gently remove the piece from the mold, sand any rough edges, and apply a thin top coat of resin or UV resin for extra shine.
Finally, attach an eye hook or bail so your finished charm can be used as jewelry or a keychain.
Mixing resin and pouring it into molds brings your designs to life. There’s something satisfying about seeing your finished charm pop out of the mold.
Essential Supplies for Making Resin Charms

Having the right materials makes a big difference when you make resin charms. The type of resin, tools, colorants, and your workspace all affect how your charm turns out.
Types of Resin: Epoxy vs UV

The two main resins for jewelry making are epoxy resin and UV resin. Each one has its perks.
Epoxy resin comes in two bottles: resin and hardener. You mix them, and curing starts. It takes a few hours to harden, so you have time to add details like glitter or dried flowers.
Epoxy works well for bigger charms or layered designs. UV resin sets when you put it under a UV lamp or in sunlight. It cures in just a few minutes, so it’s great for quick earrings or small pendants.
But UV resin only cures in thin layers, so it doesn’t work as well for thick charms. If you’re new, try both types. Use epoxy for more working time, and UV when you want fast results.
Molds and Tools
Silicone molds are the go-to for resin charms. They’re flexible, so you can pop out your charm easily. You can find molds in all sorts of shapes, from basic circles to detailed jewelry designs.
You’ll need a few basic tools:
- Mixing cups (disposable or silicone)
- Stir sticks for blending resin and hardener
- Tweezers for placing inclusions
- Toothpicks or needles to poke bubbles out
A flat surface helps the resin cure evenly. If you want to make earrings or pendants, a small drill or hand tool lets you add holes for jump rings or hooks.
Colorants and Inclusions
Adding color or tiny objects makes each resin charm different. Resin dyes and pigments come as liquids or powders. Liquid dyes give a see-through look, while powders like mica make the resin shimmer.
You can also toss in:
- Glitter for sparkle
- Dried flowers for a natural vibe
- Gold leaf or foil for shine
- Small charms or beads for detail
Don’t go overboard—too much pigment or stuff can mess up curing. Try layering to get cool effects inside your charm.
Safety Equipment and Workspace Setup
Resin looks harmless, but you need to handle it carefully. Always wear nitrile gloves to protect your skin.
Use a respirator mask or at least work in a well-ventilated spot, especially with epoxy resin. Those fumes can sneak up on you.
Cover your table with a silicone mat or wax paper. Keep paper towels and rubbing alcohol close for cleanup.
Try to work in a dust-free area. If you can, cover your curing pieces with a box to keep dust and hair away.
Once you finish your first project, you might want to explore even more fun creations—by reading our guide, Cool Resin Art To Try: Creative Ideas and Techniques.
Step-by-Step Guide to Crafting Resin Charms
You need the right tools, careful mixing, and patience with curing to make resin charms that look clean and polished. How you prep your mold and handle each step really shows in the final result.
Preparing Your Materials
Gather everything before you start mixing resin. You’ll need resin and hardener, silicone molds or bezels, mixing cups, stir sticks, gloves, and a flat work surface.
Keep paper towels and rubbing alcohol handy for spills. Choose molds that fit the charm size you want. Small molds work best for keychains or pendants.
If you want to add glitter or flowers, set them nearby so you can work fast once the resin’s ready. Lay down wax paper or a silicone mat to protect your table.
Check for dust—bits can stick to resin and ruin the look. Good lighting helps you spot bubbles and details, too.
Mixing and Coloring Resin
Read your resin kit instructions first. Most use a 1:1 ratio of resin and hardener, but some brands are different.
Measure both parts in separate cups, then pour them together. Stir slowly for at least 2–3 minutes, scraping the sides and bottom.
If you stir too fast, you’ll get bubbles. Let the mix sit for a minute before pouring. If it looks foamy or cloudy, you probably stirred too quick.
Add a few drops of resin dye, mica powder, or alcohol ink for color. Start with a little—too much pigment can mess up curing. Stir until the color looks even.
If you want more depth, mix different shades or add metallic flakes. Play around until you like what you see.
Pouring and Layering Techniques
Pour resin into your mold slowly, aiming for the center. This helps keep bubbles down and avoids spills.
Use a toothpick, heat gun, or lighter (held just above the resin) to pop any bubbles that rise. If you’re adding decorations like glitter or flowers, put them in the mold first, then pour resin over them.
You can also pour in stages to make layers. Let the first layer set a bit before adding more. This keeps things from sinking or clumping.
Don’t overfill the mold—leave a tiny gap at the top since resin spreads as it settles. Wipe away drips before they harden.
Curing and Demolding
Most resins need 24–48 hours to cure fully. Set your mold on a flat, safe spot where it won’t get bumped.
Cover it with a box to keep dust off while it cures. Don’t rush with too much heat, or you might get yellowing or warping.
If the resin feels tacky after the listed time, give it a few more hours. Once it’s cured, flex the silicone mold gently to pop out the charm.
If it sticks, press lightly on the back instead of pulling. For bezels, use a craft knife to trim any overflow.
Sand rough edges with fine-grit sandpaper. If you want a shiny finish, add a thin topcoat of resin or use a polishing compound. It really makes your charms look finished.
To make your pieces shine beautifully, take the next step and read our article: How to Polish Resin to High Gloss Fast & Easy.
Creative Design Ideas for Resin Charms

Resiners® Togetherness Hand in Hand Silicone Mold DIY Kit
What you put inside the resin is what makes each charm yours. Adding things like glitter, flowers, or photos turns a plain mold into something special.
Playing with color, texture, and little details gives you endless ways to make your charms stand out.
Using Glitter, Dried Flowers, and Gold Leaf
Glitter is an easy way to add sparkle. Mix fine glitter into the resin or sprinkle it in the mold for a layered look.
Try different glitter sizes to see how the light catches in your charm. Dried flowers give a soft, natural look. Pressed petals or tiny buds work best.
Thick flowers might not cure right, so stick to small ones. Place them face down in the mold so the pretty side shows through the resin.
Gold leaf gives a cool metallic shine. Tear it into small bits and scatter them in the mold. Thin flakes catch the light and add texture.
Layer gold leaf with glitter or flowers for more depth.
Tip: Use tweezers to place flowers or gold leaf exactly where you want them.
Personalized Photo Charms
Photo charms let you carry memories in your jewelry. Print small photos on glossy paper and seal them with clear tape or a thin layer of Mod Podge.
This step keeps the ink from bleeding when you add resin. Cut the photo to fit your mold and put it face down.
Pour a thin layer of resin first, let it set a bit, then add the photo. This helps stop bubbles from forming under the paper.
You can frame the photo with glitter or metallic flakes for a finished look. Charms with family pictures, pets, or favorite designs make great gifts.
Color Combinations and Effects
Resin charms really pop when you play with color. Mix dyes, mica powders, or alcohol inks to get solid colors, swirls, or marbled effects.
Stir gently for soft blends, or use a toothpick to swirl for bold patterns. Try pouring colors in layers—let one cure a bit, then add another for a stacked look.
Clear resin with a single tint looks subtle. If you want something bold, mix colors like blue and orange or pink and gold.
Quick reference:
- Swirls: mix inks lightly
- Marble effect: blend mica powders
- Layered look: pour in stages
These tricks help you design resin jewelry that feels personal and creative, not just another craft project.
Looking for another beginner-friendly project? Check out our guide: How to Make Resin Dog Tags at Home for Beginners.
Finishing and Assembling Your Resin Charms

Once your resin charms are cured, you’ll want to smooth the edges, add hardware, and connect them to jewelry pieces. These steps make your charms look neat and ready to wear or give away.
Sanding and Polishing Edges
Check the edges of your resin charms for sharp spots or rough surfaces. Use fine-grit sandpaper to smooth them out.
Work slowly and keep the charm flat against the paper so you don’t scratch the front. For a glossy finish, use a few grits of sandpaper, starting around 400 and going up to 1000 or higher.
Wet sanding keeps dust down and gives a cleaner edge. After sanding, polish with a soft cloth and a bit of polishing compound.
This step brings back the shine and makes your charms look pro. Or, if you want, dome a thin layer of resin on top for a glassy finish.
Adding Jump Rings and Bails
To make your resin charms wearable, you'll need to add jump rings or bails. A jump ring is a tiny metal ring that opens and closes, while a bail connects your charm to a chain or cord.
If your mold made a hole in the charm, just slide a jump ring through. Use two pairs of pliers to twist the ring open, loop it through, then close it tight. Don’t pull the ends apart, or the ring gets weak.
If your charm doesn’t have a hole, glue on a flat pad bail using some strong jewelry glue. Press it firmly and let it cure before you touch it again. That gives you a solid spot to attach necklaces, bracelets, or earrings.
Attaching to Chains, Bracelets, or Earrings
Now you can connect your resin charms to jewelry pieces. For necklaces, just thread the charm onto a chain or cord using the jump ring or bail.
To make bracelets, attach charms to chain links or use split rings for extra hold. Try to space them out so the bracelet looks balanced.
For earrings, hook the jump ring straight onto an ear wire. Check that both earrings hang at the same height. Keep pliers nearby so you can tweak things and make sure everything feels sturdy.
Ready to expand your creativity further? Discover more inspiration in our article, Unique Resin Art Ideas: Creative Projects for Every Creator.
Turning Resin Charms into Jewelry
By adding findings and chains, you turn resin charms into jewelry you can actually wear. Little hardware like jump rings, earring hooks, and clasps let you finish up your resin projects fast.
Making Resin Earrings
To make earrings, start by drilling a tiny hole in each cured resin charm. Use a hand drill or pin vise for better control. Keep the hole close to the edge, but not too close, or the resin might crack.
Next, open a small jump ring with pliers and thread it through the hole. Attach an earring hook to the jump ring, then close it tight. Make sure the loop is secure so the charm doesn’t fall off.
For stud earrings, just glue flat pad earring posts to the back of your resin charms with strong jewelry adhesive. Let them cure all the way before you wear them.
Tip: Try to keep earring pairs even in size and weight. That way, they feel good to wear and look more polished.
Creating Charm Bracelets and Necklaces
For bracelets and necklaces, use jump rings to connect your resin charms to a chain or cord. A plain chain bracelet works well since you can space the charms out along the links.
If you want a necklace pendant, drill a hole in the charm and add a bail or jump ring. Slide it onto a chain or leather cord, and you’re done.
You can mix resin charms with metal charms, beads, or even fabric links for a more interesting look. It adds some fun variety to your jewelry projects.
Common Supplies:
- Jump rings
- Lobster clasps
- Chain or cord
- Jewelry pliers
Advanced Tips and Troubleshooting
Small details can make or break your resin charms. Getting the finish right and avoiding little mistakes helps your jewelry last longer and look sharp.
Drilling Holes and Making Beads
If you want to make a resin charm into a bead or pendant, you’ll need to drill a clean hole. Wait until the resin is fully cured—at least 24 hours for UV resin, up to 72 for epoxy.
Use a pin vise or a tiny rotary tool with a fine drill bit. Start slow to avoid cracks. Hold the charm steady on something soft so it doesn’t slip.
Keep the drill bit straight and use light pressure. If you push too hard, the resin might chip. For thick charms, drill halfway from one side, then finish from the other to keep the hole neat.
To smooth the edges, lightly sand the hole with fine-grit sandpaper. That keeps sharp spots from cutting string or wire. You can also polish with a toothpick wrapped in sandpaper.
Avoiding Bubbles and Imperfections
Bubbles show up all the time in resin jewelry. To cut down on them, mix your resin slowly in a clean cup. Stirring too fast traps air.
Warm up your resin a bit before mixing. It gets thinner and bubbles float up easier. A warm water bath works, but don’t let water get in the resin.
After pouring, use a heat gun or a small torch to pop surface bubbles. Move the heat quickly so you don’t scorch the resin. A toothpick helps with stubborn bubbles in corners or molds.
Dust and lint can mess up the finish too. Cover your curing resin with a clean box or container. Try to work somewhere without fans or loose fibers flying around.
Choosing the right material makes all the difference—learn more in Types of Resin: A Crafter's Guide to Finding the Perfect Pour.
Final Thoughts
Making resin charms is a simple craft that lets you turn imagination into wearable art. By mixing resin with colors, glitter, or tiny trinkets, you can create charms that sparkle with personality.
The curing process takes a little patience, but the end result is worth it—smooth, shiny charms perfect for keychains, necklaces, or gifts. Whether you’re a beginner or an experienced crafter, resin charms are a fun way to explore creativity.
So grab your resin kit, pick your favorite mold, and start designing charms that are as unique as you are. Your custom creations are waiting to shine!
Explore Resiners’ collections of starter kits and equipment to make your charm-making even easier and more inspiring.
Frequently Asked Questions
What materials do I need to start making resin charms?
Can you guide me through the process of embedding objects into resin charms?
Pour a thin layer of resin into your mold and let it set a little. Place your object—maybe a bead or flower—on top of that layer. Then cover it with more resin, making sure it’s sealed and doesn’t float away.
What are the steps to create my own molds for resin charms?
Use silicone putty or liquid silicone to make custom molds. Press the putty around your object or pour liquid silicone into a container with your item inside. Once it cures, you’ve got a reusable mold for casting resin charms.
How long does it take for resin charms to cure completely?
Most epoxy resins need 24 to 48 hours to fully harden. UV resin cures much faster under a UV lamp, sometimes in just a few minutes. Temperature and humidity can change cure times, so check the instructions on your resin brand.
What safety precautions should I take when working with resin for charm making?
Wear gloves to protect your skin and a mask to avoid breathing fumes. Work in a space with good airflow, and keep food and drinks far from your work area. Always follow the safety rules on your resin product.
Are there any tips for achieving a bubble-free finish in resin charms?
Stir the resin slowly. This helps keep air bubbles from forming.
If bubbles pop up, grab a heat gun or lighter and gently wave it over the surface. A toothpick works too for poking any stubborn ones.
Try warming the resin a bit before you mix it. That makes it easier for bubbles to get out.


Laisser un commentaire
Ce site est protégé par hCaptcha, et la Politique de confidentialité et les Conditions de service de hCaptcha s’appliquent.