A resin pyramid is a fantastic way to showcase your creativity while adding a stunning touch to your space!
With a variety of styles, from sleek moderns to enchanting crystal-inspired designs, the possibilities for personalization are truly endless.
Even if you're just starting out, with a little guidance and practice, you can create impressive pieces that look professionally crafted.
In this guide, you’ll find expert tips, inspiring design ideas, and exciting projects for 2025. So, get ready to dive into some beginner-friendly DIY adventures and craft beautiful art that you'll be proud to display!
Unique Resin Pyramid Ideas You’ll Want to Try
Creating resin pyramids can be a rewarding and imaginative hobby. Each pyramid can reflect your personality and interests or even serve a specific purpose. From galaxy themes to spiritual chakras, each idea offers a unique twist and function.
1. Galaxy Resin Pyramid
Transform your resin pyramid into a small piece of the universe. Use mica powder and dark pigments to create a starry effect.
Glow-in-the-dark stars can add extra charm. For a magical night-time glow, consider embedding a small LED light.
Materials:
- Mica powder
- Dark pigments
- Glow-in-the-dark stars
- LED light
Skill Level: Intermediate
Value: Perfect for space lovers who enjoy cosmic decor.
2. Chakra Resin Pyramid
Design a resin pyramid that represents spiritual balance. Use colored pigments and crystals like amethyst, lapis, and citrine to create seven distinct layers to symbolize each chakra. This pyramid can serve as an excellent meditation tool.
Materials:
- Colored pigments
- Crystals (e.g., amethyst, lapis)
Skill Level: Advanced
Value: Ideal for spiritual individuals focused on energy balance.
3. Memorial Pyramid
Preserve cherished memories with a personal touch by using transparent resin to encapsulate ashes, pet fur, or meaningful keepsakes.
Delicate soft pigments can enhance its beauty, creating a lovely commemorative piece.
Materials:
- Transparent resin
- Keepsakes (e.g., ashes, fur)
- Soft pigments
Skill Level: Intermediate
Value: Offers a personalized way to remember loved ones.
4. Beach-Inspired Resin Pyramid
Bring the serenity of the beach into your home. Incorporate sand, seashells, mini palm trees, and blue pigments. Add tiny surfboards or dolphins for an extra playful element.
Materials:
- Sand
- Seashells
- Miniature palm trees
- Blue pigments
Skill Level: Beginner
Value: Provides a coastal escape to any room.
5. Dried Flower Resin Pyramid
Preserve nature’s beauty in resin. Use real pressed flowers and botanical oils to make a charming pyramid perfect for weddings or anniversaries. Each pyramid is a unique reflection of natural elegance.
Materials:
- Pressed flowers
- Botanical oils
Skill Level: Beginner
Value: Perfect for sentimental gifts and nature lovers.
6. Orgone Energy Pyramid
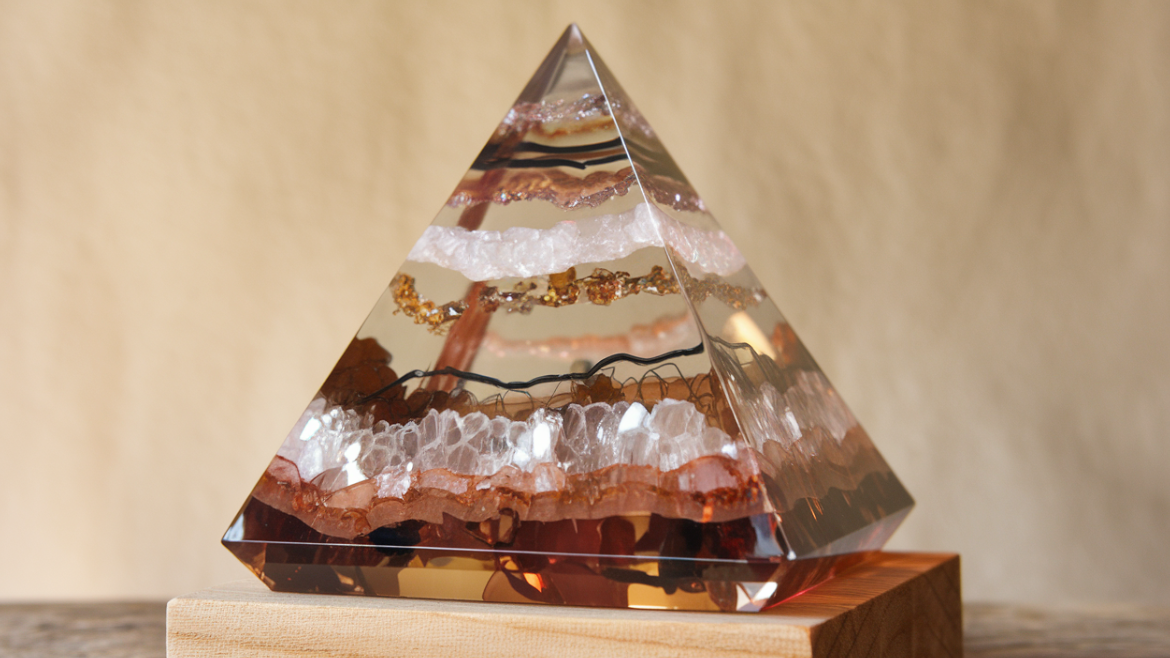
Create an energy-regulating sculpture with orgone pyramids. Incorporate copper coils, various metals, and crystals into layered resin. These pyramids are often used for spiritual healing and EMF protection.
Materials:
- Copper coils
- Metals
- Crystals
Skill Level: Intermediate
Value: Used by those seeking holistic health benefits.
7. Fairy Garden Pyramid
Delight in creating a magical mini-world. Combine miniature mushrooms, grass, and tiny fairies within the resin. Include soft lighting effects using embedded LEDs for a whimsical touch.
Materials:
- Miniatures (e.g., mushrooms, fairies)
- LED lights
Skill Level: Beginner
Value: A fun project for fairy tale enthusiasts.
8. Fantasy Creature Pyramid
Craft fantasy realms in your resin pyramid with tiny dragon or unicorn figures and colorful glitter. This is ideal as a gift for anyone who adores mythical beings and vibrant, magical art.
Materials:
- Dragon or unicorn figures
- Colored glitter
Skill Level: Beginner
Value: Appeals to those captivated by myth and fantasy.
9. Glow-in-the-Dark Resin Pyramid
Illuminate your space with a glow-in-the-dark pyramid. Use phosphorescent powders to create a striking nighttime effect, perfect as a unique desk light or night decor.
Materials: Phosphorescent powders
Skill Level: Intermediate
Value: Offers both function and charm as ambient lighting.
10. Geode-Style Resin Pyramid
Emulate the look of natural geodes with broken crystal pieces and metallic resin pigments. This pyramid becomes a stunning centerpiece that mimics nature’s geological marvels.
Materials:
- Broken crystals
- Metallic resin pigments
Skill Level: Advanced
Value: Perfect for adding a sophisticated touch to decor.
How to Create Your Own Resin Pyramid from Scratch
Creating a resin pyramid is a fun and creative process. To ensure success, gather the right materials, carefully follow step-by-step instructions, and be aware of common mistakes.
Materials You’ll Need for a Resin Pyramid
Before you begin, it’s important to gather all your supplies so you’re fully prepared. Everything on hand will make the process smoother and help you avoid common mistakes. Here’s what you’ll need:
- Epoxy or UV resin: A high-quality brand like Resiners® is a great choice for both beginners and experienced crafters.
-
Silicone pyramid mold: This is essential for creating the shape of your resin piece.
-
Measuring cups and stir sticks: Accurate mixing ensures your resin cures properly and has a smooth finish.
-
Gloves and a respirator or face mask: Resin can release fumes, so always work in a well-ventilated space and use protective gear.
- Optional decorative items: You can personalize your pyramid with dried flowers, glitter, crystals, gold flakes, or color pigments.
Take a moment to double-check your materials before you start mixing. A little preparation goes a long way toward a successful resin project.
How to Make a Resin Pyramid: Step-by-Step
Step 1: Prep your workspace: Cover your work surface with parchment paper or plastic. Ensure that the area is clean and free of dust.
Step 2: Measure and mix your resin: Follow the ratio specified in your resin kit exactly. Mix the resin slowly and thoroughly to minimize bubbles.
Step 3: Pour the First Layer: Start with a thin base layer of resin. This helps to reduce trapped air and creates a smooth foundation.
Step 4: Add Decorative Elements: Once the first layer has partially cured (it should feel slightly tacky), carefully place your decorative items using tweezers or a stick. Ensure they stay in position.
Step 5: Build Up in Layers: Pour the remaining resin in stages, allowing each layer to cure completely before adding the next. This method prevents overheating and ensures that your pyramid cures evenly.
Step 6: Allow the resin to cure completely without disturbance.
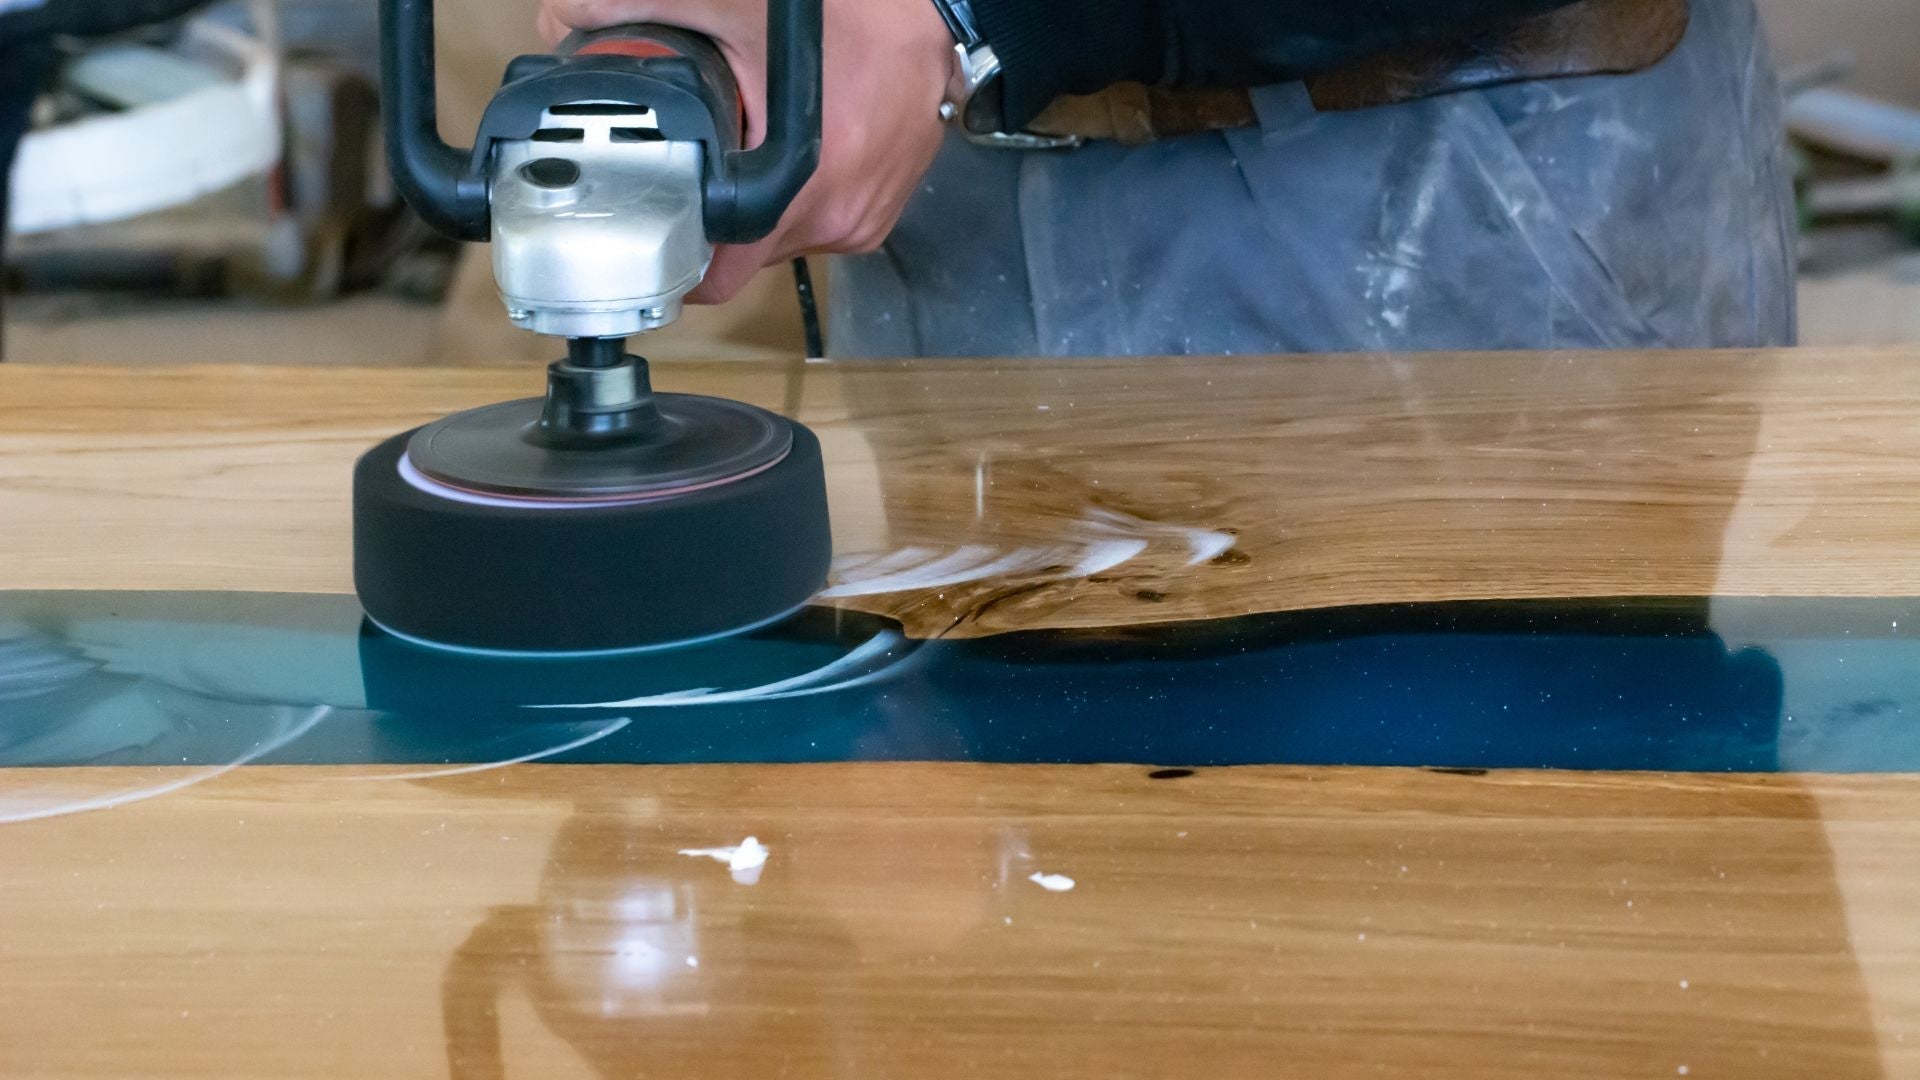
Step 7: Gently demold your pyramid and sand any rough edges to achieve a smooth, clean finish.
Common Mistakes and How to Avoid Them
Here are some common issues to be aware of, along with tips to prevent them:
- Resin overheating: Thick, single pours can overheat and crack. To avoid this, always pour in layers and monitor the temperature throughout the process.
- Floating decorations: Objects can shift or rise to the surface if they are added too soon. Wait until the resin is semi-cured before placing any decorations.
- Cloudy or soft resin: This issue is usually caused by incorrect mixing or high humidity levels. To prevent it, mix the resin thoroughly and follow the curing instructions carefully. Additionally, keep your workspace clean and dry.
What to Put Inside Your Resin Pyramid: Creative Fillers and Their Meanings
The items you include in your resin pyramid not only enhance its visual appeal but can also add meaningful and emotional value.
Whether you're creating a decorative piece or a personalized gift, these fillers can help convey a story.
1. Crystals and Gemstones
Crystals are a popular choice for resin art. Each type carries its own symbolism:
- Rose Quartz – Known for its soft pink color, this stone represents love, compassion, and emotional healing.
- Black Tourmaline – A powerful protective stone, often used to ward off negative energy and create a sense of grounding.
- Citrine – With its warm yellow tone, citrine is believed to attract abundance, positivity, and success.
Using crystals can give your pyramid both a spiritual and aesthetic boost.
2. Natural Elements
Bringing nature into your design adds a calming and organic feel. Consider including:
- Dried herbs or flowers – Sage symbolizes cleansing and purity, while lavender promotes relaxation.
- Leaves or moss – Adds texture and a woodland vibe, perfect for grounding energy.
- Shells or sand – Great for ocean-inspired pieces; they bring a sense of peace and connection to the sea.
These materials offer both visual interest and symbolic meaning.
3. Metallics & Industrial Materials
For a more modern or edgy look, metallic elements work well. They also carry deeper symbolism:
- Copper wire – Represents energy flow and connection. It can also be shaped into coils or spirals for added visual interest.
- Gold or silver foil – Adds a reflective, high-end finish and symbolizes wealth or clarity.
- Gears or small hardware – Great for a steampunk or industrial theme. Gears often represent time, progress, and creativity.
These touches can transform your pyramid into something bold and unique.
4. Personal Items for Custom Projects
If you're creating a custom piece with emotional value, personal items can make it meaningful:
- Ashes or hair – Often used in memorial art to honor loved ones.
- Initials or small charms – Mark a special occasion like a wedding, birth, or anniversary.
- Tiny handwritten notes or photos – Laminated or sealed versions can be embedded as keepsakes.
These additions turn your resin pyramid into a personal memory that lasts.
Resin and Mold Tips for Pyramid Projects
Making a resin pyramid involves more than just pouring and waiting. From choosing the right resin to picking a quality mold and staying safe, here’s what to know before you start.
Deep Pour Resin vs. Standard Epoxy Resin
For thicker pyramids, using the right type of resin is essential. Here’s how the two compare:
Deep pour resin is made for thick layers (often over 1 inch at a time).
- Reduces the risk of overheating and cracking.
- Ideal for large molds like pyramids.
- Takes longer to cure (usually 24 to 72 hours).
- Offers better clarity for deep, clear pours.
- Trusted brands: Resiners®
Standard epoxy resin is better suited for shallow molds or small projects.
- Cures faster but can overheat in thick pours.
- More affordable but not ideal for large pyramids.
Always check the product label for maximum pour depth and curing times before starting.
What to Look for in a Silicone Mold
Your mold plays a big role in how your final piece turns out. A good mold should have:
- Heat resistance – Prevents warping during long cures.
- Smooth interior – Gives your pyramid a clear, polished surface.
- Flexibility – Makes it easier to remove the finished piece without breaking it.
Check Out: Resiners® Togetherness Hand in Hand Silicone Mold DIY Kit
Avoid low-quality molds, as they can deform or tear after a few uses. Investing in a durable mold pays off over time.
Safety Precautions You Shouldn’t Skip
Resin projects can be messy and potentially hazardous if mismanaged. Make safety a habit by doing the following:
- Work in a well-ventilated space – Open windows or use a fan to help with airflow.
- Wear gloves and a mask – Protect your hands and avoid inhaling fumes.
- Use accurate measurements – Follow the resin-to-hardener ratio strictly. A digital scale can help.
- Mix in the right container – Use a clean, appropriate container to avoid contamination or unwanted reactions.
- Avoid skin contact – Resin can cause irritation, especially before it cures.
Improper handling can lead to curing issues, wasted materials, or even health risks. Take the time to do it right.
Conclusion: Find Your Next Resin Pyramid Idea and Start Pouring
Creating a resin pyramid is an enjoyable and rewarding way to explore color, layering, and design.
Whether you aim for a minimalist style or a bold statement piece, using the right materials is essential. With a bit of creativity and the tips from this guide, you’ll be well on your way to crafting something truly unique.
Ready to start your next project? Check out Resiners® Epoxy Resin along with their complete range of craft tools and accessories designed specifically for resin art. It's everything you need to bring your ideas to life with quality and ease.
FAQs: Resin Pyramid Ideas & Techniques
How do I stop bubbles from forming in my resin pyramid?
To reduce bubbles, pour the resin slowly and in layers. Let the resin sit for a few minutes after mixing so bubbles can rise and pop. You can also use a heat gun or torch to remove surface bubbles before the resin sets gently. Warming the mold slightly before pouring can also help.
Can I layer resin with different colors in one pyramid?
Yes, you can layer different colors of resin in a pyramid mold. Pour each color slowly and let it partially set before adding the next layer. This helps keep the colors from blending too much. Layering adds depth and makes the finished piece more visually interesting.
What’s the best resin for thick pyramid molds?
For thick molds like pyramids, deep pour or casting resin works best. These resins are specially made for larger pours and cure more slowly to reduce heat and bubbles. Regular resin may not cure evenly in deep molds and can crack. Always check the label to make sure it’s safe for deep pours.
Can I put electronics like LEDs inside a resin pyramid?
Yes, if sealed and safe for resin use, you can embed LEDs or other small electronics in a resin pyramid. Ensure the items are clean and dry before placing them in the mold. Pour the resin into stages to avoid trapping air around the electronics. Leave part of the wire or switch accessible if needed for power.
How long does it take for a resin pyramid to cure fully?
Depending on the resin type and room temperature, a resin pyramid usually takes 48 to 72 hours to cure fully. Thicker molds need more time to harden completely. Keep the mold in a level, dust-free area while curing. Avoid touching or moving it during this time to prevent surface damage.
Why is my pyramid sticky or soft after curing?
Sticky or soft resin usually means the mixing ratio was off or it wasn’t stirred well. Always follow the instructions and mix the resin thoroughly for a full cure. High humidity or low room temperature can also affect curing. If the resin doesn’t harden after a few days, you may need to remove it and start over.


Laisser un commentaire
Ce site est protégé par hCaptcha, et la Politique de confidentialité et les Conditions de service de hCaptcha s’appliquent.