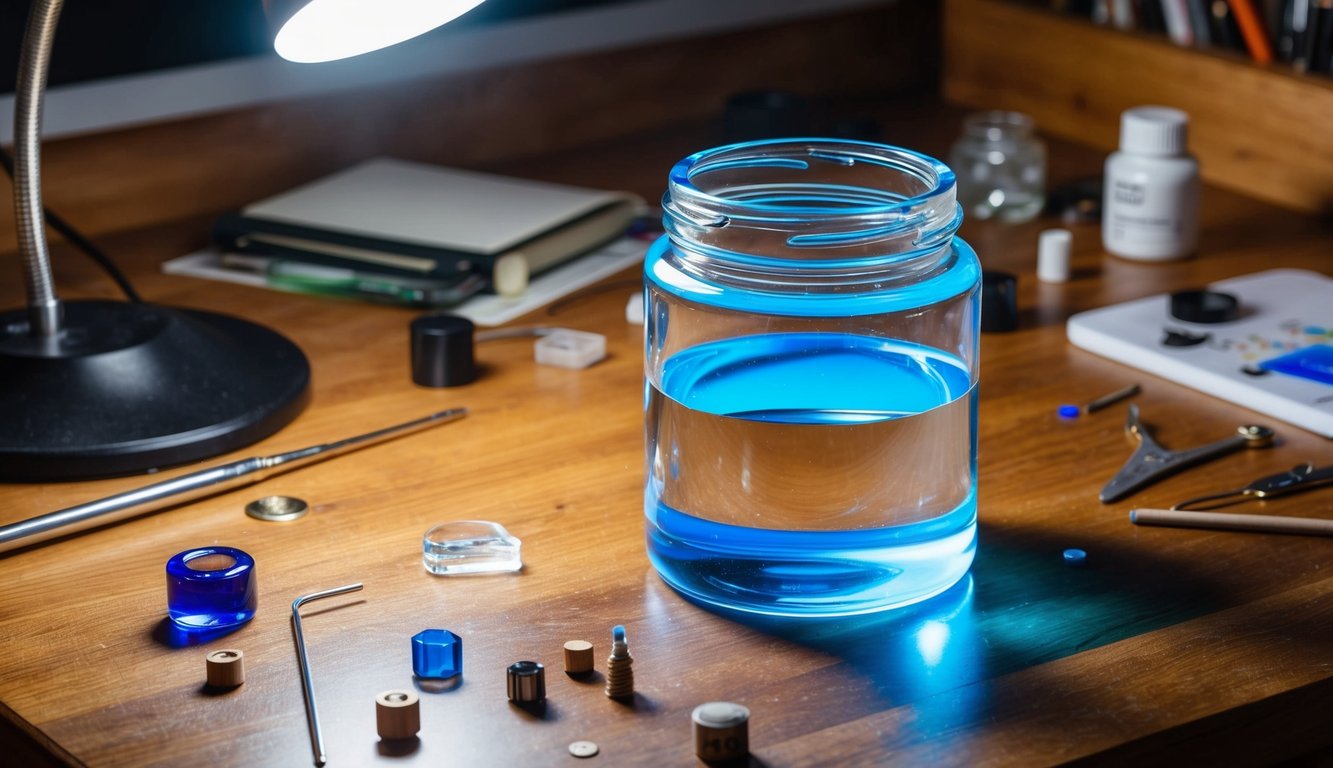
What is UV resin? It's a special liquid material that magically hardens when exposed to ultraviolet light, usually in just 1-5 minutes!
Unlike epoxy, UV resin comes ready to use with no mixing needed, making it perfect for jewelry, small crafts, and projects needing a glossy finish.
The best part is you control exactly when it hardens by using a UV lamp or natural sunlight. This makes UV resin super beginner-friendly - no measuring, no mixing, just pour and cure! You can create beautiful, professional-looking pendants and decorative items in minutes instead of waiting hours.
Want to learn how to make stunning projects with this amazing material? Keep reading!
What Is UV Resin?
UV resin is a popular crafting material that hardens when exposed to ultraviolet light. It offers quick curing times and versatile applications for various creative projects.
UV resin is a special type of resin that hardens when exposed to ultraviolet light. Unlike epoxy resin that needs two parts mixed together, UV resin comes ready to use in one container. You don't have to measure or mix anything!
The main ingredients in UV resin include monomers, oligomers, and photoinitiators. These chemicals work together when UV light hits them. UV resin is thicker than epoxy and cures in minutes instead of hours or days.
UV resin works best for small projects like jewelry, bezels, and thin layers. It's not good for big items because the UV light can't reach deep inside to cure it properly.
Many crafters love UV resin because it's less messy and doesn't smell as strong as epoxy.
Curious about how UV resin compares to other options? Our article Epoxy Resin vs UV Resin: What's the Difference? provides an in-depth comparison to help you choose the right material.
Understanding The UV Curing Process And Required Light Sources
When UV light hits the resin, it triggers a chemical reaction. The photoinitiators in the resin absorb the light energy and start a chain reaction. This makes the liquid turn solid super fast - often in just 1-5 minutes!
You have two main options for curing UV resin:
-
UV lamps or torches: These are small devices made just for crafting. They give off the right kind of light to harden your resin.
-
Sunlight: Natural sunlight works too! Just place your project in direct sun.
For best results, cure your resin in thin layers. Thick pours might stay sticky in the middle where light can't reach.
Keep your UV lamp about 1-2 inches away from your project while curing. Move it around to make sure all areas get light.
Once it's fully hardened, your creation is safe to handle!
For successful UV resin projects, proper curing is essential. Browse our UV light for curing resin collection to find the perfect lamp for your creative needs.
Advantages And Limitations Of UV Resin

Benefits: Fast Curing, No Mixing Required, Extended Working Time
UV resin cures super fast! You just need to expose it to UV light, and it hardens in minutes oreven seconds. This quick curing time saves you lots of waiting compared to epoxy resin that takes hours or days to fully harden.
Unlike epoxy resin that needs careful measuring and mixing of parts A and B, UV resin comes ready to use. This makes it much simpler for beginners. The resin stays liquid until you expose it to UV light. This gives you all the time you want to work on your project without rushing.
You can position embeds, remove bubbles, or make adjustments before you cure it with your UV lamp.
Limitations: Depth Restrictions, Potential Tackiness, Shelf Life Considerations
UV resin has trouble curing in thick layers. Light can't reach deep into the resin, so you're limited to thin applications (usually 1-4mm).
For thicker pieces, you'll need to work in multiple layers, curing each one before adding the next. Sometimes UV resin stays sticky on the surface even after curing. This tacky layer can collect dust or feel unpleasant to touch.
You might need to apply a final topcoat or polish the piece to get a fully dry surface.
While UV resin has a long shelf life, it's sensitive to light exposure. You must store it in opaque containers and work in controlled lighting.
Any accidental exposure to sunlight or even bright indoor light can partially cure the resin in its bottle, making it unusable.
Essential Tools and Materials

To make UV resin jewelry or crafts, you'll need some basic equipment and supplies. Having the right tools will make your projects turn out better and help keep you safe.
UV Lamps
UV lamps are must-have tools for curing your resin. These special lights make the liquid resin harden quickly.
You can choose between a UV flashlight or a UV lamp box.
Lamp boxes work better for larger projects because they cure the resin evenly. Flashlights are good for small areas or when you're traveling.
Also, the power of your UV lamp matters a lot. Stronger lamps (36W or higher) cure resin faster than weaker ones. Most resin cures in 1-5 minutes under a good lamp.
So make sure your lamp gives off light in the 395-405nm wavelength range for best results.
Basic Supplies
You'll need more than just resin and a lamp to make cool stuff. Silicone molds help shape your creations. They come in many designs like jewelry, coasters, and figurines. Mixing tools are important too.
Grab some of the following:
- Small plastic cups
- Wooden stir sticks
- Pipettes for adding tiny amounts
- Tweezers for placing small items
Colorants make your projects pop! You can use options like the following:
- Alcohol inks
- Mica powders
- Liquid pigments
Don't forget decorative items like dried flowers, glitter, or small charms to embed in your resin. And for more info, read our guide: Coloring Resin: Techniques for Vibrant DIY Crafts.
Safety Guidelines and Best Practices When Using UV Resin

Working with UV resin requires careful attention to safety. Following proper procedures protects your health and ensures the best results for your crafts.
Proper Ventilation, Protection, Storage, And Handling Procedures
Always work in a well-ventilated area when using UV resin. Open windows or use a fan to keep fresh air flowing.
This helps reduce your exposure to fumes that can be harmful if breathed in for too long.
Protect yourself by wearing gloves to keep the sticky resin off your skin. UV resin can cause irritation or allergic reactions if it touches you.
Don't forget eye protection too! Sunglasses or safety glasses shield your eyes from both resin splashes and the UV light used for curing.
Apply sunscreen (at least SPF 30) on exposed skin areas when working with UV lamps. This helps prevent skin damage from UV rays.
UV-blocking glasses shield your eyes from harmful rays. Never look directly at your UV lamp while it's on. The light can damage your eyes over time.
Work in a well-ventilated area or use a small fan. While UV resin doesn't smell as strong as epoxy, it still gives off fumes.
Cover your work surface with silicone mats or wax paper for easy cleanup if spills happen. Use proper storage containers for your resin and keep them away from children and pets.
Store your resin in a cool, dark place away from children and pets. Keep bottles tightly closed when not in use.
UV resin can start hardening if exposed to sunlight through windows. Clean up spills right away with alcohol wipes. Don't let hardened resin go down drains. Dispose of leftover resin according to local regulations for chemical waste.
How To Use UV Resin

Working with UV resin is simple once you know the basic steps. With proper preparation and technique, you can create beautiful projects that cure quickly under UV light.
Quick Guide About Workspace Preparation
Start by setting up in a well-ventilated area. UV resin releases fumes that aren't good to breathe.
Wear a respirator even when working with UV resin. Cover your work surface with silicone mats or wax paper to catch drips.
Gather these supplies before starting:
- UV lamp or sunlight
- Disposable gloves
- Toothpicks for bubbles
- Small containers for mixing
- Alcohol for cleanup
Keep your resin bottles closed when not in use to prevent early hardening. UV resin is sensitive to light, so store it in a dark place.
Application Techniques
Before using UV resin, give the bottle a warm water bath. This makes it more fluid and easier to work with.
Stir gently to avoid creating bubbles.
You can apply UV resin in several ways:
- Dripping: Use for dome effects on jewelry
- Brushing: Great for thin, even coats
- Pouring: Works for filling molds
For colorful projects, mix small amounts of resin with colorants. Don't mix too much at once as it must be used quickly.
Apply thin layers rather than thick ones for best results. If bubbles appear, pop them with a toothpick or heat tool.
Curing Process
UV resin needs ultraviolet light to harden. You have two main options:
- UV Lamp: Fastest method (30-120 seconds)
- Sunlight: Takes longer (10-30 minutes)
Place your project under the light source and wait for it to cure. Thicker layers need more time.
For larger or thicker pieces, cure in layers. Each layer should be thin and fully cured before adding the next. Some colors, especially dark ones, may take longer to cure completely.
Finishing Tips
After curing, your resin might still feel slightly tacky. Wipe with rubbing alcohol to remove the sticky layer.
If your project has uneven spots, you can sand them with fine-grit sandpaper (start with 400 grit, then move up to 1000+).
For a glossy finish:
- Apply another thin layer of clear resin
- Buff with polishing compound
- Use a small amount of resin oil
If you make mistakes, you can fix many issues by adding another layer or sanding down problem areas.
For sharper edges, carefully trim excess resin with craft knives after it's fully hardened.
Now that you understand what UV resin is and how it works, check out The Best UV Resin Guide: Perfect Results Every Time for advanced techniques and project ideas.
Popular Applications For UV Resin

Jewelry Making And Small Crafts
UV resin is perfect for making beautiful jewelry pieces. You can use it to create pendants, earrings, and rings with embedded objects like dried flowers or glitter.
Many crafters love using UV resin because it works well with metallic bezels and small molds. Just expose your creation to UV light (either sunlight or a special UV lamp) and it hardens in minutes.
When making jewelry with UV resin, you should work in thin layers to avoid bubbles. This is especially important for clear pieces.
Some crafters add a tiny bit of blue dye to prevent yellowing over time.
Coatings, Sealants, And Decorative Projects
UV resin makes a great protective coating for many surfaces. You can use it to seal paintings, photos, or paper crafts with a glossy finish. It's also perfect for adding a dome effect to small items.
Many people use UV resin to:
- Coat wooden surfaces
- Fill in gaps in projects
- Create decorative coasters
- Attach embellishments to crafts
- Make custom phone cases
The quick-curing nature of UV resin means you can complete coating projects in one sitting.
For best results with coating projects, make sure your surface is clean and dry before applying resin.
If you're covering something with texture, you might need multiple thin layers to get full coverage.
UV Resin Vs. Epoxy Resin

Key Differences In Curing, Project Suitability, And Cost Factors
With UV resin, your jewelry pieces and small crafts can be done in minutes instead of hours!
Epoxy resin works differently. You mix two parts together, and it cures on its own over time. It doesn't need any special light to harden. This makes epoxy better for bigger projects like river tables or large art pieces.
It's also more heat-resistant and durable than UV resin. Cost is another big difference. UV resin usually comes in smaller bottles and costs more per gram than epoxy. But for tiny projects, you might use less material overall.
Epoxy gives you more bang for your buck in larger projects.
Project size matters too! UV resin works best in thin layers (under 1/4 inch), while epoxy can be poured in thicker layers. This makes epoxy better for deep molds and larger castings.
Ready to start creating with UV resin? Explore our comprehensive Best Epoxy Resin for DIY and Professional Projects guide to find the perfect materials for your next masterpiece.
Final Thoughts
UV resin is the perfect craft material for anyone who wants quick, impressive results without the long wait times. Its fast-curing magic lets you complete projects in minutes that would take days with other materials.
While best for thin layers and smaller creations, the crystal-clear finish and ease of use make it worth trying for your creative adventures.
Ready to start creating? Check out our collection of UV resin kits and don't miss our detailed article: The Best UV Resin Guide: Perfect Results Every Time for expert tips and project ideas!
Frequently Asked Questions on What Is UV Resin
Can you wash off UV resin?
Uncured UV resin can be cleaned off your hands and tools with isopropyl alcohol. But once it's cured, you can't wash it off.
That's why wearing gloves is important when working with UV resin. If you get uncured resin on your skin, wipe it off right away. Then wash the area with soap and water.
How long does UV resin last?
Unopened UV resin typically lasts 6-12 months. After opening, it's best to use it within 3-6 months for the best results.
Cured UV resin projects can last for years if kept away from direct sunlight. UV light might make them yellow over time. Store your unused resin in a dark, cool place to make it last longer.
What is the downside to UV resin?
UV resin is more expensive than epoxy resin. This makes bigger projects cost more. It can only cure in thin layers, usually 1-3mm thick. Thicker pours might not cure all the way through.
Some people find the smell strong. UV resin can also cause skin irritation for some users, so always wear gloves.
What kind of molds can you use with UV resin?
Silicone molds work best with UV resin. They're flexible and make it easy to pop out your finished pieces.
Clear or transparent molds are ideal since they let UV light pass through to cure the resin. Opaque molds might not work well.
You can also use metal bezels and open-backed settings for jewelry making.
Can you make large projects with UV resin?
UV resin works best for small projects like jewelry, keychains, and small decorations. Making large items is hard because UV resin cures in thin layers only.
For bigger projects, you might need to pour multiple thin layers. This takes time as each layer must cure before adding the next.
If you want to make large items like coasters or trays, epoxy resin might be a better choice.


Commenta
Questo sito è protetto da hCaptcha e applica le Norme sulla privacy e i Termini di servizio di hCaptcha.