Making epoxy resin at home opens up endless possibilities for creative projects. You can craft custom jewelry, decorate coasters, or pour glossy tabletops that reflect your personal style.
You make epoxy resin at home by combining resin and hardener in the right ratio, mixing carefully, and letting it cure into a strong, clear finish.
You don’t need specialized equipment to start. With a few basic tools, safe handling, and proper mixing, you can create professional-quality results from your own workspace.
Learning the process will also help you understand how resin behaves and how to control the outcome of each project.
This guide walks you through what epoxy resin is, the materials you’ll need, the steps to make it, and creative ways to use it.
Whether you want to make practical items or art pieces, you’ll learn how to work with resin confidently and avoid common mistakes.
To get your mixing just right, check out our epoxy resin and hardener collection for high-quality products that guarantee great results.
Understanding Epoxy Resin

Epoxy resin comes from mixing two key ingredients—resin and hardener—to form a tough, glossy, and durable plastic. You use it in art, crafts, and repairs because it’s strong, waterproof, and sticks to many materials like wood, glass, and metal.
What Is Epoxy Resin and How Does It Work
Epoxy resin is a two-part system made of resin and hardener that react through a chemical process called curing.
When you mix these parts in the correct ratio, they form solid plastic that resists heat, moisture, and chemicals. The mixture starts as a thick liquid that slowly sets over several hours.
The curing reaction gives epoxy its strength and clarity. Some formulas cure clear for decorative use, while others include fillers for added hardness.
You can also add pigments, dyes, or glitter to change how it looks. Temperature and humidity affect curing time—warmer conditions speed it up, while cooler ones slow it down.
Once hardened, your resin can be sanded, polished, or drilled just like wood or plastic.
Types of Epoxy Resin
Epoxy comes in different types for specific projects. The most common are:
|
Type |
Features |
Best For |
|
General-purpose resin |
Clear finish, easy to mix |
Coasters, jewelry, crafts |
|
Deep-pour resin |
Longer cure time, thick layers |
River tables, molds, large art pieces |
|
Casting resin |
Low viscosity, bubble release |
Small figurines, molds |
|
Coating resin |
Fast-curing, glossy surface |
Tabletops, floors, protective finishes |
Choosing the right kind matters. Use deep-pour epoxy when you need thicker layers, and coating epoxy when you want a hard, shiny finish.
Stick to the manufacturer’s mix ratio and working time to avoid sticky or soft results.
Epoxy Resin Versus Vinyl Ester Resin
Epoxy resin and vinyl ester resin look similar but behave differently. Epoxy resin bonds better and resists water, making it ideal for crafts, woodworking, and marine use.
Vinyl ester resin, made from polyester and epoxy components, is more flexible and tolerates high heat and chemicals.
Here’s how they compare:
|
Property |
Epoxy Resin |
Vinyl Ester Resin |
|
Bond strength |
Very high |
Moderate |
|
Chemical resistance |
Good |
Excellent |
|
Cost |
Higher |
Lower |
|
Cure shrinkage |
Low |
Moderate |
|
Craft use |
Art, coatings, molds |
Industrial, marine, automotive |
For home projects, epoxy resin is easier to handle and gives clearer, more consistent results.
Vinyl ester resin suits larger or more demanding builds where cost and chemical resistance matter most.
Common Uses and Applications
You’ll find epoxy resin used in DIY art, home décor, and repair projects. Many crafters use it for river tables, jewelry, keychains, and wall art because it cures glossy and enhances colors beneath it.
In practical use, epoxy acts as a strong adhesive or coating. It seals wood, concrete, and metal surfaces to protect them from moisture and wear.
It also works in automotive, electronics, and aerospace industries where strength and insulation are needed.
At home, start small—make coasters or molds. Once you understand mixing and curing, try layering techniques or embedding objects.
For a flawless finish, consider the right tools from our resin tools collection designed to make your epoxy resin projects easier and more precise.
Essential Tools and Materials

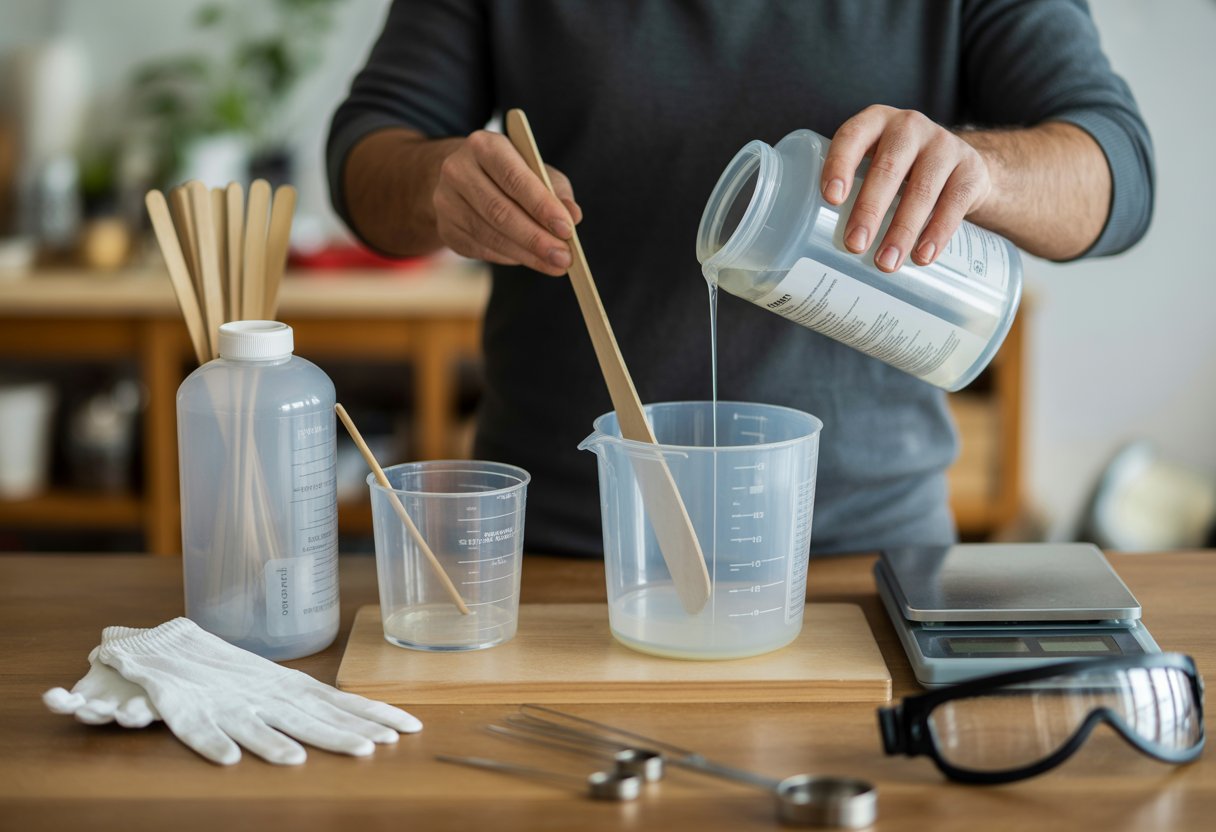
Working with epoxy resin requires simple but specific tools to ensure a clean mix, accurate measurements, and safe handling. Having the right supplies keeps your project smooth, reduces waste, and helps you get clear, even results every time.
Required Equipment for DIY Epoxy Resin
Start with high-quality resin and hardener made for small craft or beginner projects. These usually come with clear mix ratios, making it easier to get proper curing.
Use measuring cups with clear markings to control the proportions precisely. Plastic or silicone cups work best because cured resin pulls out easily.
Keep a few stirring sticks on hand, preferably wooden or silicone. Mix slowly to avoid air bubbles.
If you want to cast shapes, silicone molds are ideal since resin releases from them cleanly. Have tweezers nearby for placing small decorations or removing dust before curing.
An organized workspace helps a lot. Use plastic drop cloths, parchment paper, or a silicone mat to protect tables.
Set everything up before mixing so you can pour quickly while the resin is still workable.
|
Tool |
Purpose |
Recommended Type |
|
Measuring cups |
Accurate resin/hardener ratios |
Silicone or marked plastic |
|
Stirring sticks |
Even mixing |
Wooden or reusable silicone |
|
Molds |
Shaping and casting |
Flexible silicone |
|
Tweezers |
Adjusting details |
Fine-tip metal |
Safety Gear and Preparation
Epoxy resin is safe to use when handled correctly, but you must take precautions. Always work in a well-ventilated space to limit fumes.
Wear nitrile gloves instead of latex to prevent skin irritation. Use a protective mask or respirator designed for chemical vapors if your space lacks airflow.
Safety glasses keep splashes out of your eyes when pouring close to the surface. A long-sleeve shirt protects your arms from accidental drips or spills.
Before starting, cover all work surfaces with plastic film or disposable paper. Keep paper towels and isopropyl alcohol nearby for quick cleanup.
Plan your timing since resin begins curing soon after mixing.
Choosing Additives and Colorants
You can customize epoxy easily with colorants and special effects. Mica powder adds shimmer and depth, making jewelry or tabletops look more dynamic.
For beginners, start with small portions—too much pigment can change curing results. Liquid resin dyes create solid, even tones without clouding.
To add sparkle, try fine glitter, metal flakes, or alcohol inks for marbled designs. Mix slowly so colors don’t streak or trap air bubbles.
Keep pigments in sealed containers to avoid moisture. Use a disposable cup for blending each color before adding it to your main resin batch.
Understanding how each additive behaves helps you create controlled, consistent color results every time.
By reading our detailed guide, How To Mix Epoxy: Guide for Perfect Results Every Time you'll master the mixing process and avoid common pitfalls.
Step-By-Step Guide to Making Epoxy Resin at Home

Making epoxy resin pieces at home requires accuracy, patience, and safe handling. You measure and mix the resin and hardener precisely, add pigments or textures for creativity, and then cure it correctly to prevent bubbles or tacky spots.
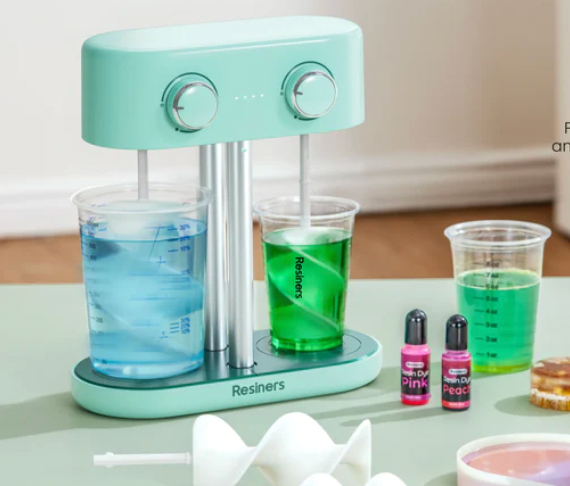
Measuring and Mixing Techniques

Resiners® 32 oz Crystal Clear Epoxy Resin Starter Kit
Start by gathering your resin and hardener, measuring cups, and stirring sticks or mixer. Always wear gloves and work in a ventilated space.
Accurate measurement matters most—uneven ratios can keep the resin from curing. Check the product’s mix ratio, often 1:1 by volume.
Pour each part into separate disposable cups. Combine them into one cup and stir slowly for about three minutes.
Scrape the sides and bottom as you mix to ensure the liquids blend uniformly. Avoid whipping air into the mixture.
Some crafters prefer the two-cup method. After the first mix, pour it into a second clean cup and stir again with a new stick.
This step helps remove unmixed portions that can lead to sticky results.
|
Recommended Tools |
Purpose |
|
Graduated measuring cups |
Keep measurements precise |
|
Wooden or silicone stirring sticks |
Mix thoroughly without scratching containers |
|
Timer |
Track mix and working times |
Adding Color, Effects, and Decorative Elements

Resiners® 26 Colors Mica Powder Set - 0.175oz(5g)/Bottle
Once the resin is fully mixed, you can customize it. Add a small amount of mica powder, liquid pigment, or alcohol ink for color.
Stir gently until the tone looks even. For dimension, try layers or swirls using contrasting colors.
You can also embed small objects like shells, dried flowers, or glitter. Place them slowly to prevent bubbles and uneven placement.
Tip: Always test new additives in a small batch. Some pigments or powders can change curing time or create clumps.
Keep ratios low—usually less than 5% of the resin volume—to maintain clarity and balance. When using metallic or pearl effects, let the resin rest for a minute before pouring.
This pause helps trapped air rise to the surface.
Pouring and Curing Tips
Prepare your mold or work surface before mixing so you can pour right away. Pour from one side in a thin stream to reduce air pockets.
If bubbles appear, use a small torch, heat gun, or a quick exhale to pop them carefully. Keep the temperature steady—about 70–75°F (21–24°C).
Cooler air can slow curing, while higher heat can cause cracks. Cover the project with a box or tent to block dust.
Cure times vary by brand and thickness, but most small projects need 24–72 hours. Avoid moving or touching the resin during this stage.
Once hardened, you can sand or polish edges for a smooth, glossy finish that highlights your design.
Discover creative ways to add sparkle and color to your homemade epoxy resin with our resin glitter powder collection.
Creative Epoxy Resin Projects and Beginner Tips

You can create a wide range of crafts with epoxy resin, from clear coasters to colorful jewelry.
Each project helps you learn how the material reacts, cures, and changes with temperature, hardener ratios, and molds.
Easy Resin Art Ideas for Beginners
Start simple with small, flat projects that cure evenly. Coasters, keychains, and small trays are great for learning how resin flows.
Try mixing in mica powder, glitter, or a few drops of resin dye to see what effects you can achieve. Use silicone molds for clean shapes and glossy finishes. You can also pour resin over wood or canvas for decorative wall art.
Work in thin layers if you plan to embed objects such as dried flowers or small stones.
- Measure resin and hardener carefully, usually at a 1:1 ratio.
- Stir slowly for at least 2–3 minutes to avoid bubbles.
- Let the piece cure in a dust-free space.
Troubleshooting Common Epoxy Issues
Beginners often face problems like bubbles, sticky finishes, or uneven curing. These usually come from inaccurate mixing or poor environmental conditions.
Mix resin thoroughly, scraping the sides and bottom of your cup to ensure both components blend completely.
If bubbles appear, use a heat gun or small torch to release them quickly.
Be careful not to overheat the surface. Cloudy resin often means the mixture was too cold, so aim for a workspace temperature of about 70–75°F (21–24°C).
To fix tacky surfaces, apply a thin new coat of properly mixed resin once the original layer hardens. Keep a checklist while working to track mixing times, ratios, and curing hours.
Care and Maintenance of Resin Creations
Once cured, epoxy resin is durable but can still scratch or yellow if not cared for.Keep resin art away from direct sunlight and high heat to protect color and clarity.
Clean finished pieces with a soft cloth and mild soap. Never use harsh chemicals or rough scrubbers.
If resin becomes dull, polish gently with a microfiber towel or apply a small amount of resin-safe restorer.
Store resin items in cool, dry places. For coasters, jewelry, and trays, use felt pads or liners to protect surfaces.
If you're curious about the essential materials to start your epoxy resin journey, explore our premium resin craft supplies for everything you need.
Wrap Up
Making epoxy resin at home allows DIY enthusiasts to create custom projects with control over materials and quality.
By carefully mixing the resin and hardener in the correct ratios and following safety precautions, you can achieve a durable, glossy finish perfect for crafts, jewelry, or repairs.
Using proper tools like disposable cups and silicone mixers ensures a smooth, bubble-free result. Understanding the process empowers you to experiment with colors, molds, and additives, expanding your creative possibilities.
With patience and precision, homemade epoxy resin can be a rewarding, cost-effective alternative to store-bought options.
Dive into our guide: How to Make Resin Dry Faster: 10 Proven Tips to speed up your curing process and complete projects efficiently.
Frequently Asked Questions
What materials do I need to start crafting with epoxy resin?
Begin with a two-part epoxy kit, which includes resin and a hardener. Use mixing cups, stir sticks, molds, and gloves to handle the mixture safely.
You’ll also need a flat, dust-free workspace and plastic sheets or disposable coverings to catch spills. Add pigments or dyes if you plan to color the resin.
Can you walk me through the steps of mixing and curing epoxy resin?
Measure the resin and hardener precisely according to the manufacturer’s ratio.
Always mix slowly for a few minutes, scraping the sides and bottom of the cup to blend evenly.
Once poured into molds or over a surface, let the mixture cure undisturbed for the time listed—usually between 24 and 72 hours, depending on temperature and humidity.
Avoid touching or moving your work before it hardens completely.
How can I ensure bubble-free results when working with epoxy?
Stir gently to avoid trapping air in the mixture. After pouring, use a heat gun or small torch to pass warm air over the surface and release bubbles.
Work in a warm environment, since cold temperatures can keep bubbles from rising and popping easily.
What are the best coloring methods for adding vibrant hues to my resin creations?
Use liquid resin dyes, mica powders, or alcohol inks that are safe for epoxy. Mix colorants slowly to prevent clumping or streaks.
Experiment with small batches to see how each pigment looks once cured, since colors may deepen or appear slightly different when hardened.
Safety first! Could you share some essential safety tips for resin crafting?
Always wear gloves, goggles, and a respirator when handling resin or hardener. Work in a space with good airflow, and avoid direct skin contact.
Never mix or cure resin near open flames or high heat. Keep materials out of reach of pets and children.
Are there any DIY tricks to achieve professional-level finishes with homemade epoxy resin?
Sand rough spots lightly once cured. Apply a thin top coat for a smooth finish. Use a level surface during curing to keep the resin even.
Clean your tools immediately with isopropyl alcohol to prevent buildup. A slow, steady approach often gives more polished results than rushing the process.


Commenta
Questo sito è protetto da hCaptcha e applica le Norme sulla privacy e i Termini di servizio di hCaptcha.