If you love working with resin, knowing how to mix resin with hardener is the key to success. Resin crafts like jewelry, art, and tabletops look amazing, but only if the mixture cures properly.
Getting the ratio wrong or not stirring enough can result in sticky spots or bubbles. The good news is that mixing resin and hardener is easy once you learn the basics.
You just need the correct measurements, a good stirring technique, and a little patience. This guide will walk you through the simple steps so your projects turn out smooth and firm every time.
How to Mix Resin with Hardener Correctly: Tools, Tips, and Timing
When working with resin, you need the right tools, accurate measurements, and careful mixing to achieve clear and strong results. Your steps make a big difference in how your project turns out.
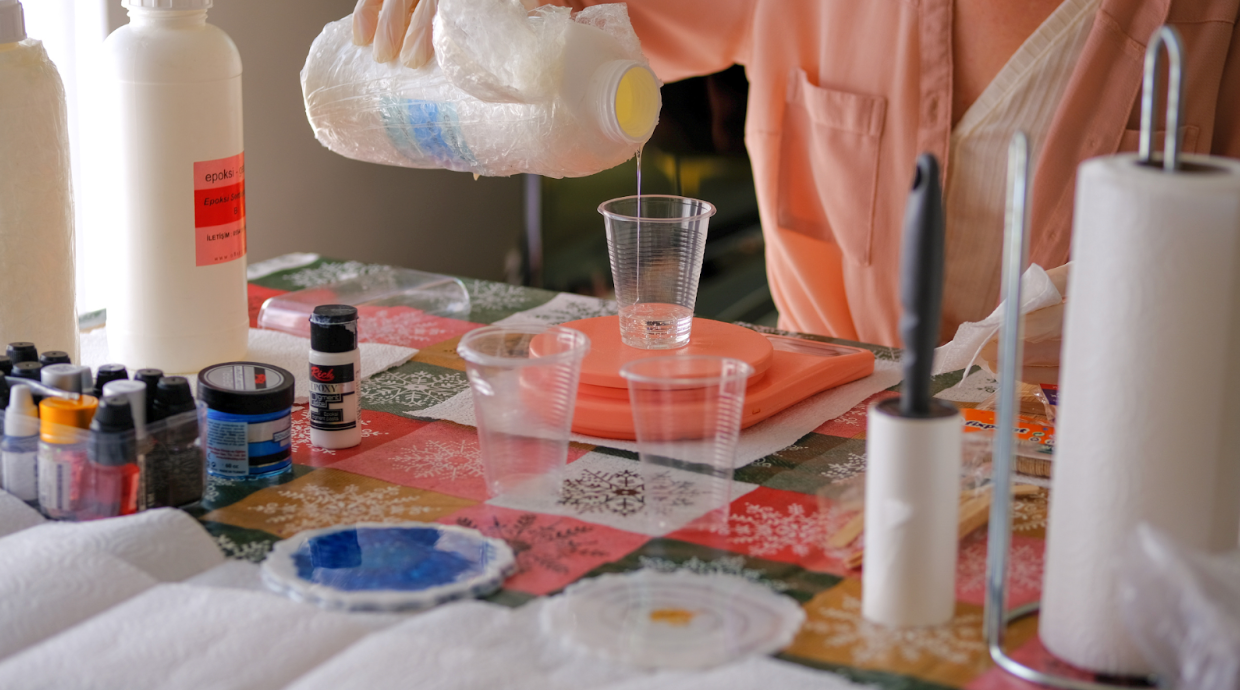
Gather Your Materials and Workspace
First, collect what you need:
- Gloves to protect your skin
- Mixing cups with measurement lines
- Stir sticks (wood or plastic)
- Timer or phone clock
- Heat gun (optional for bubbles)
Set up your workspace on a clean, level surface with good ventilation. Open a window or turn on a fan if needed. Make sure nothing could spill or contaminate your resin.
Wipe your work area with a dry towel to remove dust. Lay down a sheet of wax paper or plastic to protect against leaks. Before you start, keep all your tools within easy reach.
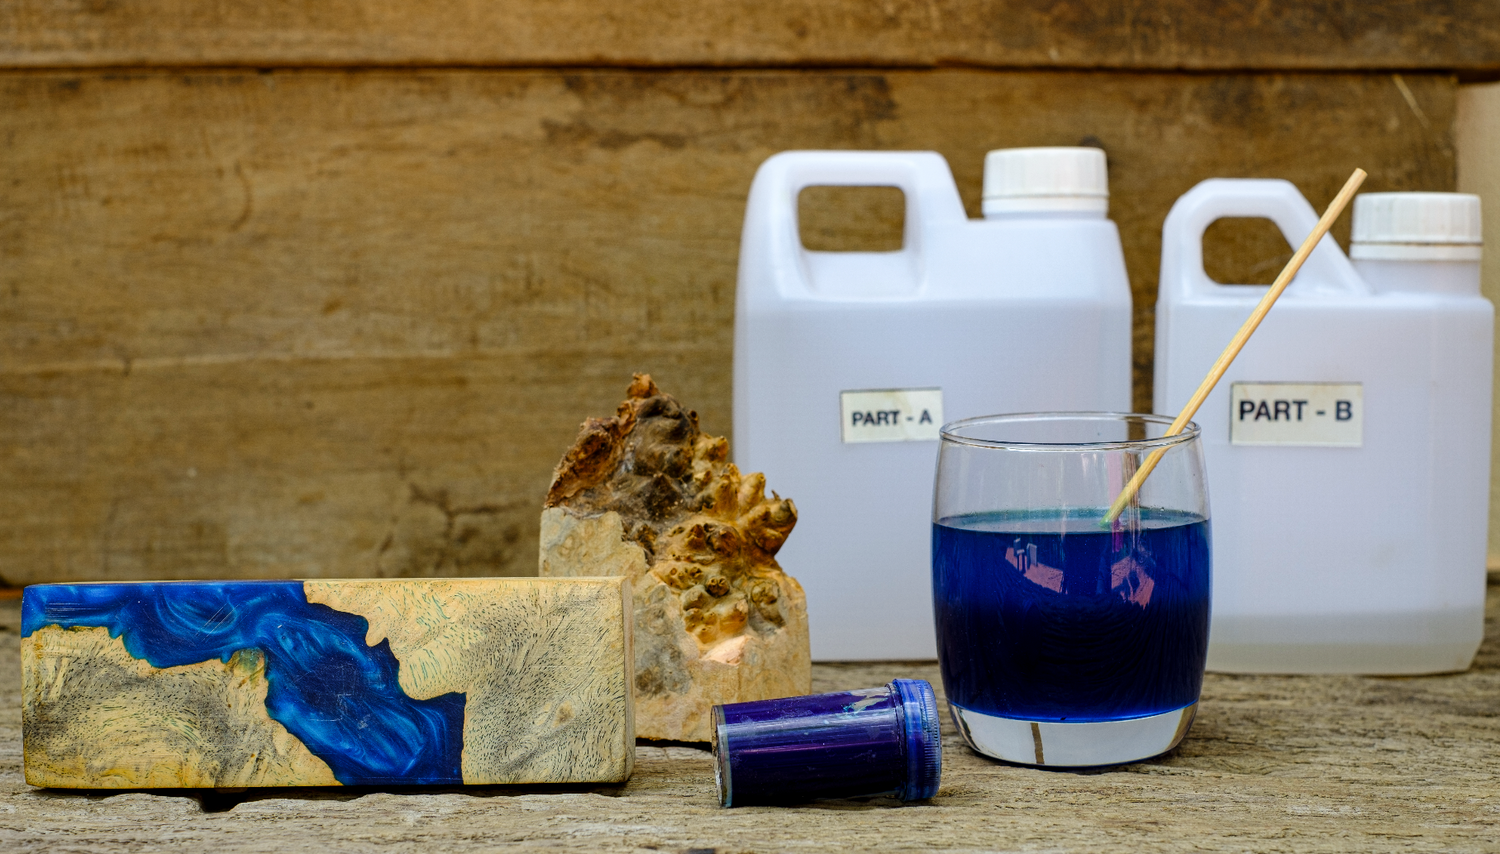
Understand the Resin-to-Hardener Mixing Ratio
Read the instructions on your resin and hardener bottles. Most products use a 1:1 or 2:1 mixing ratio. "1:1" means equal parts resin and hardener, and "2:1" means two parts resin for every part hardener.
Measuring correctly is very important. Never try to guess amounts by just looking. Always use measuring cups with clear lines. Even small mistakes in ratio can cause sticky or soft results.
If you use different brands, always check the mixing guide. Ratios can change depending on the product. Double-check before you pour.
Step-by-Step Instructions on How to Mix Resin with Hardener
Follow these steps to mix resin with hardener correctly:
- Pour the resin and then the hardener into your mixing cup, using the exact ratio listed on the label.
- Set a timer for at least 2 to 3 minutes.
- Mix slowly with a stir stick. Scrape the sides and bottom often so there are no unmixed bits.
- Stir until the mixture looks clear, with no streaks or swirls left.
- Let the cup sit for a minute. This helps air bubbles float to the top.
- If you see bubbles, use a heat gun or blow lightly on the surface to pop them.
Do not rush the process. Careful mixing and patience give the best results for your resin project.
📌 Also Read: Will Epoxy Resin Stick to Glass? Tips for Better Adhesive
Common Mistakes When Learning How to Mix Resin with Hardener

Mixing resin with hardener the wrong way can cause your project to fail. Many people make the same mistakes, like mixing too fast, using the wrong ratio, or not mixing long enough. Knowing these mistakes can help you get the best results.
Mistake 1: Mixing Too Fast or Too Hard
If you mix the resin and hardener quickly or with too much force, you will trap a lot of air in the mixture. This creates air bubbles, which can leave your finished project with small holes or a cloudy appearance.
Vigorous mixing might also cause the resin to start curing too soon. This shortens your working time and can make your project sticky or uneven.
How to Avoid:
- Stir slowly and steadily with a flat tool, such as a wooden stick or paddle.
- Scrape the sides and bottom of the container as you mix.
- Take your time, and avoid whipping the mixture.
Slow mixing helps keep bubbles out and makes sure your resin stays smooth and clear.
Mistake 2: Wrong Ratio of Resin to Hardener
Getting the mix ratio wrong is a common mistake. Too much or too little of either resin or hardener will stop the chemical reaction from working as it should.
If you use the wrong ratio, your project might stay sticky, soft, or not cure at all. Measuring by eye or guessing often leads to these problems.
Tips to Prevent Ratio Mistakes:
- Always read the instructions for your resin brand.
- Use a measuring cup or syringe for accuracy.
- Double-check your measurements before pouring the two parts together.
Most resin kits need an exact 1:1 or 2:1 ratio by volume. Following these steps helps you get a hard, fully cured outcome.
Mistake 3: Not Mixing Long Enough
If you stop mixing too soon, you may leave unmixed resin and hardener streaks. Unmixed spots can create soft spots or sticky areas after curing.
Sometimes it looks like you are done mixing, but you really need to go longer for the chemical reaction to work everywhere in your batch.
How to Make Sure You're Mixing Enough:
- Mix for the full time listed in the instructions, usually 2 to 5 minutes.
- Set a timer to keep track.
- Check for clear consistency with no streaks or cloudy spots.
Thorough mixing is key. It is one of the easiest ways to keep your project strong and trouble-free.
📌 Also Read: Epoxy Cure Time: What You Need To Know for Perfect Results
Tips to Get the Best Results When Mixing Resin and Hardener

To get smooth, strong, and bubble-free resin, you need to mix carefully and pay attention to temperature and cleanliness. Small adjustments in how you mix and where you work can make a big difference in the final look and quality.
Pre-Warm Your Resin
Warming your resin before mixing helps reduce bubbles and makes it flow more easily. To do this, place the closed bottles of resin and hardener in a bowl of warm water for about 5 to 10 minutes. The water should be warm to the touch, not hot, to avoid any damage.
Warm resin mixes better, so you get fewer streaks and a more even blend. It also lowers the viscosity, which helps bubbles rise to the surface and pop independently.
Pro tip:
- Dry off the bottles completely to keep water drops out of your mix.
- Do not heat resin in the microwave.
- If your space is cold, pre-warming can help avoid cloudy or thick results.
Use the Two-Cup Method
The two-cup method is one of the best ways to ensure your resin and hardener are fully mixed. First, pour the correct amounts into your mixing cup and stir slowly for a couple of minutes, scraping the sides and bottom as you go.
Pour this mixture into a second clean cup, then mix again for another minute or two. This catches any unmixed spots that could cause sticky or soft patches in your resin projects.
Why this works:
- Ensures full blending of both parts
- Reduces risk of unmixed resin on the sides
- Results in clearer and stronger finished pieces
Work in Ideal Conditions
Temperature matters a lot when mixing resin and hardener. Your workspace should be around 70 to 75°F (21 to 24°C). If it’s too cold, the resin may not cure right and can get cloudy or thick.
Humidity and dust also affect your results. Work in a clean, dry room without open windows, fans, or airborne dust. Moist air can cause the surface to look cloudy or sticky.
Check your conditions:
- Use a thermometer to watch room temperature
- Close doors and windows to block dust
- Avoid working when rain or humidity is high
Taking these steps helps your resin cure properly and gives your project a cleaner, more professional finish.
📌 Also Read: Epoxy Resin vs UV Resin: What's the Difference?
What to Do After Mixing Resin with Hardener
Once you finish mixing resin with hardener, you need to move fast and follow a few important steps to get good results. Using the right tools and handling the resin properly will help prevent problems like bubbles or sticky surfaces.
Pour or Apply Quickly
Epoxy resin begins to harden as soon as you mix it with hardener. You usually have 30 to 45 minutes of working time before it gets thick and harder to use. Make sure you have your work area set up first.
Before mixing, prepare your molds, tools, or surfaces so they are ready and easy to reach. This helps you pour or apply the resin without delay. If you take too long, the resin might start to cure in your mixing cup, making it hard to spread evenly.
Pour the resin gently and steadily to avoid adding air bubbles. Pour in a thin stream or layer instead of dumping it all at once for best results. This also gives you better control and helps you fill all the details in your mold or cover your surface evenly.
Use a Heat Gun or Torch to Remove Bubbles
After you pour the resin, air bubbles often form on the surface. Removing them quickly is essential to get a smooth, clear finish.
Hold a heat gun or small torch a few inches above the resin surface and move it slowly back and forth. The heat helps air bubbles rise and pop without harming your project.

🛒 Resiners® Mini Heat Gun for Crafts
Don’t hold the heat tool in one spot for too long. This can burn the resin or make it yellow. Keep your motions steady and watch for bubbles as they disappear. Always follow safety instructions for your tools and wear protective gear. This method works for most epoxy resin types.
📌 Also Read: Best UV Light for Curing Resin: What to Look for Before You Buy
Common Mixing Issues and Solutions
Mixing resin with hardener can lead to problems like sticky spots, bubbles, and a short working time. These issues usually happen because of incorrect measurements, environmental factors, or issues with tools and containers.
Dealing With Improper Mix Ratio
The mix ratio is the amount of resin and hardener you combine. Most resins require a specific ratio, such as 1:1 or 2:1 by volume or weight. Mixing them incorrectly can cause the resin not to cure properly, leaving it sticky or soft.
Key tips:
- Always read the instructions for the correct ratio.
- Use precise measuring cups or scales.
- Double-check your measurements before you pour.
If you've already mixed the wrong ratio, there’s often no easy fix. You may need to remove the failed project and start again. For small mistakes, try scraping off the tacky areas and reapplying new resin with the correct mix.
Fixing Air Bubble Problems
Air bubbles can get trapped in your resin as you stir or when you pour it into a mold. These bubbles can leave small holes, cloudy spots, or weak areas in your finished piece.
To minimize bubbles:
- Mix slowly and steadily for 3–5 minutes to avoid whipping air in.
- Tap your mixing cup or mold gently.
- Use a heat gun or small torch by waving it over the surface to pop surface bubbles.
If bottomless bubbles remain after pouring, you might be able to poke them with a toothpick or use a pin to burst them before the resin cures. For best results, work in a room that is warm and not too humid.
Check Out The Best Bubble Removal Machine
|
|
Resiners® AirLess Pro Resin Bubble Remover MachineKill 99.99% of resin bubbles in just 3 minutes with the new AirLess Pro. Faster suction, bigger capacity, smart timing, and low-noise design. Built tough for all resin types. |
|
|
Resiners® AirLess Lite Resin Bubble Remover MachineKill bubbles fast with Resiners AirLess Pro and Lite. Enjoy up to 99.99% bubble removal in minutes, powerful suction, smart timing, low noise, and sleek design. From beginners to pros, handle any resin with ease. Compact or high-capacity, both deliver flawless results without mess or hassle. |
 |
AirLess Bubble Removal MachineRemove 99% of bubbles fast with Resiners AirLess. It hits -95kPa vacuum with smart sensors and runs at 12L/min for quick, clean results. One-touch screen, strong seal, and safe design make it easy for anyone to use. Fits most mixing cups and gets the job done in 5 to 9 minutes. |


Contamination Prevention
Contamination from dust, oil, water, or dirty tools can keep your resin from curing and leave imperfections. Even fingerprints or mixing cups not meant for chemical use can cause problems.
Steps to prevent contamination:
- Wipe down your workspace and use clean, dedicated tools.
- Wear gloves to prevent skin oils from touching the resin.
- Keep your resin covered before and after pouring so nothing falls in.
- Avoid using containers with leftover paint, soap, or water stains.
If you spot contaminants after mixing, you may be able to pick them out with tweezers or a toothpick before curing. For large problems, sanding and refinishing may be needed after curing.
Addressing Short Pot Life
Pot life is the time you have to work with the mixed resin before it starts to harden. If you mix too much resin at once or work in a hot room, the pot life gets even shorter.
To manage pot life:
- Mix only what you can use within the listed time (for example, 20–40 minutes).
- Keep your work area at lower room temperatures (around 70°F or 21°C).
- Pour your mixed resin out into a larger, shallow tray to slow down the reaction and keep it from heating up too fast.
When pot life runs out, the resin thickens and becomes hard to spread evenly. At this point, stop working and discard any thickening resin, as it won’t cure clear or strong. Always plan your project and mix small batches if you are new to using resin.
Conclusion
Mixing resin and hardener takes precision and patience. Carefully measuring the correct ratio is the first step to avoid sticky or brittle results. Even small mistakes in the amounts can affect the final quality.
Always:
- Use a clean container and stir stick
- Scrape the sides and bottom while mixing
- Mix for the recommended amount of time
Rushing can lead to bubbles, uneven curing, or weak spots. Take your time and check for any streaks before pouring.
Sticking to these steps will help you get professional, long-lasting results. With practice, your technique will only get better.
Now that you know the process, you can mix resin and hardener with confidence. Your well-mixed batches are the foundation for all kinds of creative and durable projects.
FAQs About How to Mix Resin with Hardener
Mixing resin and hardener requires attention to detail. The way you measure, combine, and mix the parts can make a big difference in your final result.
What is the correct ratio for mixing resin and hardener?
Always check the instructions on your resin kit. Common ratios are 1:1 or 2:1 by volume, but some products may need 3:1 or even 5:1. Using the right ratio is important for the resin to cure properly.
Can I mix resin and hardener by eye?
It’s not recommended to mix by eye. Small errors in measuring can cause the resin to cure incorrectly. Always use proper measuring tools to get an accurate ratio.
How long should I mix resin and hardener?
Mix the resin and hardener for 3 to 4 minutes. Stir slowly and scrape the sides and bottom of your container to make sure everything is well blended. This helps avoid sticky spots or soft areas.
What happens if I don’t mix resin and hardener properly?
If you do not mix well, the resin might not cure. You could end up with sticky, soft, or cloudy spots. These areas will not harden or might break down over time.
Can I remix resin if I got the ratio wrong?
Once resin and hardener are combined, you cannot fix the ratio by adding more of either part. If the mix is wrong, you will need to start over with a new, correct batch.


Commenta
Questo sito è protetto da hCaptcha e applica le Norme sulla privacy e i Termini di servizio di hCaptcha.