يضيف إعداد حرف زينة الكريسماس المصنوعة من الراتنج للبالغين لمسة عصرية وشخصية لديكور عطلتك.
يمكنك بسهولة صنع زينة لامعة ومخصصة تتناسب مع ذوقك بينما تستمتع بمشروع مريح وعملي.
باستخدام بضع أدوات بسيطة وراتنج شفاف، يمكنك تصميم زينة مليئة باللمعان أو الزهور المجففة أو الألوان الاحتفالية التي تجسد روح الموسم.
بينما تستكشف المستلزمات وتتبع الخطوات السهلة وتجرب أفكار تصميم جديدة، ستجد طرقًا لا حصر لها لتخصيص إبداعاتك.
للبدء بمواد موثوقة للزينة التفصيلية، استكشف مجموعة راتنج الإيبوكسي والمقوي للحصول على نتائج متينة وواضحة تمامًا.
المستلزمات والأدوات الأساسية لحرف زينة الكريسماس المصنوعة من الراتنج

يتطلب العمل بزينة الكريسماس المصنوعة من الراتنج بعض التخطيط وبضع أدوات عالية الجودة. ستحتاج إلى راتنج وأصباغ موثوقة للألوان، وقوالب سيليكون متينة للتشكيل، ومعدات السلامة المناسبة لحماية نفسك أثناء الصنع.
يركز على المواد الموثوقة التي تساعدك على إنشاء زينة أكثر وضوحًا ونعومة وتدوم طويلاً.
اختيار أفضل أنواع الراتنج والألوان

مجموعة راتنج الإيبوكسي الشفاف الكريستالي من Resiners® سعة 1 جالون
اختر راتنج الإيبوكسي الذي يجف شفافًا ومقاومًا للاصفرار. الإيبوكسي مثالي لحرف الكريسماس الصغيرة لأنه يمتزج بسهولة ويجف مع أقل قدر من الفقاعات.
بالنسبة للمبتدئين، فإن نسبة 1:1 من الراتنج إلى المقوي تبسط العملية وتضمن نتائج متسقة. استخدم مسحوق الميكا، أو صبغة الراتنج السائلة، أو حبر الكحول لتلوين زينة الراتنج الخاصة بك.
يضيف الميكا بريقًا، بينما تنتج الأصباغ درجات ألوان متساوية. تخلق أحبار الكحول تأثيرًا رخاميًا أو شفافًا عند مزجها بلطف في الراتنج. يمكنك مزج كميات اختبار صغيرة لترى كيف يبدو كل صبغة بعد المعالجة.
احتفظ بهذه الأدوات في مكان قريب:
- أكواب قياس بعلامات واضحة
- عصي تقليب بلاستيكية أو سيليكون
- حاويات خلط صغيرة للألوان المنفصلة
تجنب المبالغة في الخلط لتقليل فقاعات الهواء، وقم بتغطية الراتنج الخاص بك أثناء الراحة لمنع الغبار من الهبوط في مشروعك.
اختيار واستخدام قوالب السيليكون

مجموعة قوالب سيليكون الكريسماس من Resiners® مع شريط
استخدم قوالب سيليكون عالية الجودة مصنوعة لحرف الراتنج. تمنح هذه القوالب زينة الراتنج أسطحًا ناعمة وأشكالًا مفصلة مثل رقاقات الثلج أو النجوم أو بطاقات الهدايا.
ابحث عن قوالب مرنة تتحرر بسهولة بمجرد معالجتها، حيث يمكن أن تتشقق أو تتمزق القوالب الصلبة عند إزالة القطعة.
قبل الصب، افحص القالب بحثًا عن الغبار أو البقايا. يضمن المسح السريع بالكحول النظيف بقاء السطح نظيفًا.
للحصول على نتائج لامعة، استخدم قوالب ذات تشطيب مصقول. إذا كنت ترغب في حفر ثقوب للشريط أو الخطافات، فتحقق من أن القالب يتضمن فتحة مدمجة أو تجويفًا للمعلّق. يمكنك إعادة استخدام قوالب السيليكون عدة مرات إذا قمت بتنظيفها بشكل صحيح.
قم بتخزينها بشكل مسطح لمنع الانحناء، وبعيدًا عن أشعة الشمس المباشرة، التي يمكن أن تسبب الالتواء أو البهتان.
معدات السلامة ونصائح التحضير
ارتداء معدات السلامة المناسبة يحافظ على مساحة عملك آمنة ومريحة. استخدم دائمًا قفازات النتريل، ونظارات واقية، وقناع تنفس مصمم للأبخرة العضوية.
يمكن لأبخرة الراتنج والمواد الكيميائية غير المعالجة أن تهيج بشرتك أو رئتيك، خاصة في المناطق سيئة التهوية. اعمل على سطح مغطى باستخدام حصيرة سيليكون أو ورقة يمكن التخلص منها. هذا يجعل التنظيف سهلاً ويمنع الانسكابات من إتلاف طاولتك.
تأكد من تهوية الغرفة جيدًا، أو استخدم مروحة لتحسين تدفق الهواء. اجمع المواد الخاصة بك وقم بقياس كل شيء قبل خلط الراتنج. يساعد هذا التحضير على تقليل التوتر ويوقف الأخطاء في منتصف المشروع.
احتفظ بالمناشف الورقية، والكحول الأيزوبروبيلي، وأكياس القمامة في مكان قريب للتنظيف السريع بمجرد الانتهاء من الحرف.
إذا كنت ترغب في الحصول على زينة نابضة بالحياة وملفتة للنظر، اقرأ مقالنا، تلوين الراتنج: تقنيات لحرف يدوية نابضة بالحياة لإتقان تأثيرات الألوان.
دليل خطوة بخطوة: صنع زينة الكريسماس المصنوعة يدويًا من الراتنج

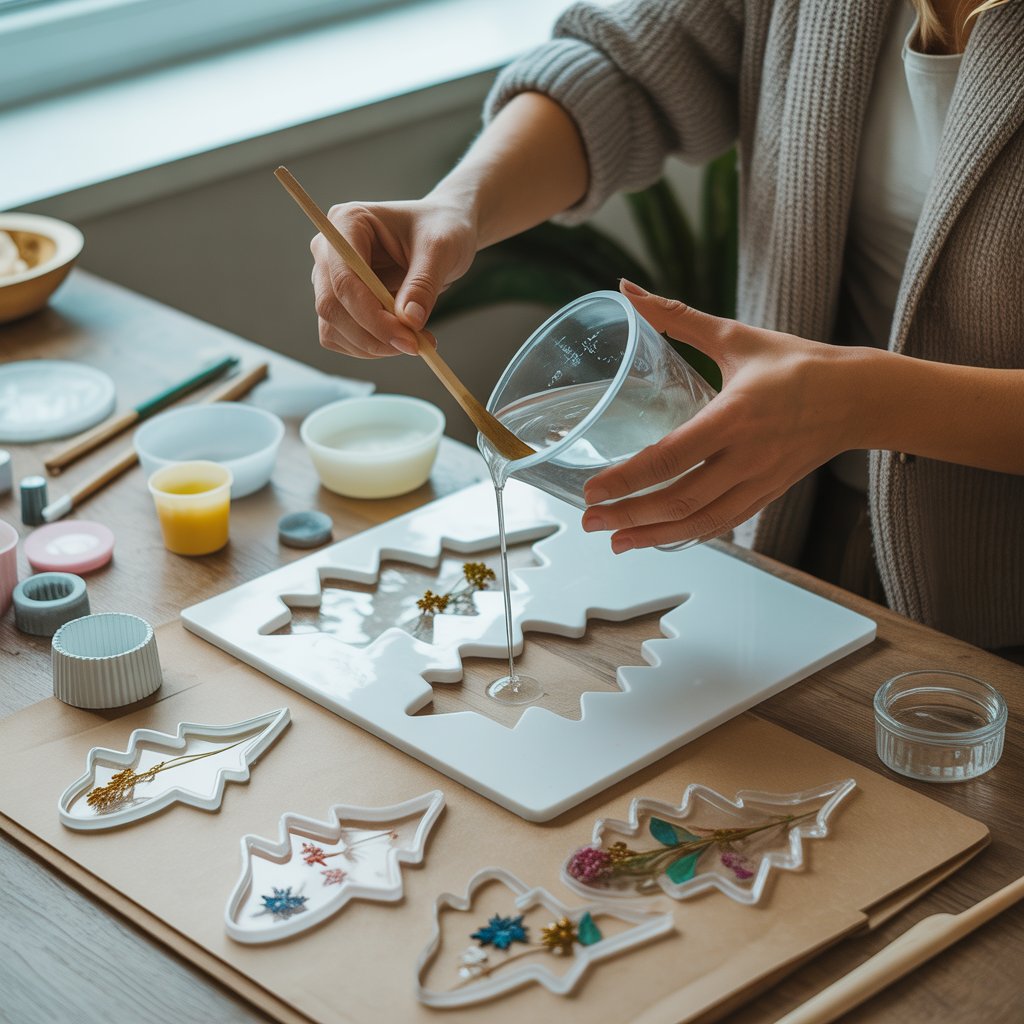
يمكنك صنع زينة عيد الميلاد DIY اللامعة التي تتناسب مع ديكور عطلتك وأسلوبك الشخصي. مع التحضير الصحيح والمواد واللمسات الإبداعية، ستحول سكب الراتنج البسيط إلى قطع DIY احتفالية مفصلة جاهزة لشجرتك أو كهدايا يدوية.
تحضير السطح والخلط وتقنيات الصب
ابدأ بـ أسطح نظيفة ومستوية محمية بورق البرشمان أو حصائر السيليكون. يمكن أن يلتصق الغبار أو الوبر بالراتنج بسهولة، لذا امسح مساحة عملك والقوالب والأدوات أولاً.
ارتدِ قفازات النتريل وحافظ على تهوية المنطقة جيدًا. عند خلط راتنج الإيبوكسي، اتبع نسبة الشركة المصنعة، وغالبًا ما تكون 1:1 راتنج إلى مقسٍ.
قلّب ببطء لمدة دقيقتين إلى ثلاث دقائق لتجنب الفقاعات. استخدم أكواب خلط يمكن التخلص منها وعصي خشبية.
إذا رأيت فقاعات هواء بعد الخلط، مرر مسدس حراري برفق فوق السطح. اسكب الراتنج في قوالب زينة السيليكون في طبقات رقيقة بدلاً من سكب واحد سميك. يساعد هذا في تسوية السطح ويمنع ارتفاع درجة الحرارة.
صنف القوالب إذا كنت تصنع تصميمات متعددة في وقت واحد. ضع القوالب على سطح مستوٍ وقم بتغطيتها بصندوق أو صينية للحماية من الغبار أثناء التجفيف.
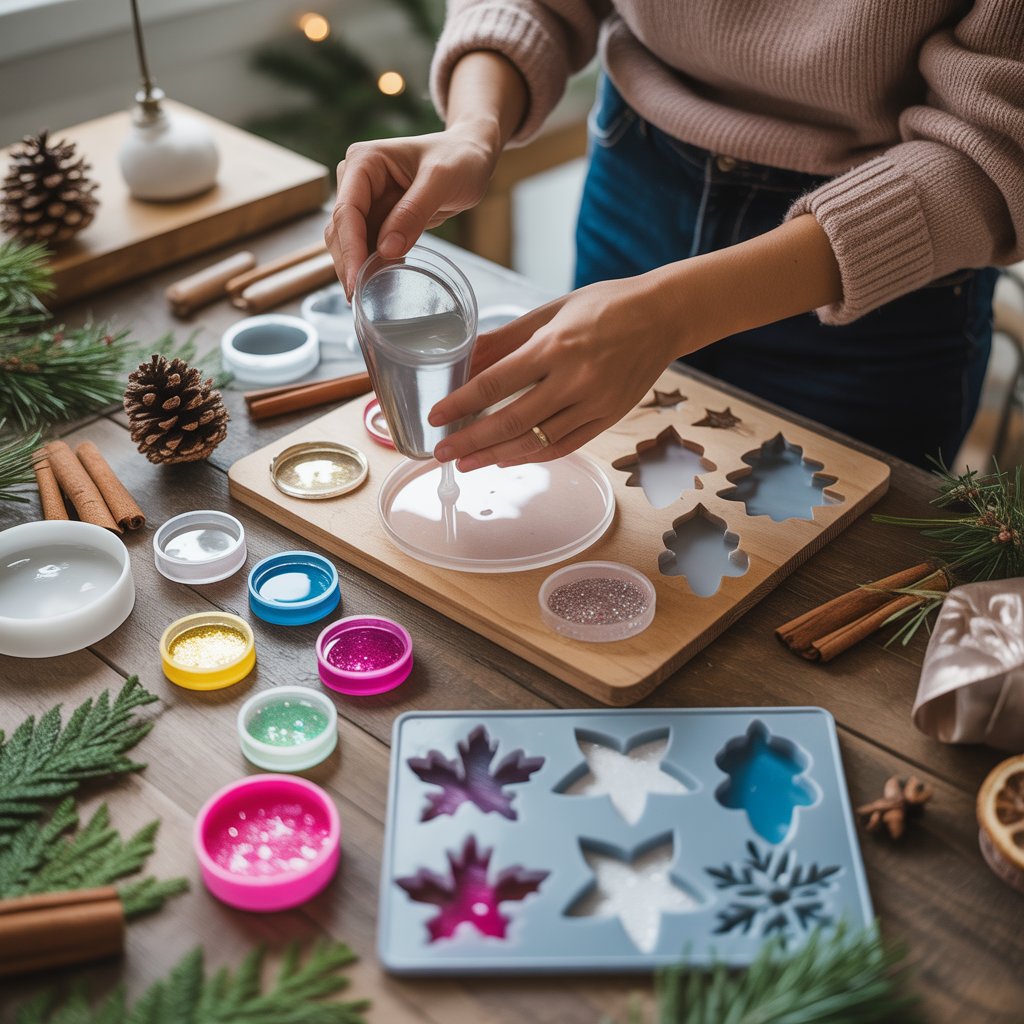
إضافة اللمعان والزخارف والمحتويات
أضف لمسة جمالية عن طريق خلط اللمعان أو مسحوق الميكا أو الأشياء الصغيرة مثل الزهور المجففة أو سحر رقائق الثلج أو الترتر في الراتنج. حافظ على نسبة خفيفة - فقد تؤدي الكثير من المكونات إلى تغيير طريقة تجفيف الراتنج.
يمكنك ترتيب الزخارف عن طريق صب نصف الراتنج أولاً، والسماح له بالتجمد، ثم إضافة الزينة. هذا يحافظ عليها معلقة بدلاً من الغرق أو الطفو.
للحصول على تأثير معدني، اخلط كمية صغيرة من الصبغة في الراتنج باستخدام عود أسنان.
جرب دمج طبقات الألوان للحصول على زينة متدرجة أو بلونين. غالبًا ما تتناسب القواعد المحايدة مع لمسات ذهبية أو فضية مع ديكورات العطلات التقليدية، بينما تتناسب خلطات اللمعان الزاهية مع الأساليب المرحة.
اختبر كميات صغيرة قبل الصب بكميات كبيرة حتى تتمكن من تعديل قوة اللون بسهولة.
التخصيص باستخدام تصميمات Cricut والفينيل
بعد المعالجة، أضف لمسات شخصية باستخدام أشكال الفينيل المقطوعة بواسطة Cricut أو الأسماء أو العبارات الموسمية. اختر الفينيل اللاصق الذي يلتصق جيدًا بالراتنج الناعم الصلب.
استخدم شريط نقل لنقل الفينيل إلى الزينة. قم بتنعيم الفقاعات بعناية باستخدام مكشطة أو بطاقة ائتمان.
ضع النص بالتساوي على سطح الزينة واضغط بقوة. يعمل الفينيل المعدني أو الهولوغرافي بشكل رائع للحروف ذات الطابع الكريسماسي.
يمكنك أيضًا قص أيقونات صغيرة مثل الأشجار أو النجوم أو رقاقات الثلج لتتناسب مع سمة عطلتك. إذا كنت تفضل الطلاء، استخدم أقلام الأكريليك ذات الرؤوس الدقيقة لإضافة الخطوط العريضة أو التظليل للحصول على مظهر مصنوع يدويًا.
إزالة القالب، والتجفيف، واللمسات النهائية
انتظر وقت التجفيف الكامل – عادةً من 24 إلى 48 ساعة – قبل إزالة الزينة من القوالب. قم بثني السيليكون برفق لتجنب تمزيق الشكل.
إذا شعرت أي حواف بخشونة، قم بصقلها برفق بورق صنفرة ناعم. امسح كل قطعة نظيفة وقم بتركيب الأشرطة أو الخطافات أو الخيوط من خلال ثقب صغير مثقوب أو حلقة تُترك في القالب.
اختر ألوان الشريط التي تتناسب مع موضوعك، مثل الساتان الأحمر للديكور الكلاسيكي أو خيوط الجوت للأنماط الريفية. للحصول على بريق إضافي، ضع طبقة رقيقة من الراتنج العلوي أو بخاخ الأكريليك الشفاف. هذا يغلق السطح ويحمي تصميمات الفينيل.
بمجرد الانتهاء، علق زينة DIY الاحتفالية أو قم بلفها بدقة لتقديمها كهدية.
يعد تلميع التفاصيل وصقلها أسهل باستخدام الأدوات المناسبة، لذا ألق نظرة على مجموعة تلميع الراتنج للحصول على لمسة نهائية خالية من العيوب.
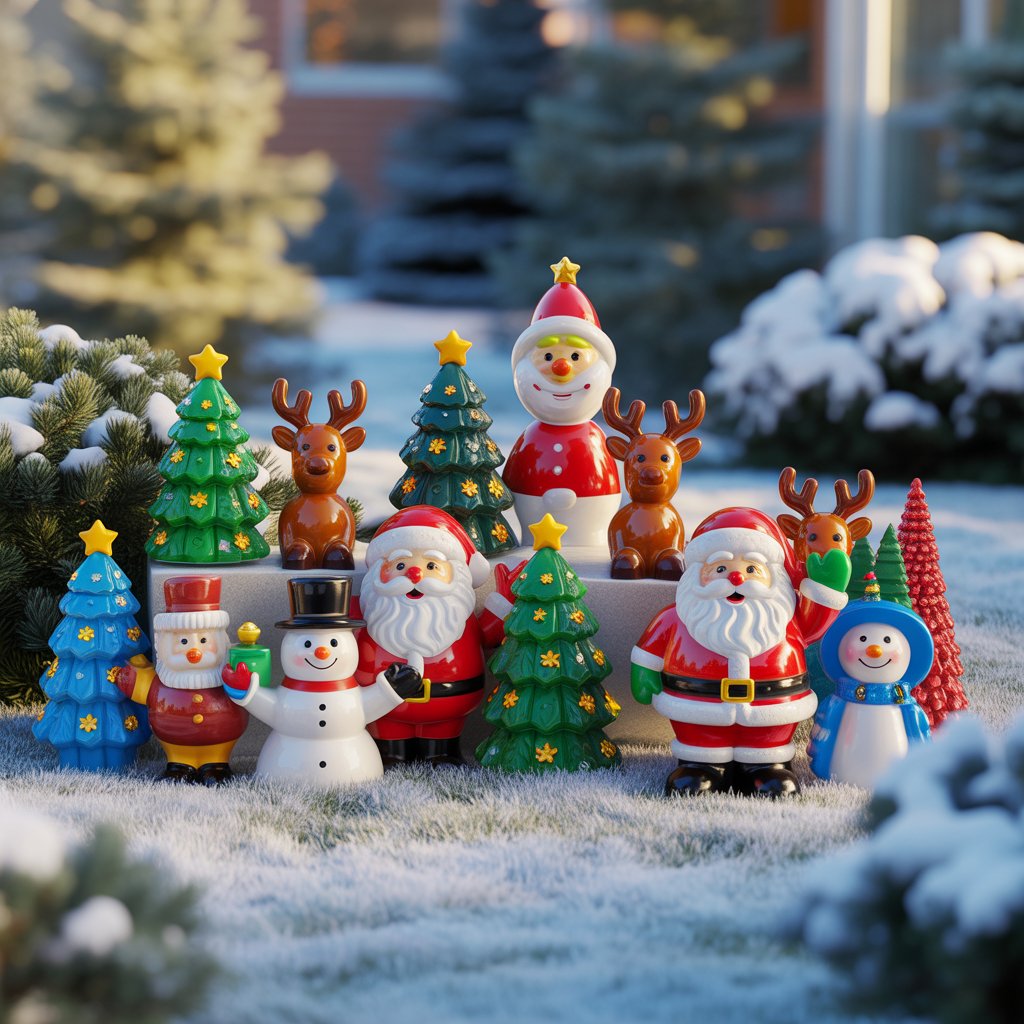
أفكار وإلهام إبداعي لحرف زينة الراتنج للكبار

استخدم الراتنج لصنع زينة عيد الميلاد الأنيقة التي تتناسب مع ديكور منزلك، وتعكس شخصيتك، وتصلح كهدايا منزلية الصنع مدروسة.
اجمع بين تقنيات التصميم الحديثة، وإعادة الاستخدام الإبداعي للمواد، واللمسات ذات المعنى لجعل كل قطعة فريدة من نوعها.
أفكار تصميم عصرية ومواكبة للموضة
إذا كنت تحب المظهر الأنيق، فركز على الخطوط النظيفة، والأشكال الهندسية، والألوان الرقيقة. يمكنك مزج رقائق معدنية، أو مساحيق الميكا، أو الأصباغ غير اللامعة في الراتنج للحصول على لمسة نهائية بسيطة ولكنها عصرية.
يمكن أن تضفي إضافة كمية صغيرة من اللمعان أو لون شفاف عمقًا دون أن تكون مبهرجة جدًا. جرب وضع طبقات من الراتنج الشفاف مع نباتات مجففة أو زهور مضغوطة للحصول على تصميم ناعم مستوحى من الطبيعة.
كما يضفي ربط الزينة الشفافة بشريط بسيط أو حبل جلدي لمسة أنيقة وراقية. يستمتع العديد من الحرفيين بالزينة ذات اللونين التي تجمع بين طبقات الراتنج المعتمة والشفافة.
استخدم الألوان الفضية أو السوداء أو الشمبانيا لديكورات عيد الميلاد الراقية التي لا تزال تشع بالاحتفالية. إذا كنت تفضل لمسة شخصية، فقم بتضمين سحر صغير أو أحرف أولية داخل الراتنج للحصول على لمسة نهائية مخصصة.
مفاهيم الزينة المعاد تدويرها والصديقة للبيئة
يمكنك صنع زينة عيد الميلاد المعاد تدويرها باستخدام بقايا الراتنج والقوالب المعاد استخدامها والمواد المعاد تدويرها من المشاريع السابقة. هذا يحافظ على النفايات منخفضة ويضيف الإبداع إلى عمليتك.
اجمع قصاصات الراتنج الصغيرة مع الزجاج المكسور أو نشارة الخشب أو قطع القماش لإنشاء أفكار جديدة لزينة DIY.
بدلاً من اللمعان البلاستيكي، فكر في استخدام اللمعان الصديق للبيئة أو الأصباغ الطبيعية أو الميكا لنهج أكثر صداقة للبيئة.
يمكنك أيضًا ملء قوالب الراتنج بـ شرائح الحمضيات المجففة، أو إبر الصنوبر، أو حبوب القهوة لإضفاء لمسة وميض ورائحة ناعمة.
بالنسبة لأدوات التعليق، أعد استخدام خطافات الأسلاك أو قص الشريط من أكياس الهدايا بدلاً من شراء جديدة. قم بإقران هذه الزينة المستدامة مع الألوان المحايدة أو الترابية للحصول على مظهر مريح وطبيعي يتناسب مع ديكور العطلات الريفي أو البوهيمي.
الزينة المنزلية كهدايا مدروسة
تُعد زينة الراتنج هدايا منزلية الصنع ذات معنى للعائلة والأصدقاء. قم بتخصيص كل قطعة بالحروف الأولى أو تواريخ الأحداث أو إدخالات الصور الصغيرة.
يمكنك صنع مجموعة صغيرة من الزينة المخصصة وتغليفها في صناديق كرافت بسيطة مبطنة بالمناديل الورقية. ابتكر موضوعات فريدة بناءً على اهتمامات الشخص — على سبيل المثال، استخدم صبغة زرقاء مستوحاة من المحيط لمحبي الشاطئ أو رقاقات ثلج صغيرة مملوءة بالراتنج لشخص يحب الشتاء.
يمكنك أيضًا صنع أزواج زينة متطابقة للأزواج أو الأصدقاء. إضافة بطاقات أو ملصقات مكتوبة بخط اليد تضيف سحرًا دون عناء كبير.
نظرًا لأن زينة الراتنج متينة ولامعة، فإنها تبدو مصقولة وتدوم طويلاً، مما يجعلها هدية مدروسة تبدو مصنوعة يدويًا ولكنها احترافية.
للحصول على أفكار زينة إبداعية، جرب قراءة دليلنا، كيف تصنع دلايات من الراتنج: أفكار حرفية ممتعة لتصميم تذكارات عطلة مخصصة.
ما وراء الزينة: توسيع ذخيرة حرف الكريسماس الخاصة بك

يمكنك تجاوز زينة الشجرة البسيطة بتحويل الراتنج إلى قطع عطلات يومية. هذه الأفكار تمزج المواد والتقنيات التي تحافظ على مساحة عملك جديدة وديكورك أكثر شخصية.
كرات الثلج الزجاجية المصنوعة من الراتنج من برطمانات ماسون ومشاريع فريدة
تُعد كرات الثلج الزجاجية المصنوعة من برطمانات ماسون مشاريع تزيين كلاسيكية للعطلات تبدو حنينًا ولكنها عصرية. يمكنك استخدام الراتنج الشفاف لإغلاق أشجار الكريسماس المصغرة أو رجال الثلج أو التماثيل الصغيرة داخل البرطمان للحصول على عرض دائم.
يساعد الراتنج على حماية المشهد من تلف الماء ويحافظ على الثلج الاصطناعي في مكانه. لإنشاء واحد، اسكب كمية صغيرة من الراتنج في قاع برطمان نظيف وضع قطعك بثبات فيه قبل التجفيف.
عندما تتصلب، يمكنك تغطيتها بالمزيد من الراتنج أو خليط من اللمعان والثلج الاصطناعي. تضيف أضواء LED أو رقائق معدنية أيضًا توهجًا لطيفًا عند عرضها على رف الموقد أو الطاولة.
تشمل الأفكار الأخرى التي تعمل جيدًا مع الراتنج قواعد الأكواب، وحاملات الشموع، وصواني الحلي. يستخدم كل مشروع خطوات صب ومعالجة مماثلة ولكن يوفر استخدامات عملية تدوم طويلاً بعد العطلات.
تشمل قائمة قصيرة من مستلزمات الراتنج الصديقة للمبتدئين ما يلي:
|
المادة |
الاستخدام |
نصيحة |
|
راتنج إيبوكسي |
الوسيط الرئيسي |
اخلط ببطء لتقليل الفقاعات |
|
قوالب سيليكون |
التشكيل |
اختر المقاومة للحرارة |
|
اللمعان، الميكا، أو الترتر |
الزخرفة |
استخدم قوامًا ناعمًا لانتشار متساوٍ |
خلط المواد: رقاقات ثلج ورقية، قماش، والمزيد
يمنح دمج رقاقات الثلج الورقية أو قصاصات القماش أو الشريط مع الراتنج مشاريعك مظهرًا مصنوعًا يدويًا مع إضافة نسيج. يمكنك تضمين قصاصات ورقية في قواعد الأكواب أو الصواني أو ظهور الزينة للحصول على تفاصيل طبقية.
حاول إغلاق رقاقات الثلج الرقيقة في طبقة راتنج شفافة لجعلها قوية ومقاومة للرطوبة. إذا كنت تحب اللمسات النهائية الناعمة، ضع القماش أو الدانتيل بين طبقات راتنج رقيقة.
يبقى التصميم مرئيًا تحت السطح اللامع، مما يخلق تباينًا بين الراتنج الناعم والقماش المنسوج. تعمل هذه التقنية بشكل جيد بشكل خاص للديكورات التذكارية أو حرف الكريسماس للبالغين الذين يستمتعون بالأعمال التفصيلية الدقيقة.
لمنع المواد الخاصة بك من التجعد أو التحرك، قم بتغطيتها برفق بمانع تسرب قبل التضمين. يمكنك أيضًا رش كمية صغيرة من اللمعان على السطح للحصول على بريق خفيف.
الأسئلة المتكررة
ما هي بعض أفكار زينة الراتنج الإبداعية لتخصيص شجرة الكريسماس الخاصة بي؟
يمكنك تضمين صور صغيرة، أو زهور مجففة، أو لمعان، أو قصاصات ورقية داخل الراتنج الشفاف للحصول على لمسة شخصية. جرب تشكيل زينة الخاص بك على شكل رقاقات ثلج، أو نجوم، أو قلوب، أو حتى الأحرف الأولى. إضافة سحر صغير أو طلاء تصاميم على الظهر بمجرد معالجته يجعل ديكوراتك تبرز أكثر.
كيف يمكنني العمل بأمان مع الراتنج أثناء صنع حرف العطلات؟
ارتدِ دائمًا قفازات النتريل وقناعًا للتنفس واعمل في مكان جيد التهوية. غطِّ طاولتك بورق يمكن التخلص منه أو حصيرة سيليكون لحماية السطح.
اتبع تعليمات الشركة المصنعة بعناية لخلط الراتنج والمقسّي بالنسب الصحيحة، مما يمنع الأبخرة أو النتائج اللزجة.
هل يمكن أن تقترح الأدوات الأساسية التي سأحتاجها لصنع زينة الكريسماس من الراتنج؟
ستحتاج إلى راتنج إيبوكسي ومقسّي، وأكواب خلط، وعصي تقليب، وقوالب سيليكون. يساعد الشعلة الصغيرة أو المسدس الحراري على إزالة الفقاعات. من المفيد أيضًا أن يكون لديك ملاقط لوضع الملحقات، وورق صنفرة لتنعيم الحواف، وشريط أو خطافات لتعليق القطع النهائية.
أين يمكنني العثور على قوالب أو تصاميم احتفالية لمشاريع زينة الراتنج الخاصة بي؟
يمكنك العثور على قوالب بأسعار معقولة عبر الإنترنت في متاجر مستلزمات الحرف اليدوية أو الأسواق مثل Etsy و Amazon. ابحث عن خيارات ذات طابع الكريسماس مثل رقاقات الثلج، والزينة، والرنة.
يقوم بعض الحرفيين أيضًا بصنع قوالبهم الخاصة باستخدام مجموعات السيليكون، مما يمنحك تحكمًا كاملاً في الشكل والحجم.
ما هي أفضل التقنيات لإضافة اللون أو اللمعان إلى زينة الراتنج الخاصة بي؟
استخدم صبغات الراتنج أو مساحيق الميكا للحصول على لون غني يمتزج بالتساوي. أضف لمعانًا دقيقًا للبريق، ولكن حركه بلطف حتى تبقى الجزيئات معلقة. يمكنك أيضًا صب الراتنج في طبقات - مع ترك كل طبقة تتصلب قليلاً - للتحكم في وضع اللون وخلق عمق.
ما المدة التي أحتاجها لترك زخارف الراتنج تجف قبل أن أتمكن من تعليقها؟
يستغرق معظم راتنجات الإيبوكسي حوالي 24 إلى 72 ساعة لتجف تمامًا، وهذا يعتمد على درجة الحرارة والرطوبة. حافظ عليها مسطحة وخالية من الغبار أثناء تصلبها. بمجرد أن تصبح صلبة ولم تعد لزجة، قم بتثبيت الخيوط أو الخطافات وعلقها على شجرتك.


اترك تعليقًا
This site is protected by hCaptcha and the hCaptcha Privacy Policy and Terms of Service apply.