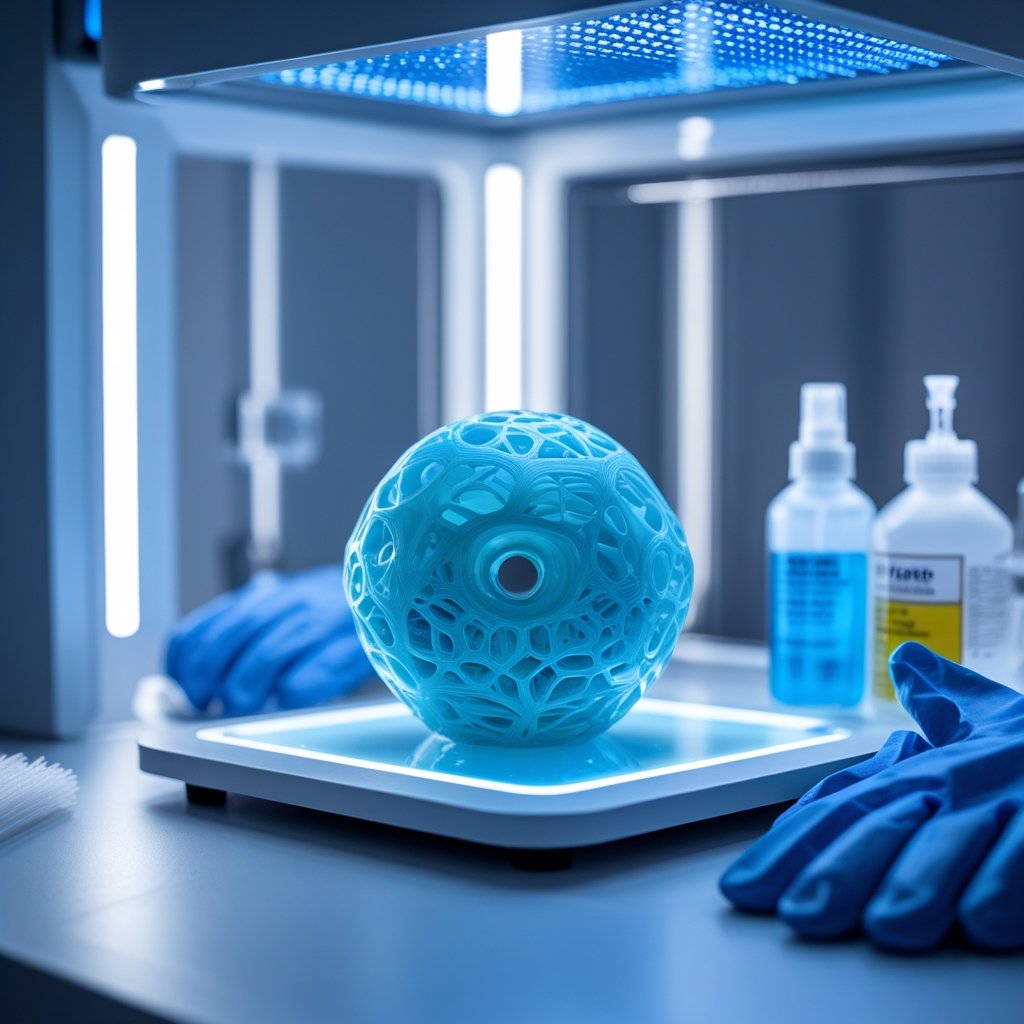
تُعد مدة معالجة المطبوعات الراتنجية أحد الأسئلة الأكثر شيوعًا التي يطرحها المتحمسون للطباعة ثلاثية الأبعاد بالراتنج—ولسبب وجيه. فالمعالجة السليمة هي التي تحول النموذج الطري، المطبوع حديثًا، إلى قطعة قوية ومفصلة ومتينة.
يمكن أن يؤدي ضبط التوقيت الصحيح إلى نجاح أو فشل النتيجة النهائية. فالمعالجة القليلة جدًا تترك المطبوعات لزجة وضعيفة، بينما الكثير منها يمكن أن يسبب الهشاشة أو تغير اللون.
في هذا الدليل، سنقوم بتحليل العوامل الرئيسية التي تؤثر على وقت المعالجة، والمدد الموصى بها لأنواع الراتنج المختلفة، ونصائح الخبراء لمساعدتك على تحقيق نتائج خالية من العيوب وتدوم طويلاً في كل مرة.
هل تريد معالجة أسرع وأكثر تجانسًا لمطبوعاتك الراتنجية؟ استكشف مجموعتنا من صناديق المعالجة بالأشعة فوق البنفسجية المصممة لتقديم نتائج احترافية في كل مرة.
العوامل التي تؤثر على وقت معالجة المطبوعات الراتنجية

تعتمد سرعة معالجة مطبوعاتك الراتنجية على عدة عوامل. يلعب الراتنج نفسه، وحجم الطباعة، وقوة ضوء الأشعة فوق البنفسجية، وحتى درجة حرارة الغرفة، دورًا في ذلك.
نوع الراتنج المستخدم
لا تُعالَج جميع أنواع الراتنج بنفس السرعة. فالمواد القياسية تُعالَج عادةً في 2-4 دقائق تحت ضوء الأشعة فوق البنفسجية. أما الراتنجات الأكثر صلابة فتحتاج لوقت أطول قليلاً—حوالي 4-6 دقائق—لأن روابطها الكيميائية أقوى.
تُعالَج الراتنجات الشفافة بسرعة أكبر من الملونة. بما أن المادة الشفافة تسمح لضوء الأشعة فوق البنفسجية بالمرور بسهولة أكبر، فإنها تتصلب بشكل أسرع. أما الألوان الداكنة مثل الأسود أو الأحمر فتحجب بعضًا من هذا الضوء وتحتاج لوقت إضافي.
تميل الراتنجات القابلة للغسل بالماء إلى المعالجة ببطء أكثر من تلك التي تعتمد على الكحول—حوالي 3-5 دقائق مقابل 2-3 دقائق للأنواع العادية.
تُعد الراتنجات المرنة هي الأبطأ. تحتاج هذه المواد الناعمة والمرنة إلى 6-8 دقائق أو أكثر للمعالجة بشكل كامل. تستغرق المواد الكيميائية وقتًا أطول لتتصلب.
تُعالَج الراتنجات النباتية بسرعات متوسطة، ولكنها تعمل بشكل أفضل إذا كانت الغرفة أكثر دفئًا قليلاً. تحقق دائمًا من زجاجة الراتنج لمعرفة الأوقات الموصى بها من الشركة المصنعة. فكل نوع يختلف قليلاً.
سمك الطبقة وحجم الطباعة
الطبقات السميكة تستغرق وقتًا أطول. طبقة بسمك 0.1 مم تُعالَج أسرع من طبقة بسمك 0.3 مم، حيث يمكن لضوء الأشعة فوق البنفسجية أن يصل إليها بسهولة أكبر.
الطباعات الأكبر حجمًا تحتاج لوقت أطول لأن هناك مساحة أكبر يجب تغطيتها. قد تنتهي النماذج المصغرة الصغيرة في 2-3 دقائق، لكن النماذج الكبيرة قد تحتاج 5-8 دقائق.
الأشكال المعقدة ذات الأخاديد العميقة أو الثقوب تحتاج إلى عناية خاصة. يجب أن يصل ضوء الأشعة فوق البنفسجية إلى كل هذه الزوايا والشقوق. عادةً ما تُعالَج الأجسام المسطحة والبسيطة بسرعة وبشكل متجانس.
الطباعات المجوفة تُعالَج بشكل أسرع من الصلبة. كمية أقل من المواد تعني وقتًا أقل تحت الضوء. الجدران السميكة والصلبة يمكن أن تحجب أشعة الأشعة فوق البنفسجية من الوصول إلى الداخل.
يساعد تدوير مطبوعاتك أثناء المعالجة. قم بتدويرها كل دقيقة أو دقيقتين حتى تحصل جميع الجوانب على حصتها العادلة من الأشعة فوق البنفسجية.
مصدر وشدة ضوء الأشعة فوق البنفسجية
قوة مصباح الأشعة فوق البنفسجية الخاص بك تحدث فرقًا كبيرًا. يمكن لمصباح بقوة 36 واط معالجة المطبوعات في 2-4 دقائق. إذا كنت تستخدم مصباحًا أضعف بقوة 9 واط، فقد تحتاج إلى 8-12 دقيقة.
مصابيح الأشعة فوق البنفسجية LED أسرع من أنابيب الفلورسنت. مصابيح LED أكثر تركيزًا، وتدوم لفترة أطول، وتستخدم طاقة أقل بشكل عام.
المسافة مهمة أيضًا. حافظ على المطبوعات على بعد 6-8 بوصات من المصباح. إذا كانت قريبة جدًا، فإنك تخاطر بحدوث نقاط ساخنة؛ وإذا كانت بعيدة جدًا، فإن المعالجة ستطول.
المزيد من أضواء الأشعة فوق البنفسجية = معالجة أسرع. غرفة بها أضواء على جميع الجوانب تغطي كل شيء بالتساوي.
ضوء الشمس يعمل، لكنه أبطأ—10-15 دقيقة في الشمس المباشرة، وما يصل إلى ساعة في الأيام الغائمة. معظم النوافذ الداخلية تحجب الكثير من الأشعة فوق البنفسجية اللازمة للمعالجة.
تتلاشى لمبات الأشعة فوق البنفسجية بمرور الوقت. حاول استبدالها كل 6-12 شهرًا إذا كنت تريد نتائج متسقة.
درجة الحرارة المحيطة والبيئة
الغرف الأكثر دفئًا تسرع الأمور. يُعالج الراتنج بشكل أفضل بين 70 و 80 درجة فهرنهايت. إذا كانت مساحتك أقل من 60 درجة فهرنهايت، فإن العملية تتباطأ كثيرًا.
الرطوبة العالية تجعل المعالجة تسحب. يمكن للهواء الرطب أن يحجب الأشعة فوق البنفسجية قليلاً، لذا إذا كنت تعيش في مكان رطب، فقد يساعد مزيل الرطوبة.
الغبار والجزيئات الأخرى يمكن أن تعرقل أيضًا. فهي تمنع الأشعة فوق البنفسجية من الوصول إلى سطح الراتنج. حاول الحفاظ على منطقة المعالجة نظيفة بشكل معقول.
تساعد غرف المعالجة في التحكم في درجة الحرارة بشكل أفضل من مجرد ترك المطبوعات بالخارج. تبقى المساحة المغلقة أكثر دفئًا من مصابيح الأشعة فوق البنفسجية، مما يساعد على الحفاظ على اتساق النتائج.
المرائب الباردة أو الأقبية في الشتاء تجعل المعالجة تستغرق وقتًا أطول. على الجانب الآخر، حرارة الصيف يمكن أن تجعل الأمور تسير بسرعة كبيرة. درجة حرارة الغرفة هي عادة النقطة المثلى.
أوقات المعالجة الموصى بها للراتنجات المختلفة
يختلف كل راتنج قليلاً، وهذا يؤثر على المدة التي تحتاجها لمعالجته. عادةً ما تحتاج الراتنجات القياسية إلى 1-15 دقيقة، بينما يمكن أن تصل أنواع الراتنجات القوية أو المتخصصة إلى 120 دقيقة قبل أن تتصلب تمامًا.
راتنجات البوليمر الضوئي القياسية
راتنجات البوليمر الضوئي القياسية هي ما يبدأ به معظم الناس. إنها تُعالج بسرعة كبيرة ولا تحتاج إلى أي شيء فاخر.
أوقات المعالجة النموذجية:
- المطبوعات الصغيرة (المصغرات): 1-2 دقيقة
- المطبوعات المتوسطة: 3-5 دقائق
- المطبوعات الكبيرة: 5-15 دقيقة
تستخدم معظم الراتنجات القياسية طول موجي 405 نانومتر للحصول على أفضل النتائج. يمكنك استخدام محطة معالجة أو حتى مصباح أظافر يعمل بالأشعة فوق البنفسجية.
درجة حرارة الغرفة مناسبة لهذه الأنواع. الغرف المُسخّنة ليست ضرورية حقًا إلا إذا كنت في عجلة من أمرك.
راقب طباعتك كل بضع دقائق. يجب أن يكون الراتنج القياسي المُعالج بشكل صحيح صلبًا وغير لزج على الإطلاق.
راتنجات قوية ومرنة
تستغرق الراتنجات القوية والمرنة وقتًا أطول بكثير من الراتنجات القياسية. إنها تحتاج إلى المزيد من طاقة الأشعة فوق البنفسجية للوصول إلى قوتها الكاملة.
متطلبات المعالجة المطولة:
- راتنجات قوية: 60 دقيقة عند 60 درجة مئوية
- راتنجات مرنة: 30-45 دقيقة
- راتنجات هندسية: 60-120 دقيقة
تساعد إضافة الحرارة هذه الراتنجات على المعالجة بشكل أفضل. إذا استطعت، استخدم غرفة مُسخّنة للراتنجات القوية.
يمكن أن تفقد الراتنجات المرنة مرونتها إذا بالغت في المعالجة. ابدأ بوقت أقل، وتحقق من المرونة، وأضف المزيد فقط إذا لزم الأمر.
إذا كانت الراتنجات القوية تبدو ناعمة أو لا تحتفظ بالتفاصيل، فمن المحتمل أنها لم تُعالج بالكامل. يجب أن يكون الراتنج القوي المُعالج بشكل صحيح صلبًا، ولكن ليس هشًا.
راتنجات شفافة وملونة
تتصرف الراتنجات الشفافة والملونة بشكل مختلف لأن كمية الضوء التي تمر عبرها تختلف. الشفاف يُعالج بشكل أسرع، والألوان الداكنة تحتاج لوقت أطول.
التوقيت بناءً على اللون:
- شفاف/شبه شفاف: 1-3 دقائق
- ألوان فاتحة: 2-5 دقائق
- ألوان داكنة: 5-10 دقائق
- راتنجات سوداء: 8-15 دقيقة
الصبغات الداكنة تحجب الأشعة فوق البنفسجية، لذا يمكن أن تستغرق الراتنجات السوداء والزرقاء الداكنة وقتًا أطول بكثير.
إذا كنت ترغب في الحصول على لمسة نهائية شفافة تمامًا، فحاول معالجة الراتنجات الشفافة تحت الماء. هذا يمنع الأكسجين من إتلاف السطح.
قم بتدوير المطبوعات الملونة بشكل متكرر أثناء المعالجة. بهذه الطريقة، تحصل كل جانب على الضوء الذي يحتاجه.
راتنجات قابلة للغسل بالماء وراتنجات صديقة للبيئة
الراتنجات القابلة للغسل بالماء والصديقة للبيئة لها خصائصها الفريدة. إنها أكثر أمانًا وأسهل في التنظيف، ولكنها عادةً ما تحتاج إلى وقت أطول للمعالجة.
إرشادات الراتنجات البيئية:
- قابلة للغسل بالماء: 15-30 دقيقة
- راتنجات نباتية: 20-40 دقيقة
- راتنجات متوافقة حيويًا: اتبع مواصفات الشركة المصنعة بدقة
تستغرق الراتنجات البيئية وقتًا أطول، لذا لا تستعجل. امنحها الوقت الذي تحتاجه.
بعض الراتنجات القابلة للغسل بالماء تعمل بشكل أفضل مع معالجة على مرحلتين: نصف الوقت، ثم استراحة، ثم إنهاء المعالجة.
تحقق دائمًا من الزجاجة أو موقع الشركة المصنعة للحصول على تفاصيل حول الراتنجات البيئية. يمكن أن تختلف بشكل كبير من علامة تجارية إلى أخرى.
احصل على راتنج ممزوج بشكل مثالي بدون فقاعات. اكتشف آلات خلط راتنج الإيبوكسي الخاصة بنا لجعل عملية التحضير الخاصة بك أكثر سلاسة واتساقًا.
نصائح لتحقيق المعالجة المثالية

إذا كنت تريد نتائج متسقة وعالية الجودة، فستحتاج إلى المعدات المناسبة، وقليل من الصبر، وبعض الاهتمام بالتفاصيل. طريقة المعالجة، وكيفية تدوير المطبوعات، وكيفية التحكم في التوقيت، وقليل من الاختبار بعد المعالجة، كلها تحدث فرقًا.
استخدام محطة معالجة مقابل ضوء الشمس الطبيعي
إن استخدام محطة معالجة بالأشعة فوق البنفسجية مخصصة هو أفضل طريقة للحصول على نتائج موثوقة. تستخدم هذه المحطات أضواء UV بطول موجي 405 نانومتر، والتي تتطابق تمامًا مع معظم الراتنجات.
يمكن لمحطات المعالجة أن تنهي المصغرات في حوالي 1-2 دقيقة، والمطبوعات الأكبر حجمًا في 5-10 دقائق. لن تقلق بشأن الغيوم أو حركة الشمس.
يمكن أن يعمل ضوء الشمس الطبيعي، ولكنه أبطأ بكثير. قد تستغرق المطبوعات الصغيرة 2-3 ساعات، وقد تحتاج المطبوعات الكبيرة إلى 10 ساعات أو أكثر من الشمس المباشرة.
الطقس مهم جدًا. الأيام الغائمة، أو الشتاء، أو ضوء الشمس المبكر/المتأخر لا توفر ما يكفي من الأشعة فوق البنفسجية.
درجة الحرارة عامل أيضًا. الأيام الباردة تجعل المعالجة تستغرق وقتًا أطول، والأسطح شديدة السخونة يمكن أن تشوه مطبوعاتك إذا لم تكن حذرًا.
مصابيح الأظافر UV هي خيار ميزانية جيد. تعمل بسرعات مماثلة لمحطات المعالجة، ولكن في بعض الأحيان لا ينتشر الضوء بالتساوي.
إذا كنت جادًا في الطباعة، فإن محطة المعالجة المناسبة تستحق العناء. إنها توفر الوقت والمتاعب.
تدوير المطبوعات للتعرض المتساوي
يساعد التدوير اليدوي على حصول جميع الأسطح على نفس كمية الأشعة فوق البنفسجية. قم بتدوير مطبوعاتك كل بضع دقائق أثناء المعالجة.
الأشكال المعقدة—خاصة تلك التي تحتوي على تجاويف عميقة—تحتاج إلى عناية إضافية. قد لا تحصل البقع المجوفة أو الأجزاء السفلية على ما يكفي من الضوء ما لم تقم بتحريكها.
تحتوي العديد من محطات المعالجة على أقراص دوارة مدمجة. هذه الأقراص تدور المطبوعات ببطء، لذلك لا يتعين عليك القيام بذلك يدويًا.
حاول توجيه الأجزاء السميكة نحو الضوء أولاً. تحتاج الأجزاء الكثيفة إلى المزيد من الأشعة فوق البنفسجية لتتغلغل بالكامل.
قم بتغيير الزوايا—ضع المطبوعات على جانبها، ثم اقلبها، حتى يتم معالجة كل جزء.
قد تحتاج المطبوعات الكبيرة إلى معالجة جزئية. قم بتغطية بعض المناطق أثناء معالجة مناطق أخرى لتجنب المعالجة الزائدة للأجزاء الرقيقة.
احذر من مناطق الظل الناتجة عن الأجزاء المتدلية أو الأشكال الهندسية المعقدة. يمكن أن تظل هذه البقع ناعمة إذا لم تقم بإعادة وضع الطباعة.
يعالج بعض الأشخاص المطبوعات تحت الماء لمنع الأكسجين من إفساد السطح. يستغرق الأمر وقتًا أطول، ولكن في بعض الأحيان تكون اللمسة النهائية أجمل قليلاً.
تجنب المعالجة الزائدة والهشاشة
المعالجة الزائدة تجعل المطبوعات هشة وأكثر عرضة للتشقق. التزم بإرشادات الشركة المصنعة وأضف الوقت فقط إذا كنت بحاجة ماسة لذلك.
عادةً ما تصل الراتنجات القياسية إلى نقطة الكمال في 5-15 دقيقة في محطة المعالجة. أي شيء يتجاوز ذلك قد يجعل المادة شديدة الصلابة أو حتى قابلة للتفتت.
الراتنجات الداكنة مثل الأسود أو الأزرق الداكن تحتاج إلى وقت أطول، بينما الراتنجات الفاتحة والشفافة تُعالج بسرعة أكبر بفضل اختراق الأشعة فوق البنفسجية الأفضل.
راقب التغيرات البصرية—الاصفرار في الراتنج الشفاف أو الأنسجة السطحية الغريبة تعني أنك ربما تجاوزت الحد.
الحرارة الزائدة من جلسات الأشعة فوق البنفسجية الطويلة يمكن أن تشوه مطبوعاتك. دع الأجزاء السميكة تبرد بين جولات المعالجة.
اختبر عينات صغيرة قبل الالتزام بمعالجة طويلة على طباعة كبيرة. بهذه الطريقة، لن تدمر نموذجًا كاملاً عن طريق الخطأ.
تدعي بعض العلامات التجارية أن راتنجاتها لا يمكن أن تُعالج بشكل مفرط، ولكن بصراحة، إذا تجاوزت 30-60 دقيقة، حتى أقوى المواد يمكن أن تصبح هشة.
الراتنجات المرنة حساسة بشكل خاص. الكثير من الأشعة فوق البنفسجية تجعلها تفقد مرونتها بسرعة.
اختبار ما بعد المعالجة للقوة والانتهاء
يساعد الاختبار الفيزيائي على التحقق مما إذا كانت طباعتك قد اكتملت بالفعل. ما عليك سوى الضغط بإصبعك—إذا كانت الطباعة معالجة، فلن تتشوه على الإطلاق.
يُعد اختبار اللزوجة السطحية مفيدًا لتحديد البقع غير المعالجة. يجب أن تكون الطباعة النهائية جافة الملمس، وليست لزجة أو صمغية.
فحص التفاصيل مهم أيضًا. ابحث عن الحواف الحادة والميزات الواضحة—إذا كانت ناعمة أو مستديرة، فهناك خطأ ما في المعالجة.
اختبار المرونة مفيد مع الراتنجات القياسية. حاول ثني جزء رفيع بلطف؛ يجب أن ينثني قليلاً ويعود إلى شكله الأصلي، دون تشققات.
اتساق اللون يمكن أن يعطيك فكرة عن المعالجة المتساوية. تبدو المطبوعات المعالجة بشكل صحيح موحدة—لا توجد بقع غائمة أو شفافية غريبة.
اختبار القوة يعني تطبيق القليل من الضغط على المفاصل أو البقع الرقيقة. لن تنكسر المطبوعات المعالجة جيدًا عند خطوط الطبقة أو الدعامات.
احتفظ بسجل لإعداداتك الناجحة للمرة القادمة. دوّن نوع الراتنج، وقت المعالجة، وإعداداتك—سيوفر عليك ذلك الكثير من المتاعب لاحقًا.
يتيح لك الاختبار التدريجي ضبط المعالجة المثالية. ابدأ بالحد الأدنى للوقت الموصى به، ثم زد دقيقة أو دقيقتين حتى تصل إلى النقطة المثالية للصلابة.
حافظ على مكان عملك آمنًا وخاليًا من الروائح أثناء المعالجة. اكتشف أجهزة تنقية الهواء للراتنج المصممة للتعامل بفعالية مع الأبخرة والجزيئات الدقيقة.
الخاتمة: كم من الوقت يستغرق معالجة المطبوعات الراتنجية
معالجة المطبوعات الراتنجية ليست مجرد خطوة أخيرة—بل هي ما يمنح إبداعاتك قوتها ووضوحها وجودتها الدائمة. إن تخصيص الوقت لمعالجتها بشكل صحيح يضمن أن تبدو مطبوعاتك رائعة وتدوم طويلاً.
تذكر أن عوامل مثل نوع الراتنج، وشدة الأشعة فوق البنفسجية، وحجم الطباعة كلها تلعب دورًا في تحديد مدة معالجة المطبوعات الراتنجية. قليل من الصبر يقطع شوطًا طويلاً نحو تحقيق نتائج احترافية.
هل أنت مستعد لاستخدام مطبوعاتك المعالجة جيدًا؟ تحقق من دليلنا حول إنشاء ديكور منزلي راتنجي مذهل لمشروعك الإبداعي التالي.
الأسئلة المتكررة
إليك بعض الأسئلة الأكثر شيوعًا التي يطرحها الناس حول معالجة المطبوعات الراتنجية. ستحصل على نصائح حول كيفية اكتشاف الطباعة المعالجة بالكامل وفكرة عن المدة التي تستغرقها الطرق المختلفة.
كيف أعرف ما إذا كانت طباعتي الراتنجية قد تم معالجتها؟
تتميز الطباعة الراتنجية المعالجة بالكامل بسطح أملس أو غير لامع، وتشعر بأنها صلبة بدون أي مرونة. اضغط عليها على سطح صلب—إذا انتهت، ستصدر صوتًا حادًا وشبيهًا بالحجر. تبدو المطبوعات غير المعالجة لزجة أو رطبة، بينما تصبح المطبوعات المعالجة بشكل مفرط هشة وقد تتحول إلى اللون الأصفر.
هل يمكن للراتنج أن يعالج في ساعتين؟
ساعتان لا تكفيان للمعالجة الكاملة بالطرق القياسية. تنهي محطات المعالجة بالأشعة فوق البنفسجية معظم المطبوعات في 1-10 دقائق، اعتمادًا على الحجم. يستغرق ضوء الشمس وقتًا أطول—قد تحتاج المطبوعات الصغيرة إلى 2-3 ساعات، والكبيرة قد تصل إلى 10 ساعات.
كم من الوقت يستغرق معالجة الراتنج بضوء الأشعة فوق البنفسجية؟
تعالج المطبوعات الصغيرة في 1-2 دقيقة تحت ضوء الأشعة فوق البنفسجية، والمتوسطة في 3-5 دقائق، والكبيرة في 5-10 دقائق. يعتمد التوقيت على نوع الراتنج وسمكه. ابدأ بوقت قصير، ثم زد إذا لزم الأمر—المعالجة بالأشعة فوق البنفسجية أسرع وأكثر اتساقًا من ضوء الشمس.
هل المطبوعات الراتنجية آمنة بعد المعالجة؟
يمكن التعامل مع المطبوعات المعالجة بالكامل بأمان لأن الراتنج يصبح بلاستيكًا صلبًا. ومع ذلك، لا يزال بإمكان البقايا غير المعالجة أن تهيج الجلد. اغسل المطبوعات دائمًا باستخدام كحول الأيزوبروبيل قبل المعالجة، وتذكر أن الراتنجات الآمنة للطعام فقط هي المناسبة للأصناف التي تتلامس مع الطعام.


اترك تعليقًا
This site is protected by hCaptcha and the hCaptcha Privacy Policy and Terms of Service apply.