يضيف الزجاج المسحوق ملمسًا ولمعانًا وعمقًا لفن الراتنج. لا توجد العديد من المواد التي يمكن أن تضاهي اللمعان والأبعاد التي يمنحها.
هل تريد تصميم جيود متلألئ؟ أو ربما قطعة تجريدية لامعة؟ يمكن للزجاج المسحوق أن يحول الراتنج العادي إلى شيء جذاب للغاية.
يمكنك استخدام الزجاج المسحوق لإنشاء طبقات، وإضافة أبعاد، ومنح فن الراتنج الخاص بك مظهرًا احترافيًا.
يعمل الزجاج المسحوق بشكل رائع لكل من المشاريع الزخرفية والمفيدة. يمكنه إبراز الحواف، وملء المساحات الفارغة، أو إضافة لمسة لامعة إلى قواعد الأكواب، والصواني، والأعمال الفنية الجدارية.
يخلق مزيج الزجاج اللامع والراتنج الأملس لمسة نهائية عصرية تبرز ولكن لا تبدو مبالغ فيها.
بينما تجرب الزجاج المسحوق في الراتنج، ستكتشف أنواع الزجاج التي تعمل بشكل أفضل وكيفية استخدامها بأمان. إيجاد التوازن الصحيح بين الملمس والوضوح هو فن بحد ذاته، بصراحة.
مع بعض الممارسة، يمكنك صنع مشاريع تلتقط الضوء وتظهر تفاصيل فريدة في كل مرة.
ابدأ مشروعك مع مجموعة الإيبوكسي سريعة الجفاف للحصول على نتائج سريعة وقوية.
ما هو الزجاج المسحوق ولماذا يستخدم في فن الراتنج؟

يمنح الزجاج المسحوق فن الراتنج ملمسًا وبريقًا. يتيح لك صنع قطع تعكس الضوء بطرق رائعة ويمنح عملك مظهرًا متعدد الطبقات.
يمكنك الاختيار من بين أنواع وتشطيبات مختلفة من الزجاج لتناسب أسلوبك.
أنواع الزجاج المسحوق للراتنج
ستجد الزجاج المسحوق على شكل رقائق زجاجية، أو شظايا دقيقة، أو قطع زجاج معاد تدويره. يمنح كل نوع مظهرًا وبريقًا مختلفًا.
الزجاج الناعم جيد للتشطيبات الملساء، بينما الرقائق الأكبر تصنع لمسات بارزة جريئة ولامعة. يأتي الزجاج المسحوق بخيارات شفافة، أو بلورية، أو ملونة.
يعطي الزجاج الشفاف لمعانًا خفيفًا، ويضيف الزجاج الملون بعض الحيوية. حتى الزجاج القزحي يغير لونه في الضوء، وهو أمر رائع.
يصنع بعض الفنانين زجاجهم المسحوق الخاص عن طريق كسر الزجاجات القديمة أو الحصى الزجاجية بعناية. إنها طريقة رخيصة وصديقة للبيئة للحصول على المواد، ولكن يجب توخي الحذر بشأن الحواف الحادة.
|
النوع |
المظهر |
الأفضل لـ |
|
الزجاج المسحوق الناعم |
بريق ناعم، خفي |
المجوهرات، قواعد الأكواب |
|
الرقائق المتوسطة |
لمعان ملحوظ، ملمس |
الفن الجداري، الصواني |
|
قطع الزجاج الكبيرة |
جريئة، عاكسة |
فن الراتنج على طراز الجيود |
فوائد إضافة الزجاج المسحوق إلى مشاريع الراتنج
يمنح الزجاج المسحوق فن الراتنج ملمسًا وعمقًا وانعكاسًا للضوء. تلتقط قطع الزجاج الضوء وتشتته، مما يجعل السطح يبدو أكثر تفصيلاً.
يمكنك استخدام الزجاج المسحوق لإضفاء تأثير ثلاثي الأبعاد يبرز في المشاريع الكبيرة والصغيرة على حد سواء. جرب تضمين الزجاج في الراتنج أو رشه فوقه بينما لا يزال الراتنج رطبًا للحصول على مظهر مختلف.
يتناسب بشكل جيد مع الأصباغ، أو رقائق المعادن، أو مساحيق الميكا. يساعد خلط هذه المواد على التحكم في اللمعان والشفافية.
يستخدم العديد من الحرفيين الزجاج المسحوق لتقليد الأحجار الكريمة في الجيود الراتنجية، أو لإضافة بريق إلى قواعد الأكواب، أو لإبراز أجزاء من الفن التجريدي.
نصائح السلامة عند التعامل مع الزجاج المسحوق
يمكن أن يكون الزجاج المسحوق حادًا، لذا احرص دائمًا على ارتداء القفازات وحماية العينين. تعامل معه برفق لتجنب الجروح.
اشطف الزجاج وجففه قبل إضافته إلى الراتنج. يلتصق الزجاج النظيف بشكل أفضل ويحافظ على وضوح القطعة.
اعمل على سطح ثابت واحتفظ بالقطع الصغيرة محتواه. استخدم فرشاة ناعمة - وليس أصابعك - لتحريك الزجاج.
إذا كنت تصنع زجاجك المسحوق الخاص، فارتدِ قناعًا لتجنب استنشاق الغبار. اسحق الزجاج داخل كيس متين للحفاظ على الشظايا تحت السيطرة.
لمزيد من المزج الإبداعي، تحقق من دليلنا: هل يمكنك خلط مسحوق الميكا مع طلاء الأكريليك للحرف اليدوية؟
تطبيقات إبداعية للزجاج المسحوق في فن الراتنج

يضيف الزجاج المسحوق ملمسًا وبريقًا وعمقًا إلى مشاريع راتنج الإيبوكسي. يمكنك بناء طبقات تلتقط الضوء من زوايا مختلفة، مما يجعل فن الراتنج الخاص بك يبدو ثلاثي الأبعاد وأكثر انعكاسًا.
يخلق مزيج الزجاج والراتنج أسطحًا ناعمة الملمس ولكنها تحتوي على القليل من الملمس.
فن الراتنج المستوحى من الجيود
يتيح لك خلط الزجاج المسحوق مع راتنج الإيبوكسي تقليد الجيود الحقيقية. تعمل قطع الزجاج مثل بلورات صغيرة، مما يمنح فنك بريقًا وشكلًا.
استخدم راتنجًا شفافًا أو ملونًا لتثبيت الزجاج وخلق عمق بين الطبقات. يمكنك صنع حلقات أو تكتلات أو عروق بأحجام زجاجية مختلفة.
تستخدم القطع الكبيرة للمركز، ويضيف الزجاج الناعم بريقًا إلى الحواف.
إليك طريقة بسيطة:
- اسكب طبقة أساسية من الراتنج الملون.
- أضف الزجاج المسحوق حيث تريد ملمسًا بلوريًا.
- أغلق بطبقة علوية رفيعة لتنعيم أي قطع حادة.
يعمل هذا على الألواح القماشية، أو الصواني، أو الأعمال الفنية الجدارية ويمنح كل قطعة مظهرًا يشبه الأحجار الكريمة.
قطع الراتنج ذات الطابع البحري والشاطئي
يعتبر الزجاج المسحوق مثاليًا لفن الراتنج البحري والشاطئي. فهو يعكس الضوء مثل الرمال الرطبة أو رغوة البحر.
استخدم الزجاج الأزرق، أو الأخضر، أو الشفاف ليبدو كأمواج ومياه ضحلة. اسكب قاعدة من الراتنج الأزرق، ثم رش الزجاج المسحوق على طول "الشاطئ".
امزج طبقات من الراتنج والزجاج لإضفاء العمق والحركة. يساعد نسيج الزجاج على إظهار مكان التقاء الرمل بالماء.
لمزيد من الواقعية، أضف الأصداف، أو الأحجار الصغيرة، أو الصبغة البيضاء للرغوة. بمجرد المعالجة، يصبح السطح لامعًا وناعمًا، بينما يلتقط الزجاج الموجود تحته الضوء.
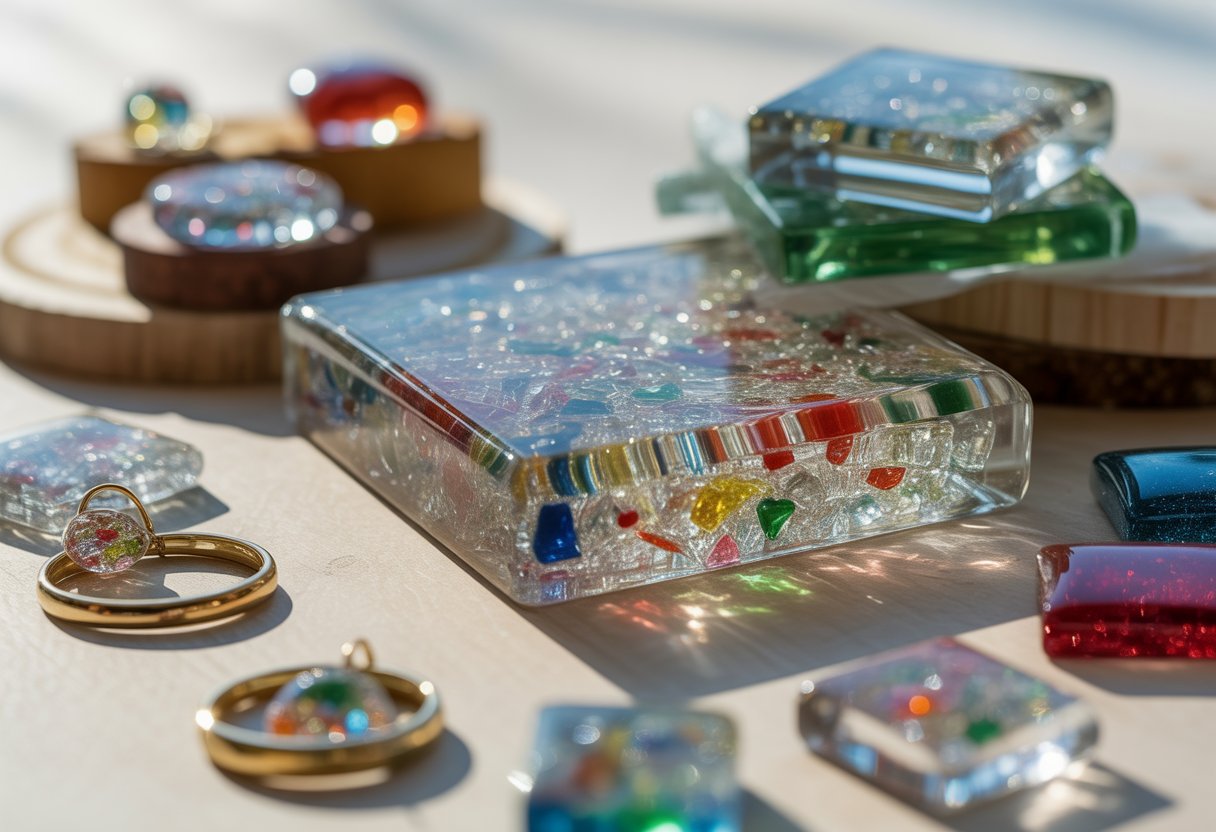
المجوهرات والفن الذي يمكن ارتداؤه
يعمل الزجاج المسحوق في قوالب راتنج صغيرة للمجوهرات أيضًا. قم بتضمين الزجاج في القلائد، أو الأقراط، أو الخواتم للحصول على بعض البريق.
استخدم الزجاج الناعم للراحة وتجنب الحواف الحادة. اجمع الراتنج الشفاف مع الزجاج الملون للحصول على تأثير شفاف، أو أضف رقائق معدنية لمزيد من اللمعان.
جرب وضع طبقات من الراتنج والزجاج على مراحل للتحكم في مكان الألوان والزجاج. هذا يجعل مجوهراتك تبدو مصقولة ولكنها لا تزال فريدة من نوعها.
القطع النهائية خفيفة الوزن، وقوية، وبصراحة، مذهلة للغاية.
تسوق من مجموعتنا من لوازم حرف الراتنج لتحصل على جميع مستلزماتك الأساسية.
تقنيات استخدام الزجاج المسحوق مع الراتنج

يمكنك خلط الزجاج المسحوق مع الراتنج لإضافة ملمس وعمق ولمعان إلى فنك. طريقة خلطك للزجاج، ووضعه في طبقات، وترتيبه تغير حقًا المظهر النهائي، خاصة مع قوالب السيليكون أو تصميمات الأسطح.
خلط الزجاج المسحوق في الراتنج
جهّز الراتنج والمصلب باتباع التعليمات الموجودة على العبوة. اخلطهما ببطء للحفاظ على فقاعات أقل.
بمجرد الخلط، رش القليل من الزجاج المسحوق. قلّب برفق حتى لا تحبس الهواء وتحافظ على الزجاج منتشرًا.
إليك دليل سريع لكمية الزجاج التي يجب استخدامها:
|
حجم الراتنج |
كمية الزجاج المسحوق |
|
100 مل |
1-2 ملعقة كبيرة |
|
200 مل |
2-4 ملاعق كبيرة |
اسكب الخليط في قالب السيليكون الخاص بك أو على سطح مستوٍ. اضغط على القالب برفق لإخراج الفقاعات.
إذا كنت تريد تشطيبًا أكثر نعومة، اترك الزجاج يستقر في الأسفل. لمزيد من البريق، قلّب مرة أخرى قبل الصب حتى يبقى الزجاج مختلطًا.
لا تستخدم زجاجًا حادًا أو غير متساوٍ في الطبقات الرقيقة، فقد يخترق. احرص دائمًا على ارتداء القفازات ونظارات السلامة.
وضع طبقات من الزجاج المسحوق لإضفاء العمق
يصنع التراص مظهرًا ثلاثي الأبعاد يجذب العين. ابدأ بقاعدة رقيقة من الراتنج الشفاف أو الملون.
عندما يصبح لزجًا قليلًا ولكن لم يتصلب تمامًا، رش الزجاج المسحوق فوقه. هذا يساعد الزجاج على الالتصاق.
اسكب طبقة راتنج رقيقة أخرى لتغطية الزجاج. كرر إذا كنت تريد المزيد من الطبقات. يجب أن تتصلب كل طبقة بما يكفي لتثبيت الطبقة التالية.
للحصول على عمق أكبر، استخدم أحجام زجاجية مختلفة - ناعمة للبريق، كبيرة للخطوط البارزة الجريئة. يمكنك أيضًا تلوين كل طبقة راتنج للحصول على تغييرات وتناقضات لونية.
ترتيب الأنماط والتصاميم
يمكنك ترتيب الزجاج المسحوق قبل صب الراتنج أو بعد طبقة أساسية رقيقة. استخدم الملاقط أو العصا لعمل أنماط أو خطوط أو مجموعات.
إذا كنت تريد تباعدًا متساويًا، ارسم مخططًا خفيفًا أولاً. في قوالب السيليكون، ضع الزجاج وجهًا لأسفل حتى يظهر من خلال الراتنج المتصلب.
جرب خلط الزجاج بمسحوق الميكا، أو رقائق المعدن، أو الراتنج الملون لمزيد من التفاصيل. ابدأ بسيطًا - فكثرة الزجاج يمكن أن تجعل السطح خشنًا.
بمجرد أن تتقن الأمر، جرب التدرجات اللونية، أو الحدود، أو اللمسات البارزة المركزية لجعل فن الراتنج الخاص بك يبرز.
وإذا كنت تحب اللمعان، استكشف المزيد عن اللمعان. اقرأ: هل اللمعان سام؟ ما تحتاج لمعرفته قبل الصناعة قبل مشروعك التالي.
اللمسات النهائية والعناية بإبداعات الراتنج الزجاجي المسحوق

تساعد اللمسات النهائية والعناية الجيدة على الحفاظ على ملمس فن الراتنج الزجاجي المسحوق الناعم، ولمعانه الساطع، وقوته. الأمور الصغيرة مثل الختم والتلميع والتنظيف مهمة حقًا لمظهر ودوام القطعة.
تقنيات الختم والتلميع
بمجرد أن يتصلب الراتنج، تبرز عملية الختم والتلميع وضوح الزجاج المسحوق وعمقه. ابدأ بصنفرة السطح بورق صنفرة ناعم لتنعيم أي بقع غير مستوية.
كن بطيئًا حتى لا تخدش الراتنج. استخدم قطعة قماش من الألياف الدقيقة وملمعًا آمنًا للراتنج لتلميع السطح حتى يصبح ناعمًا ولامعًا.
يساعد مركب التلميع القليل على تسوية البقع الباهتة. إذا كنت تريد تشطيبًا لامعًا للغاية، ضع طبقة رقيقة من الراتنج الشفاف كطبقة علوية.
بالنسبة للفن ذي الزجاج المنقوش، حاول ألا تبالغ في الصنفرة. قم بتلميع مناطق الراتنج برفق فقط واترك حواف الزجاج حادة وواضحة.
ارتدِ دائمًا القفازات وحماية العينين عند الصنفرة أو التلميع. يمكن أن تكون قطع الزجاج الحادة مؤذية إذا لم تكن حذرًا.
|
الخطوة |
الأداة |
الغرض |
|
1 |
ورق صنفرة ناعم |
|