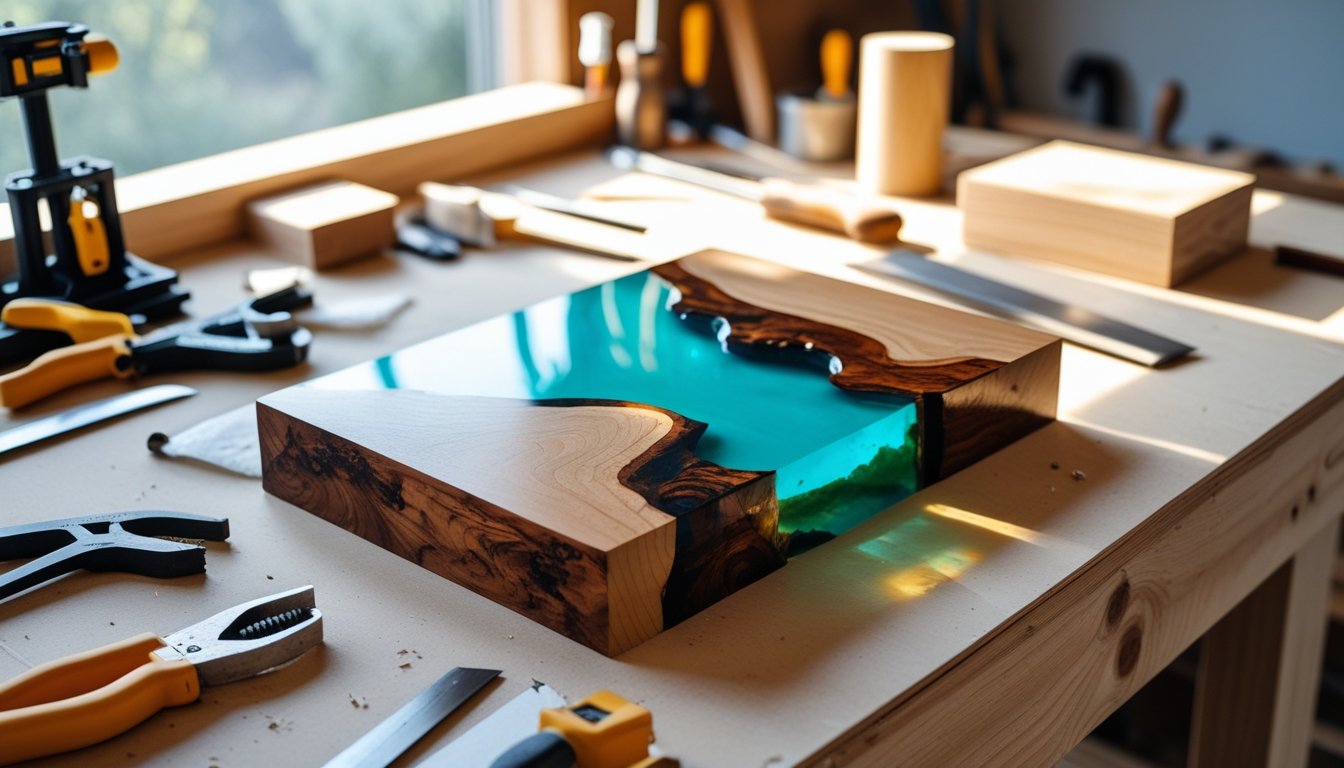
يُعد العمل بالخشب والراتنج طريقة إبداعية لصنع قطع مخصصة تبدو مصقولة، حتى لو كنت مبتدئًا. لا تحتاج إلى مهارات متقدمة للبدء؛ فصناعة قواعد الأكواب والصواني والقطع الفنية الجدارية هي مشاريع جيدة للمبتدئين. عندما تقوم بالتجربة، ستشعر بكيفية تدفق الراتنج وتصلبه والتصاقه بالخشب. يمكن أن يؤدي الجمع بين الملمس الطبيعي للخشب واللمسة النهائية اللامعة للراتنج إلى تحويل الخردة العادية إلى شيء فريد بشكل مدهش.
ستتعلم كيفية تجهيز المواد، وخلط وصب الراتنج بشكل صحيح، وتشكيل مشروعك بحيث يخرج نظيفًا وقويًا. تساعدك هذه الأساسيات على تجنب المشكلات الشائعة مثل البقع اللاصقة أو البقع المعتمة. باستخدام عدد قليل من الأدوات وبعض الصبر، يمكنك إنشاء فن وظيفي من الخشب المتبقي.
للحصول على تشطيبات ناعمة ومتينة على مشاريعك الخشبية، استكشف مجموعة إيبوكسي سطح الطاولة لدينا - مثالية لطاولات الأنهار والأثاث المخصص.
البدء بمشاريع الخشب والراتنج

يفتح مزج الخشب والراتنج الكثير من الإمكانيات لإنشاء قطع جذابة ومتينة. لإنجاز ذلك، ستحتاج إلى الأدوات المناسبة، ومواد جيدة، وقليل من المعرفة حول كيفية تفاعل الخشب والراتنج.
المواد والأدوات الأساسية التي ستحتاجها
جهز مساحة عمل نظيفة وجيدة التهوية ومستوية - يحب الراتنج أن يتدفق إذا لم تكن الأمور مستوية. غطِ طاولتك بالبلاستيك أو حصائر السيليكون حتى لا تضطر إلى كشط الراتنج لاحقًا.
ما ستحتاجه:
- راتنج الإيبوكسي والمصلب
- أكواب خلط وعصي تقليب
- قفازات واقية ونظارات أمان
- مسدس حراري أو شعلة لإزالة الفقاعات
- ورق صنفرة (درجات مختلفة) لتنعيم الأشياء
- قوالب أو أشكال شريطية لتشكيل مشروعك
استخدم مقياسًا رقميًا لقياس الراتنج والمصلب - التخمين هنا يؤدي عادةً إلى خيبة الأمل. ابقِ الغبار بعيدًا أثناء تصلب الراتنج، وإلا سترى الغبار مضمنًا إلى الأبد في قطعتك.
بالنسبة للمشاريع الصغيرة مثل قواعد الأكواب أو المجوهرات، تعمل القوالب البسيطة والأدوات اليدوية بشكل جيد. إذا كنت تفكر في مشاريع أكبر - طاولات، قطع فنية جدارية - فمن المحتمل أن تحتاج إلى مشابك، وصنفرة، وسطح مستوٍ تمامًا لتصلب متساوٍ.
اختيار الخشب والراتنج المناسب لمشروعك
اختر خشبًا جافًا وثابتًا ولا يحتوي على الكثير من الزيت أو الرطوبة. القيقب، والجوز، والكرز، والأرز هي خيارات قوية - فهي تلتصق جيدًا بالراتنج وتصقل بشكل جميل. الأخشاب اللينة؟ تميل إلى امتصاص الكثير من الراتنج ويمكن أن تكون صعبة.
انظر إلى حجم مسام الخشب وكثافته. الأخشاب ذات الحبيبات المفتوحة تمتص المزيد من الراتنج، مما قد يكون مكلفًا ويبطئ عملية التصلب. عادة ما يستحق الأمر ختم الخشب المسامي بطبقة رقيقة من الراتنج قبل الصب الرئيسي لتقليل الفقاعات.
بالنسبة للراتنج، اختر راتنجات الصب الشفافة أو الإيبوكسي للصب العميق. هذه تتصلب ببطء، مما يتيح للفقاعات وقتًا للهروب ويساعد الطبقات على الاستقرار بشكل مسطح. الأصباغ أو الألوان ممتعة، ولكن أضفها ببطء - الكثير منها يمكن أن يجعل الأشياء غائمة.
حاول الحفاظ على درجة الحرارة ثابتة (حوالي 70-75 درجة فهرنهايت) أثناء تصلب الراتنج للحصول على أفضل النتائج.
احصل على هذا المظهر الخالي من العيوب والشفاف تمامًا مع مجموعة راتنجات الإيبوكسي الشفافة كالزجاج لدينا - مثالية للإبداعات الخشبية والراتنجية عالية اللمعان.
دليل خطوة بخطوة لصنع مشاريع الخشب والراتنج

يتطلب صنع قطع الخشب والراتنج بعض التحضير وقليلًا من الصبر. إن تجهيز الخشب، وختمه لتقليل الفقاعات، وخلط الراتنج بدقة، كلها أمور مهمة إذا كنت تريد الحصول على لمسة نهائية واضحة وناعمة. يمكن أن يظهر الاهتمام بالتفاصيل الصغيرة مثل التنظيف، والحفاظ على درجة الحرارة المناسبة، وعدم التسرع في التصلب في النتيجة النهائية.
تحضير سطح الخشب وختمه
ابدأ بصنفرة الخشب بورق صنفرة ناعم - تخلص من البقع الخشنة وافتح المسام. امسح الغبار بقطعة قماش خالية من الوبر أو قطعة قماش لاصقة. أي بقايا متبقية ستفسد طريقة التصاق الراتنج.
تحقق من وجود تشققات أو ثقوب واملأها بحشو الخشب أو طبقة رقيقة من راتنج الإيبوكسي. تأكد من أن كل شيء جاف قبل أن تقوم بالختم.
ضع طبقة عازلة من الراتنج - طبقة رقيقة فقط. هذا يمنع الهواء من الهروب من الخشب ويبقي الفقاعات بعيدًا عن صبك الرئيسي. اترك الطبقة العازلة تتصلب تمامًا قبل المتابعة.
إذا كنت تستخدم قوالب، قم بتبطينها بشريط الرسام أو عامل تحرير لتسهيل الأمور لاحقًا. حافظ على مساحة عملك مستوية وخالية من الغبار قدر الإمكان.
خلط وصب وتصلب الراتنج
قم بقياس راتنج الإيبوكسي والمصلب بدقة كما يذكر المصنع - عادة بنسبة 1:1 أو 2:1. اخلط ببطء لمدة دقيقتين، مع كشط الجوانب والقاع. التقليب بسرعة كبيرة يسحب المزيد من الفقاعات.
لصوبات أعمق أو قطع أكبر، استخدم راتنج الصب - فهو يتصلب ببطء ولا يصبح ساخنًا جدًا. بمجرد الخلط، اسكب ببطء عبر الخشب ودع الراتنج ينتشر. استخدم مسدسًا حراريًا أو شعلة لإزالة أي فقاعات سطحية.
اترك مشروعك يتصلب في مكان نظيف ودرجة حرارة ثابتة، حوالي 70-75 درجة فهرنهايت (21-24 درجة مئوية). لا تحركه أثناء التصلب. اعتمادًا على الراتنج الخاص بك، يمكن أن يستغرق التصلب الكامل من 24 إلى 72 ساعة. بمجرد أن يصبح صلبًا، قم بالصنفرة والتلميع للحصول على هذا المظهر الزجاجي.
لمسات نهائية وأفكار إبداعية
التشطيب هو ما يجعل قطعة الخشب والراتنج تبدو أنيقة وتدوم طويلًا. نعومة السطح واللمعان وطبقة الحماية الجيدة كلها أمور مهمة. هناك الكثير من الطرق الإبداعية البسيطة لدمج الخشب والراتنج في الفن أو الديكور أو الحرف اليدوية الصغيرة التي ستستخدمها بالفعل.
صنفرة وتلميع وحماية قطعتك
ابدأ بصنفرة الراتنج المتصلب بورق صنفرة ناعم، بدءًا من 400 وصولًا إلى 2000 للحصول على لمسة نهائية ناعمة كالحرير. يساعد الحفاظ على السطح رطبًا أثناء الصنفرة على تجنب الخدوش وارتفاع درجة الحرارة.
بمجرد أن يصبح ناعمًا، استخدم مركب تلميع وقطعة قماش ناعمة أو أداة تلميع لإبراز اللمعان. بالنسبة لأجزاء الخشب، امسح الغبار قبل إضافة أي تشطيب.
اغلق الخشب بالزيت أو الشمع أو البولي يوريثان لمنع دخول الرطوبة. بالنسبة للراتنج، طبقة رقيقة من الإيبوكسي الشفاف أو ملمع الراتنج تحافظ على لمعانه وتقاوم الخدوش.
|
الخطوة |
الأداة/المادة |
الغرض |
|
الصنفرة |
ورق صنفرة رطب/جاف |
سطح ناعم |
|
التلميع |
مركب تلميع |
إضافة لمعان |
|
الختم |
زيت أو ملمع راتنج |
حماية اللمسة النهائية |
دع كل طبقة تجف قبل لمس أو تحريك قطعتك - التسرع يؤدي فقط إلى المشاكل.
أفكار مشاريع خشب وراتنج ملهمة للمبتدئين
ابدأ بأشياء صغيرة مثل قواعد الأكواب، أو سلاسل المفاتيح، أو قلادات المجوهرات - فهي مثالية لممارسة الصب والصنفرة والتشطيب دون استخدام الكثير من المواد.
جرب صواني ذات أسطح راتنجية، أو ساعات، أو ألواح تقطيع للديكورات الوظيفية. يمكن أن يجعل الراتنج الملون في التشققات أو العقد الطبيعية الخشب العادي يبدو مميزًا للغاية.
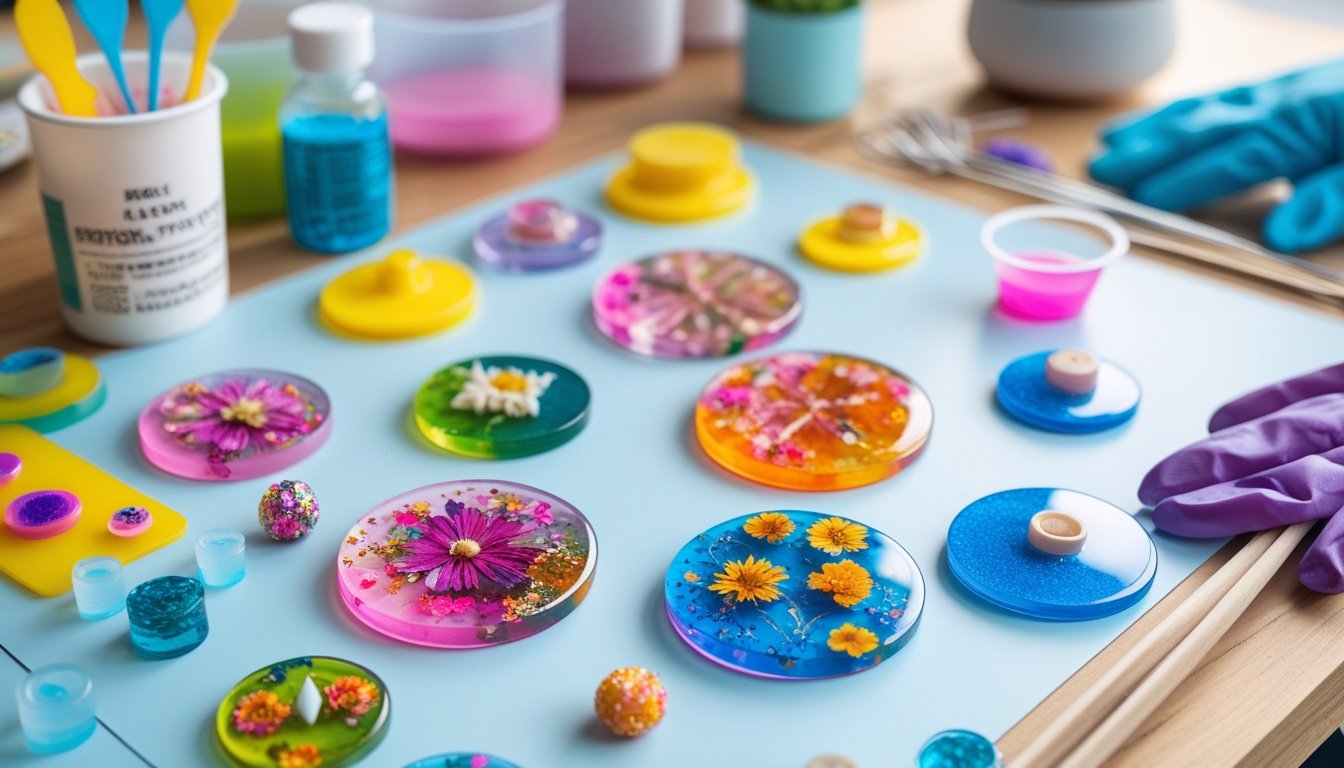
إذا كنت من محبي الحرف اليدوية بالراتنج، جرب المجوهرات ذات الشكل الحر - ادمج الزهور المجففة أو رقائق معدنية في الراتنج على قواعد خشبية رفيعة للحصول على شيء فريد.
حافظ على تصميماتك بسيطة وركز على الحواف النظيفة، والألوان المتوازنة، والتشطيبات الناعمة. كل مشروع تنجزه يبني المهارة والثقة لأشياء أكبر في المستقبل.
أضف لمسة طبيعية إلى قطعتك التالية مع مجموعة الزهور المجففة الصغيرة لدينا - مثالية للدمج في الفن أو مشاريع الديكور بالراتنج.
الخلاصة: مشاريع الخشب والراتنج
تُعد مشاريع الخشب والراتنج مزيجًا مثاليًا من الطبيعة والإبداع، مما يتيح للمبتدئين صُنع قطع عملية وجميلة في آن واحد. بفضل المواد المناسبة والصبر واللمسات النهائية، يمكنك تحويل الخشب البسيط إلى فن مذهل.
كلما اكتسبت المزيد من الخبرة، حاول تجربة أنواع مختلفة من الأخشاب والألوان وتأثيرات الراتنج لجعل كل مشروع فريدًا لك.
هل تبقى لديك بعض الراتنج بعد الصب؟ اطلع على دليلنا حول ماذا تفعل بالراتنج المتبقي للحصول على طرق ذكية لاستخدام كل قطرة.
الأسئلة المتكررة
ماذا تصنع بالخشب والراتنج؟
يمكنك صنع الطاولات، قواعد الأكواب، الصواني، ألواح التقطيع، والمجوهرات. يبدأ معظم المبتدئين بأشياء صغيرة مثل سلاسل المفاتيح أو قواعد الأكواب لتعلم كيفية خلط وصب الراتنج. تتطلب المشاريع الأكبر مثل طاولات الأنهار أو الأعمال الفنية الجدارية المزيد من الراتنج والإعداد، ولكن العملية الأساسية هي نفسها.
كيف تستخدم الراتنج لمشاريع الخشب؟
نظف الخشب وجففه واصقله قبل إضافة الراتنج. اخلط الراتنج والمصلب حسب تعليمات المنتج - عادة بنسبة 1:1 أو 2:1. اسكب ببطء لتجنب الفقاعات، واترك كل طبقة تتصلب قبل إضافة المزيد. اعمل في مكان جيد التهوية وارتدِ قفازات ونظارات واقية.
هل يمكنك وضع الخشب في الراتنج؟
نعم، يمكنك تضمين الخشب في الراتنج لإنشاء قطعة صلبة ومختومة. يجب أن يكون الخشب جافًا تمامًا وإلا ستحصل على فقاعات أو تعكر. يساعد ختم الخشب المسامي بطبقة رقيقة من الراتنج قبل الصب الرئيسي على تقليل إطلاق الهواء ويحسن التصاق الراتنج.
ما هو أفضل خشب لفن الراتنج؟
إذا كنت تفكر في فن الراتنج، فإن الأخشاب الصلبة الكثيفة مثل الجوز والبلوط والقيقب والكرز تميل إلى أن تكون خيارات رائعة - فهي لا تتشوه بسهولة، وتظهر حبيباتها رائعة تحت الراتنج. سأبتعد عن الأخشاب اللينة أو أي شيء رطب لأنها يمكن أن تحبس الهواء وتفسد طريقة تصلب الراتنج. قبل البدء، تأكد من أن الخشب نظيف وناعم ولا يحتوي على أي زيوت. هذا القدر القليل من التحضير يؤتي ثماره حقًا.


اترك تعليقًا
This site is protected by hCaptcha and the hCaptcha Privacy Policy and Terms of Service apply.