Butterflies have such delicate patterns and colors, which makes them a favorite for craft projects. When you preserve them in resin, you capture all those details in a clear display that lasts for years.
A butterfly in resin lets you protect its fragile beauty and turn it into art you can hold, display, or even wear.
Maybe you want to make a keepsake, decorate your space, or design small accessories like magnets or pendants. With the right materials and steps, you can keep the wings vibrant instead of dull or soaked.
Learning how to prepare the butterfly, pour the resin, and add finishing touches helps you avoid common mistakes. This guide covers the basics, from what a butterfly in resin actually is to how you can craft your own pieces with confidence.
You’ll see material choices, step-by-step methods, and creative ideas to make your project stand out. There’s a lot to try, and honestly, it’s easier than you might think.
What Is a Butterfly in Resin?

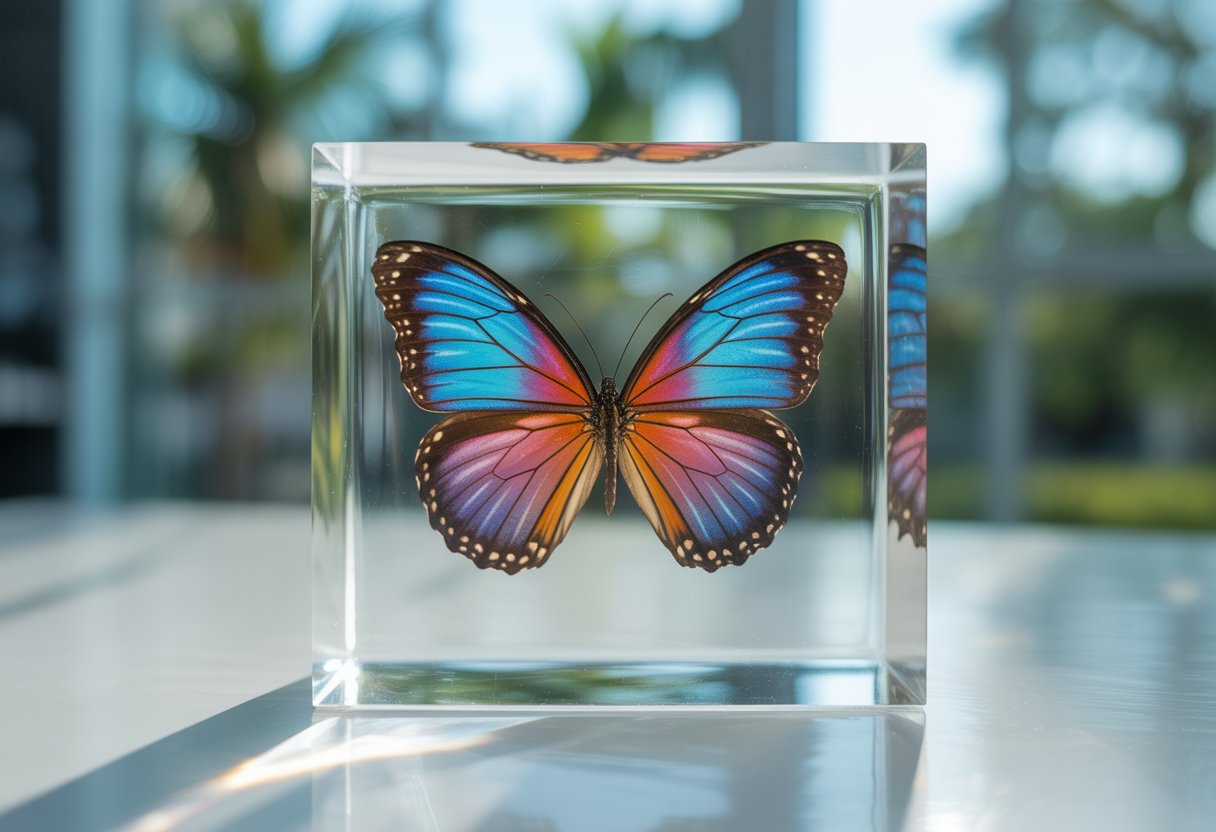
A butterfly in resin is a preserved specimen or a crafted shape sealed in clear epoxy or UV resin. You can use real butterflies or resin molds to make decorative pieces that won’t fade or break down.
These projects mix nature with resin art, so you get something practical or just plain pretty. They’re kind of magical, honestly.
Types of Butterflies Used
Both real and artificial butterflies work for resin projects. Real butterflies get dried and positioned before being sealed in resin.
Crafters usually pick species with strong colors, like Morpho, Swallowtail, or Monarch, since their wings stay bright after curing.
Artificial options include resin molds shaped like butterflies or printed butterfly decals. These let you skip handling real specimens but still make colorful designs.
Silicone molds come in different sizes, so you can make pendants, coasters, or display pieces with the same shape every time.
Here are two common approaches:
- Real butterflies: Preserved specimens, often ethically sourced
- Resin butterfly molds: Cast with pigments, glitter, or films for color effects
Choose what fits your style—natural or more artsy. Both are fun and honestly, it’s up to you.
Popular Uses and Displays
You can turn butterflies in resin into all sorts of decorative and useful items. Small projects like jewelry pendants, keychains, or charms are popular since they’re easy to make and wear.
Larger pieces, like paperweights or display blocks, show off full-wing spreads. Many people use butterfly resin art in home décor, too.
Encased specimens look great in shadow boxes, resin coasters, or even table inlays. Clear resin lets you see the butterfly from every angle, which is just cool for display pieces.
Some folks preserve butterflies from special events or trips, turning them into keepsakes. Others add pigments, metallic flakes, or films to make the butterfly pop against the resin background.
Choosing Materials for Butterfly in Resin Projects

The quality of your resin piece really depends on the epoxy you pick, how you prep the butterfly, and the tools you use. These details make the process smoother and your final piece more durable and good-looking.
Playing with colors can really make butterflies pop. For fresh inspiration, read Resin Color Ideas: Creative Ways to Make Your Crafts Pop.
Selecting the Right Epoxy Resin

Resiners® 20.28oz Crystal Clear Epoxy Resin
Pick a clear epoxy resin that won’t turn yellow, since you want to see all the butterfly details. Look for a resin with a simple mix ratio, like 1:1 or 2:1, so measuring is easy.
Use a resin made for casting projects, not coating. Casting resins cure slower and let you pour deeper layers without overheating.
This helps you cover the butterfly in layers without trapping bubbles or messing up the wings. Check the resin’s working time—a longer open time gives you more control when placing the butterfly.
If you want extra convenience, you can use bubble-removal machines or curing tools to speed things up and reduce flaws. Not required, but handy.
Butterfly Sourcing and Preparation
If you use real butterflies, make sure they’re ethically sourced. Many suppliers sell naturally expired specimens, so you don’t have to harm insects.
You can also use high-quality printed transparencies or silicone molds shaped like butterflies for a cruelty-free option. Before embedding a real butterfly, you need to relax and position it.
This means softening dried wings with gentle humidity, then pinning them flat until they hold their shape. Once set, the butterfly is ready for resin.
Resin can darken or distort fragile wings if you don’t seal them first. A thin coat of clear-drying glue, spray sealant, or Mod Podge protects the colors and keeps resin from soaking into the wings.
Essential Tools and Supplies

Resiners® AirLess Pro Resin Bubble Remover Machine
You’ll need mixing cups, stir sticks, and silicone molds to shape your resin. Disposable cups and wooden sticks work, but reusable silicone tools save money and cut down on waste.
Pick molds a bit bigger than the butterfly’s wingspan so nothing gets squished. A heat gun or torch helps pop surface bubbles.
Work in a ventilated space or use an air purifier for resin fumes. Gloves, aprons, and a flat workspace keep both you and your project safe.
Optional tools like bubble-removal machines or curing stations make things easier if you’re making a bunch of pieces. Not a must, but they do help you get a smoother, pro finish.
Butterfly art makes great gifts, but there’s more you can create. Get inspired when you explore our article, 9 Stunning Resin Gift Ideas for Every Occasion.
Step-by-Step Guide: Preserving a Butterfly in Resin
You need a clean setup, careful resin mixing, and steady hands for placing the butterfly. Each step takes patience so the wings keep their color and the resin cures without bubbles.
Preparing Your Workspace
Work in a well-ventilated area with a flat surface. Resin gives off fumes, so crack a window or use a small fan.
Cover your table with wax paper or a silicone mat to catch any drips. Gather your supplies before you start.
You’ll need:
- Epoxy resin and hardener
- Mixing cups and sticks
- Gloves and mask
- Mold or frame
- Tweezers
- Dried butterfly
Make sure the butterfly is totally dry before embedding. Any moisture can cause discoloration or mold inside the resin.
If needed, press the wings flat between parchment paper and a book for a few days. Keep paper towels and rubbing alcohol nearby for quick cleanup.
Once resin starts to cure, it’s tough to get off surfaces or skin. Trust me, you don’t want to skip this step.
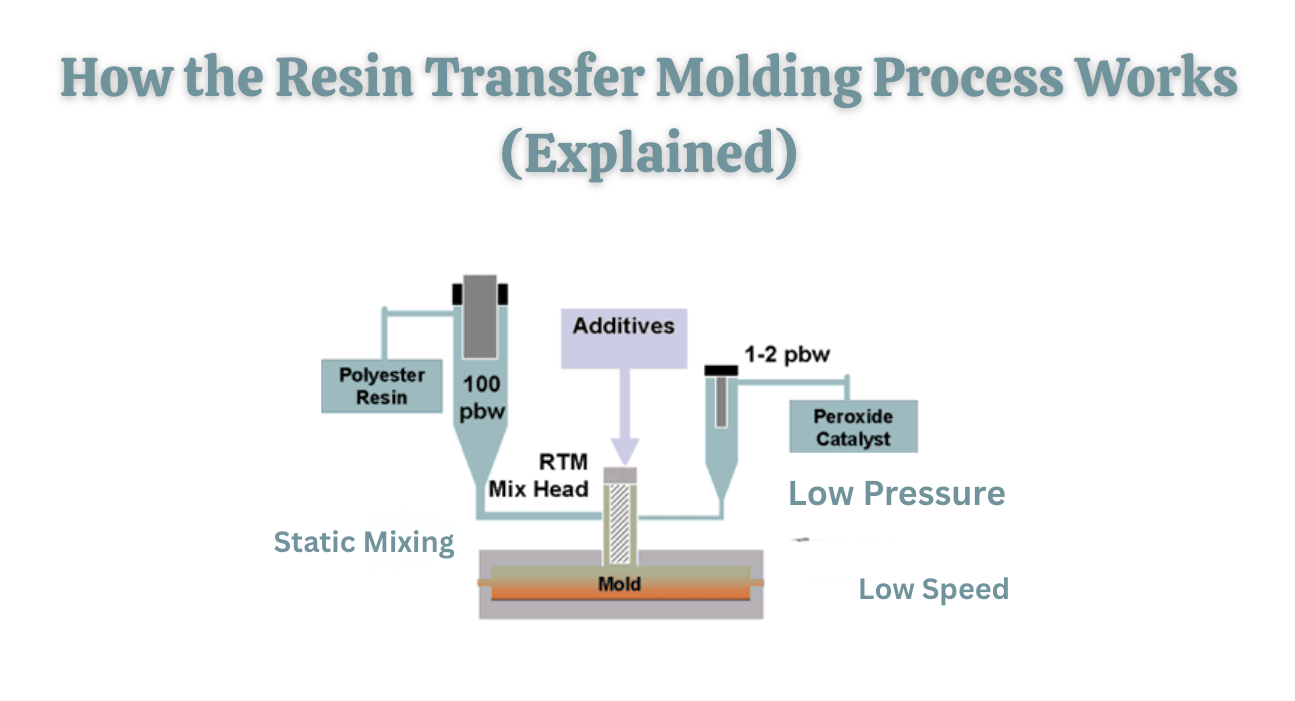
Mixing and Pouring Resin
Measure equal parts of epoxy resin and hardener, following the brand’s instructions. Use disposable cups and stir slowly to avoid bubbles.
Scrape the sides and bottom of the cup so the mix blends evenly. Let the resin sit for 2–3 minutes after mixing to help bubbles rise.
If bubbles stick around, lightly exhale over the resin or use a heat gun on low. Pour a thin base layer into your mold—this keeps the butterfly off the bottom and gives it a clear background.
Let this layer cure until it’s tacky but not sticky. Keep your mold level while curing to avoid resin pooling or weird shapes.
Embedding the Butterfly
When the base layer is ready, place the butterfly gently with tweezers. Center the wings so they show clearly through the resin.
Don’t touch the wings with your fingers—oils can mess up the colors. Pour another thin layer of resin over the butterfly, working slowly so the wings don’t shift.
If bubbles pop up, poke them with a toothpick or pass a heat gun quickly above the surface. Add layers until the butterfly is fully covered.
Let each layer cure a bit before adding the next to keep heat down. When the mold is filled, let the resin cure completely—usually 24 to 48 hours, depending on the brand.
Once hardened, pop the piece out of the mold and sand the edges if they’re rough. Now you’ve got a smooth, clear resin art piece with the butterfly preserved inside.
Preserving wings in resin is beautiful, but adding color takes it further. Learn how by exploring Coloring Resin: Techniques for Vibrant DIY Crafts.
Creative Techniques and Finishing Touches
When you make a butterfly in resin, the little details really change how the final piece looks. Color choices, mold shapes, and how you finish the surface all matter here.
Adding Color, Glitter, and Effects
You can mix pigments, alcohol inks, or mica powders into resin for rich colors. Alcohol inks spread in cool patterns, while mica powders give you a soft shimmer.
If you want a bold look, try layering different shades. Glitter adds sparkle and works great with butterfly wings.
Fine glitter gives a smooth shine, while chunky glitter adds texture. Holographic flakes or iridescent films create a color-shifting effect.
For more control, pour clear resin first, then add colored resin in small amounts. This keeps colors from blending too much.
If you want a stained-glass style, use transparent tints that let light pass through. Tip: Always stir colors slowly to avoid bubbles. A quick stir will trap air, and you’ll see it in the finished piece.
Using Molds for 3D Designs
Silicone molds make it easy to shape butterflies in different sizes. Pick a mold that’s about 1–2 inches bigger than your butterfly design.
This gives you enough room for detail without making the piece too heavy. Pour resin in layers for depth.
Start with a thin base layer, then add colored resin, glitter, or small embellishments like foil. Let each layer cure before adding the next so your design stays crisp.
If you want a domed look, overfill the mold a little. The resin will curve at the top, giving a rounded finish.
For wing details, you can place thin films or stickers inside the mold before pouring resin. Here’s a quick supply checklist:
- Silicone butterfly mold
- Clear epoxy resin
- Pigments or glitter
- Mixing cups and sticks
Polishing and Demolding
When the resin cures, gently flex the silicone mold to release the butterfly. Pull slowly so you don’t bend or crack thin wing edges.
If the mold sticks, press from the back instead of tugging the front. Edges might feel rough after demolding.
You can sand them with fine-grit sandpaper or use a nail file for tiny spots. Wet sanding cuts down on dust and makes things smoother.
Polishing brings out the shine. Use a resin polish or a little mineral oil on a soft cloth. Rub in circles until the resin looks clear and glossy.
If you want a pro look, add metallic paint or a chrome marker along the wing edges. It’s a small detail, but it really makes the butterfly stand out.
Once you’ve tried butterflies, you’ll enjoy making your own beads too. For a fun project, check out our article, How To Make Resin Beads: A Step-by-Step Guide for Creative Crafters.
Crafting Butterfly Resin Magnets and Accessories
You can turn butterfly resin pieces into practical things like fridge magnets or wearables such as earrings and pendants. Both projects use simple supplies, but each has its own steps to make sure your design is sturdy and looks polished.
Making Fridge Magnets
Start with a silicone butterfly mold for your resin magnets. Pour in epoxy or UV resin, then add color with mica powder, glitter, or even dried flowers.
Let it cure until the butterfly turns clear and glossy. Once it’s set, pop it out of the mold.
Sand any rough edges with a nail file or sandpaper. This step makes the back smooth so the magnet sticks better.
Grab a strong flat-backed magnet and glue it on using a drop of super glue or resin adhesive. Press down and let it dry.
If you want a 3D look, bend the wings up a bit before the resin gets too hard. It’ll look like the butterfly is flying right off your fridge.
Tip: Try small neodymium magnets if you want your butterfly to actually hold up notes or photos.
Designing Jewelry and Embellishments
These resin butterflies aren’t just for magnets. They work great for jewelry and little accessories too.
Make pendants, earrings, or pins by picking smaller molds or trimming bigger pieces with a craft knife. It’s really up to you.
During the pour, toss in metallic flakes, pressed flowers, or swirl in some color. It adds depth and keeps every piece different.
For a domed finish, brush on a thin coat of clear resin after the first layer cures. It gives a nice shine.
Once you’re happy, attach earring hooks, jump rings, or brooch pins with jewelry glue or a dab of resin. Give it a gentle tug to make sure it’s secure before you wear it.
You can also glue these butterflies to hair clips, keychains, or use them in scrapbooking. Mix up the sizes and colors to fit your project.
Create Stunning Butterfly Resin Crafts With Resiners

Resiners® 100Pcs Dried Pressed Flowers
If you want your butterfly in resin projects to look truly stunning, the secret is starting with the right materials. That’s why so many makers turn to Resiners. Their collections are designed to take the guesswork out of crafting, giving you pro-quality results without the stress.
Imagine pairing a delicate butterfly with vibrant dried flowers sealed in crystal-clear epoxy. With Resiners clear epoxy resin, you’ll get a flawless glass-like finish that stays bright and resists yellowing.
Add in their resin molds, and you can easily create perfect pendants, coasters, or display blocks every single time.

Resiners® Silicone Heart Mold for Photo Frames
The extras matter too—Resiners’ resin accessories make mixing, pouring, and protecting your workspace simple, while their mica powders and pigment inks let you add shimmer, sparkle, and bold color effects that make your piece one-of-a-kind.
Create your butterfly crafts with Resiners and turn every project into a masterpiece.
Love the idea of turning butterflies into keepsakes? Take your skills further by reading our guide, Resin Jewelry Making for Beginners: Start-to-Finish Guide.
Frequently Asked Questions on Butterflies in Resin
What are the best practices for preserving a real butterfly in resin?
Always use a dried butterfly. If it’s even a little damp, it might discolor or rot inside the resin.
Spray the wings with a clear sealer before casting. That keeps the colors bright and stops them from going see-through.
Where can I find high-quality resin for embedding butterflies?
Pick epoxy resin that cures clear and doesn’t yellow over time. Craft stores and online shops usually have good options.
If you’re new, choose resin with a longer working time. It’s easier to arrange delicate things like butterflies when you’re not rushing.
How do I prevent bubbles when casting butterflies in resin?
Pour resin in thin layers, not all at once. That helps keep bubbles away.
Wave a heat gun or torch over the surface to pop bubbles. Don’t hold it too long or you could scorch the butterfly.
What are the legal considerations for using real butterflies in resin art?
Check your local laws before collecting or buying butterflies. Some kinds are protected and off-limits for crafts.
If you’re unsure, buy from trusted sellers who source butterflies legally and ethically.
How can I achieve a professional finish on my resin butterfly piece?
Once the resin cures, grab some fine-grit sandpaper and smooth out the edges. This helps get rid of any rough spots.
If you want a shiny, glassy look, polish the surface or brush on a thin topcoat of resin. That extra step really makes your butterfly look sharp and finished.


Dejar un comentario
Este sitio está protegido por hCaptcha y se aplican la Política de privacidad de hCaptcha y los Términos del servicio.