Sharp or uneven epoxy resin edges can really mess up the look and feel of your project. They might even make your piece uncomfortable or a little risky to handle.
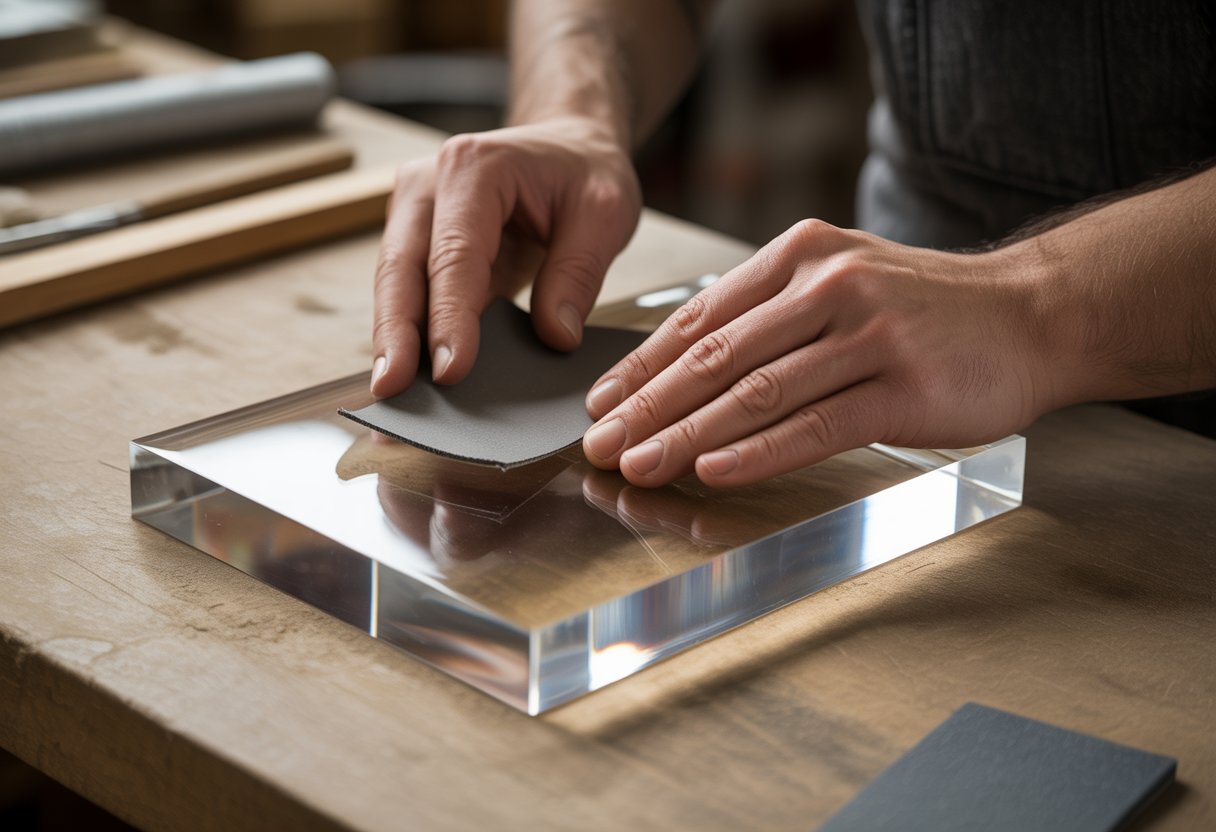
To fix sharp or uneven edges on an epoxy resin piece, start sanding with coarse wet/dry sandpaper (around 80–150 grit) to knock down rough spots, then move up through finer grits until you reach 400 or higher for a smooth finish.
You can also use a deburring tool to scrape away extra material. Always wear safety goggles and a mask while sanding, and keep the sandpaper wet to control dust and prevent heat buildup.
This method keeps your resin safe, your workspace clean, and your finished project looking polished and professional. Ready to make your edges smooth and flawless? Keep reading to find out how!
Understanding Epoxy Resin Edges

Epoxy resin edges usually need extra attention. How resin cures, how it flows in a mold, and your project’s design all change whether the edges come out smooth or sharp.
Why Edges Become Rough or Sharp
Resin shrinks a little as it cures. This often leaves behind raised or sharp edges, especially along the rim of molds or where drips form.
The mold type matters too. Flexible silicone molds sometimes let resin creep up the sides, creating thin ridges. Flat panels or artwork coated with resin can collect drips that harden into sharp points.
How the resin flows can also cause problems. Even self-leveling formulas let gravity pull extra resin to the edges. If you don’t remove or guide this while it’s still workable, it hardens unevenly.
Cured vs. Uncured Resin Handling
How you handle resin depends on whether it’s cured. When it’s uncured or still tacky, you can guide it toward the edges with a spreader or wipe away drips before they harden.
Once resin is fully cured, you can’t reshape it with tools or heat without risking damage. You’ll need to sand, file, or trim the hardened resin to fix the edges.
Pay attention to the resin’s curing time. Some harden in hours, others in days. Knowing this helps you decide if you should adjust edges early or wait until sanding is safe.
Common Edge Problems in Epoxy Resin Projects
You’ll usually run into three edge problems: sharp ridges, hardened drips, and uneven thickness. These all come from how resin cures and how it interacts with molds or surfaces.
Sharp ridges show up when resin pulls away from the mold walls. Hardened drips happen when extra resin flows past the edge and hardens. Uneven thickness pops up on flat projects where resin pools more on one side.
These issues don’t just look bad—they can make your project uncomfortable or even unsafe. If you spot them early, you can pick the right fix, whether that’s sanding, trimming, or smoothing during curing.
If you’re just starting out with resin, you’ll love the basics explained in our guide, Resin Casting Basics: Everything Newbies Need To Know.
Preventing Rough Edges Before Curing

You can save a lot of sanding and polishing if you set up your epoxy resin project right from the start. The resin you use, how you prep your mold, and how you pour all matter for smooth or sharp edges.
Choosing the Right Epoxy Resin
Not all epoxy resins cure the same way. Some are made for art projects and level out nicely, while others are thicker and might leave more obvious edges.
Look for a resin labeled self-leveling. It spreads evenly and helps avoid raised lips along the edges.
Check the cure time too. Slower-curing resins give you more time to spread them and fix drips. Fast-curing ones might lock in uneven edges if you don’t move quickly.
If you’re making small things like coasters or jewelry, go for a resin made for molds. For big flat surfaces, use a coating resin. Matching the resin to your project helps prevent sharp or uneven edges.
Mold Preparation and Sealing
A clean, prepped mold makes a huge difference. Dust, oils, or leftover resin can cause jagged lines. Always wash and dry your mold before pouring.
If you’re using silicone, spray on a mold release. It protects the mold and helps you pop out the cured piece without tearing up the edges.
If your mold isn’t silicone, seal seams with tape or a thin layer of glue. Even tiny leaks can leave drips that turn into sharp edges. For flat panels, tape the underside so you can peel away cured drips instead of sanding them later.
Pouring Techniques for Smooth Results
The way you pour resin really affects the edges. Pour slowly and steadily to avoid air bubbles and uneven build-up. Dumping it quickly usually makes messy rims.
Use a stir stick or gloved finger to guide resin along the edges. This helps coat them and keeps thin spots from turning into sharp lips.
If you’re coating artwork or wood, let the resin flow just past the edge and smooth it down. Wipe away drips as the resin sets, checking every 10–15 minutes until it thickens.
Tip: Keep a small tool like a trowel or spatula handy. Run it along the edge as the resin starts to gel to remove extra material before it hardens into a ridge.
Want to add holes or hardware to your resin pieces? For safe and easy methods, check out our article: Can You Drill Into Epoxy Resin Safely and Easily?
Essential Tools and Materials for Smoothing Edges
Epoxy resin projects often leave you with sharp or uneven edges to fix. The right sanding tools, small power equipment, and safety gear make the process easier and safer.
Sandpaper and Grit Selection
Sandpaper is the go-to tool for smoothing resin edges. Start with a coarse grit (around 120–180) to knock down sharp spots. Move to finer grits like 400, 600, or even 1000+ for a glassy surface.
Wet sanding works well for resin. It cuts down on dust and keeps the surface cool, so nothing melts or sticks. Just grab a bowl of water and waterproof sandpaper.
Sand in stages. Switch to the next grit only after the marks from the last one are gone. Keep a few sheets of each grit nearby so you don’t have to stop and hunt for more.
Power Tools and Attachments
If you want to save time or have thick edges, small power tools help a lot. A Dremel tool with a sanding drum or polishing bit lets you shape and smooth resin with more control.
Use a sanding attachment for bigger surfaces or when you need even pressure. Rotary tools work best for tight corners, while small orbital sanders handle flat areas.
Keep the speed low to avoid overheating. Short, gentle passes work better than pressing hard. Always test on a scrap piece first to see how your resin reacts.
Safety Gear and Workspace Setup
Sanding resin makes fine dust you really don’t want to breathe. Always wear a dust mask or respirator made for fine dust. Safety glasses protect your eyes, and gloves help avoid skin irritation.
Work somewhere with good airflow. A fan or open window helps keep dust moving away. If you’re wet sanding, put a towel under your project to catch water drips.
Keep your tools organized and your area clear. A tidy setup helps you work faster and make fewer mistakes.
Looking to make your resin projects stand out? By reading our guide Can You Put LED Lights in Epoxy Resin Projects?, you’ll discover creative lighting ideas.
Using Power Tools for Efficient Edge Smoothing
Power tools let you remove sharp resin edges fast and give your project a clean finish. With the right attachments and a light touch, you can shape, smooth, and polish epoxy resin without spending forever sanding by hand.
How to Use a Dremel Tool on Resin Edges
A Dremel tool comes in handy for smoothing epoxy resin edges. It has different attachments for sanding, grinding, or polishing, depending on what you need.
Start with a sanding attachment to take down sharp corners. Work slowly and move the tool along the edge instead of pressing hard in one spot. That way, you avoid uneven surfaces.
Keep your Dremel at a medium speed. High speeds might melt resin, but low speeds might not do enough. Try it out on a scrap piece first to get used to it.
Wear safety glasses and a mask. Resin dust can really irritate your eyes and lungs. If you have a small vacuum or dust collector, use it to keep your workspace cleaner.
Buffing Wheels and Rotary Attachments
After sanding, switch to a buffing wheel or felt polishing tip to shine the edges. These work well for jewelry, coasters, or any resin piece that needs a polished look.
Put a little polishing compound on the wheel. Lightly run it over the edge, moving steadily to avoid dips or grooves.
For big projects, use larger rotary attachments to cover more area. Smaller buffing tips are better for corners or detailed spots.
Check your progress often. Buffing can change the edge quickly, and stopping early keeps you from removing too much resin.
Tips for Avoiding Overheating and Damage
Resin softens if it gets too hot. When using any power tool, don’t press down too hard. Let the tool do the work.
Take short breaks to keep the tool and resin cool. If the edge turns cloudy or sticky, stop and let it rest before you keep going.
Use lower speed settings with polishing attachments. High speeds make more friction and heat, which can mess up the surface.
Keep a spray bottle of water nearby. A light mist on the edge can help cool things down and keep the finish clear.
Heat tools can do more than you think in DIY and crafts. Learn smart tricks by reading our article Heat Gun Uses: Tips for DIY, Repairs, and Crafts.
Alternative Methods to Smooth Edges Without Sanding
You don’t always need sandpaper to fix sharp epoxy resin edges. Heat, fresh resin, or simple hand tools can make your project safer and better looking.
Smoothing with a Heat Gun
A heat gun softens sharp edges so they blend in. When you add gentle heat, the resin melts just a bit, which smooths out roughness and rounds off corners. This works best on small problems, not big uneven edges.
Hold the heat gun about 6–8 inches from the resin. Move it in steady passes—don’t hold it in one spot or you’ll get bubbles or scorch marks. Keep the heat on low or medium for control.
Work slowly, and watch the surface as you go. If the resin starts to gloss over, pull the heat away. You can repeat with light passes until the edge feels smoother.
Applying a Thin Epoxy Coat
A fresh coat of epoxy resin covers rough edges and gives a glossy, even surface. Instead of grinding down sharp spots, you seal them under a thin self-leveling layer.
This trick works great for jewelry, coasters, or artwork. Mix a small batch of resin, making sure you stir it well and get rid of bubbles.
Use a brush or a small stick to dab resin just along the edge. If you want to coat the whole piece, let the resin flow over the sides.
Put your piece on a raised surface so drips can fall away. Once the resin cures, the new layer smooths over sharp edges and leaves a shiny finish.
Using Deburring Tools
A deburring tool lets you scrape away sharp edges by hand. It works best on cured epoxy resin when sanding feels too rough or messy.
The curved blade shaves off thin layers without hurting the surface. Hold the tool at a slight angle and run it along the edge in one smooth motion.
Use light pressure so you don’t gouge the resin. Keep going until the edge feels rounded and safe to touch.
This method is quick and gives you precise control. It’s a good pick if you want to keep the original surface but lose the sharp spots.
Polishing Epoxy Resin for a Glossy Finish
If you want a smooth, glass-like surface, you’ll need a good polishing compound and some patience. Sometimes a buffing tool helps, too.
Honestly, you can get a shine without polish by using sealers or clear coats. They boost clarity and protect the surface.
Choosing and Applying Polishing Compounds
Polishing compounds remove fine scratches and help restore clarity. They usually come as pastes or liquids for smoothing epoxy resin after sanding.
Pick products labeled for plastics or resins—they cut gently and don’t leave haze. Put a little compound on a clean, soft cloth or pad.
Rub it into the surface in circles, covering the area evenly. Start with light pressure, then add a bit more as the compound starts to break down.
Wipe off any leftover compound with a microfiber cloth. If you still see dull spots, repeat until the resin looks even.
For big projects, polish in sections so the compound doesn’t dry out. Tip: Keep the surface dust-free before applying compound, or you’ll risk new scratches.
Polishing Epoxy Resin by Hand
Hand polishing is great for small resin pieces like jewelry, coasters, or keychains. It gives you more control and avoids the risk of overheating the resin.
Grab a soft cotton or microfiber cloth. Put a tiny amount of polishing compound on the cloth, then rub in small circles across the resin.
Rotate the piece often to polish evenly. This method takes patience and you might need to repeat it a few times for a glossy finish.
Check under bright light to see if scratches remain. Finish by wiping with a clean, dry cloth to remove leftover polish.
Hand polishing may not give a mirror shine on big projects, but it’s reliable for small, detailed work.
Using Buffing Wheels for Shine
A buffing wheel speeds up polishing and gives a high-gloss finish on bigger resin surfaces, like tabletops or art panels. Attach the wheel to a drill or rotary tool, and use a soft foam or felt pad.
Put a little polishing compound on the wheel or directly on the resin. Run the tool at a low to medium speed, moving slowly in overlapping passes.
Don’t hold the wheel in one spot too long, or the resin can heat up and warp. After buffing, wipe the surface clean with a soft cloth.
If you want extra clarity, repeat with a finer compound.
Note: Wear safety glasses when using a buffing wheel—compound or resin dust can fly around.
How to Make Resin Shiny Without Polish
If you want shine without using polish, try a resin gloss sealer or a clear spray coat. These products add a smooth top layer that fills in scratches and reflects light.
Brush or spray on a gloss sealer in thin coats. Once dry, it creates a tough finish that makes resin shiny without polish.
This method works well for flat surfaces or pieces that are hard to buff. You can also pour a thin layer of fresh epoxy over the cured piece—a “flood coat.”
The self-leveling layer gives a glassy surface without sanding or buffing. Just remember, sealers and topcoats may need reapplying over time, especially if you handle the item a lot.
Let everything cure fully before you use or display the piece.
Ready to experiment with color for bold and beautiful results? Don’t miss our article Coloring Resin: Techniques for Vibrant DIY Crafts.
Final Thoughts
Smoothing epoxy resin edges doesn’t have to be tricky. It’s all about the right tools, the right grit, and a little bit of care.
By sanding in stages, polishing, or even using a deburring tool, you can transform sharp, uneven edges into smooth, professional-looking finishes. Remember to stay safe with goggles, a mask, and water to keep dust under control.
Once you master this step, your resin projects will look polished and feel amazing to the touch. Now that you know the basics, it’s time to grab your tools and give it a try. Your next resin masterpiece is waiting!
For the best results, we recommend using Resiners epoxy resin and high-quality resin equipment to make your projects smoother, safer, and more professional.
Frequently Asked Questions
What's the best technique for hand-smoothing epoxy resin edges?
Start with fine-grit sandpaper, like 400 grit, and work up to higher grits. Sand lightly in small circles to avoid uneven spots.
Keep the surface damp while sanding to cut down on dust and heat.
Can you achieve a polished resin edge without sanding?
Yes, you can use a heat gun to slightly melt and round off rough edges. Move the heat evenly and don’t hold it in one place, or you’ll get burns or bubbles.
This works best for small touch-ups, not big areas.
What are the steps to sand resin edges without leaving scratches?
Start with a lower grit like 220 if the edge is sharp, then move through finer grits up to 1000 or higher. Always sand in stages and keep the surface wet.
Finish with a polishing compound to remove any haze.
Which deburring tool is recommended for smoothing resin?
A handheld deburring tool with a sharp swivel blade is great for trimming sharp resin edges. You get control and can remove thin layers without gouging the surface.
This tool works especially well for straight or flat edges.
How can I make my resin project shiny after the sanding process?
Use a polishing compound with a buffing wheel or a soft cloth. Apply it in small amounts and work evenly until the resin gets its clear shine back.
Wipe with a microfiber cloth to remove residue and boost the gloss.
What's the secret to getting a perfectly smooth finish on epoxy resin?
Careful prep matters a lot. Pour the resin slowly and try to keep it even.
Keep an eye out for drips. Wipe away any extra resin before it starts to cure.
Once it dries, sand the surface gently. Then polish it well to bring back that clear shine.
If you take your time at each step, you'll avoid most flaws. The finish ends up looking clean and smooth—almost like glass.


Commenta
Questo sito è protetto da hCaptcha e applica le Norme sulla privacy e i Termini di servizio di hCaptcha.