エポキシ樹脂を使った作品に彩りを加えたいですか?そう思っているのはあなただけではありません!多くのクラフト愛好家が、鮮やかで目を引く、個性的な作品を作りたいと考えています。
ジュエリー、コースター、アート作品など、何を作る場合でも、レジンに色を加えることで、創造的な可能性が大きく広がります。
エポキシ樹脂を着色するには、マイカ粉末、アルコールインク、液体顔料など、樹脂専用の着色剤を使用できます。これらの材料は樹脂とよく混ざり合い、硬化過程に影響を与えません。
食用色素やマニキュアは使用しないでください。これらはうまく機能せず、作品を台無しにしてしまう可能性があります。
レジンに色をつける一番の魅力は、思い通りの色合いに仕上げられることです!透明感のある透き通った色から、しっかりとした不透明な色まで、自由に作ることができます。
色を混ぜ合わせるのもおすすめです。適切な着色剤を選び、少し練習すれば、レジン作品はきっと素晴らしい仕上がりになるでしょう。
エポキシ樹脂に最適な着色剤
エポキシ樹脂を扱う場合、適切な着色剤を選ぶことが最終的な作品の出来栄えを大きく左右します。 着色料樹脂の硬化特性や耐久性に影響を与えることなく、良好に混ざり合う。
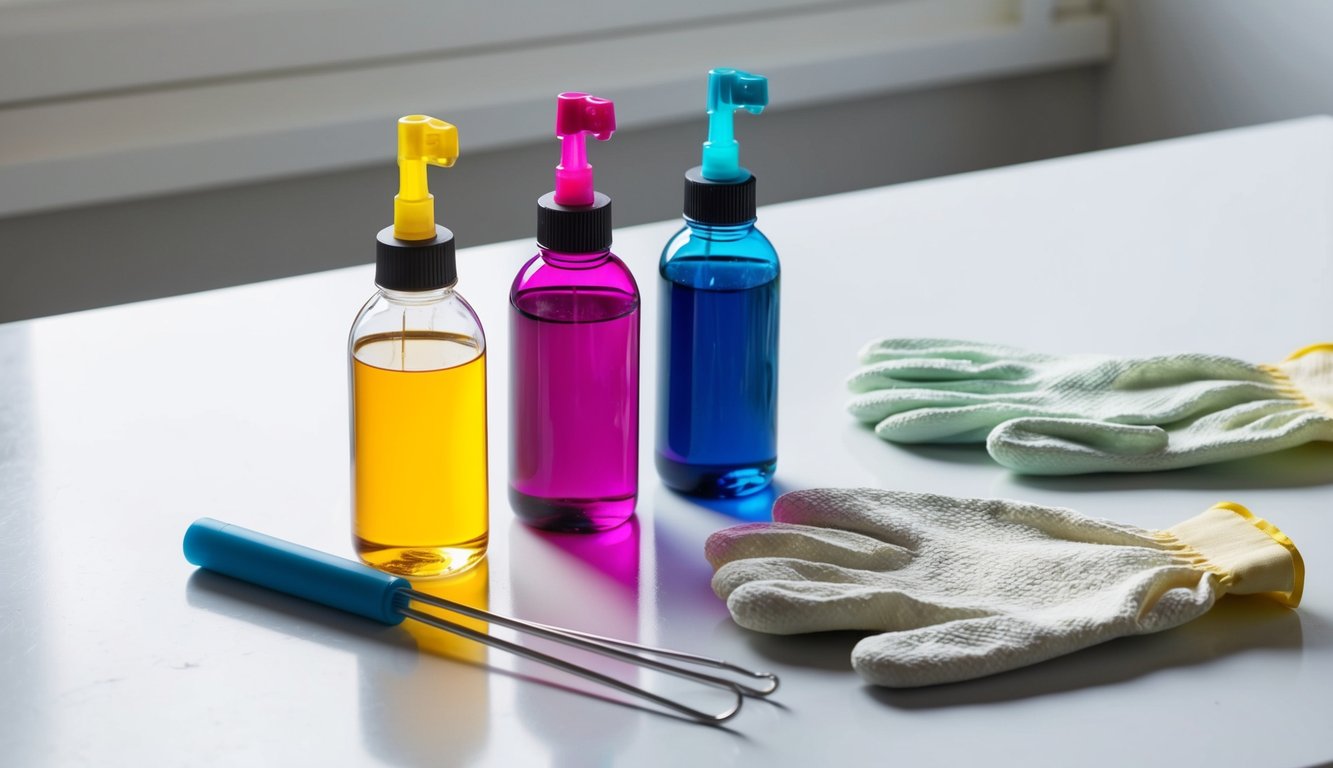
液体染料、マイカ粉末、アルコールインク
レジン専用の液体染料は、鮮やかで透明感のある仕上がりを実現します。混ぜやすく、少量で十分な効果が得られます。数滴加えて、気泡が入らないように優しくかき混ぜるだけです。
雲母粉末メタリックやパールのような効果を出すのに最適です。これらのきらめく微粒子顔料は、作品に奥行きを与えます。
手芸店や化粧品販売店などで入手できます。最良の結果を得るには、粉末を少量の樹脂と混ぜてから、メインの混合物に加えてください。
アルコールインクは、鮮やかで大胆な発色で、セル模様や波模様のようなクールな効果を生み出します。ジュエリーやアート作品に最適です。 これらのインクは樹脂の中で美しく広がり、夢のような、流れるような模様を作り出します。
プロのヒント: 着色料はごく少量から始めてください。後から追加することはできますが、一度混ぜてしまったら取り除くことはできません!
エポキシ樹脂にアクリル絵具を使用する
アクリル絵の具は、エポキシ樹脂の着色に手頃な価格で使える選択肢です。より良い仕上がりを求めるなら、クラフト用絵の具ではなく、アーティスト向けの高品質なアクリル絵の具を使用してください。絵の具は粘度が高く、発色が良いものが良いでしょう。
アクリル絵の具を使用する際は、以下の簡単なルールに従ってください。
- 樹脂混合物に塗料を加える量は10%以下にしてください。
- 筋が残らないようによく混ぜてください
- まずは少量のサンプルでテストしてみましょう。
アクリル絵の具を入れすぎると、樹脂の硬化に悪影響を及ぼす可能性があります。多すぎると、樹脂がべたついたり、柔らかすぎたりすることがあります。また、特に赤や紫などの色は、日光に当たると時間とともに退色することがあります。
不透明な仕上がりを求めるなら、アクリル絵の具が最適です。表面をコーティングしたり、単色のアイテムを作ったりするのにうってつけです。多くのクラフト愛好家は、手軽に色付けができるように、様々な種類のアクリル絵の具を常備しています。
レジンを着色する際に使用してはいけないもの
すべての着色剤がエポキシ樹脂と相性が良いわけではありません。中には作品全体を台無しにしてしまうものもあります!
食用色素は絶対に使用しないでください。うまく混ざらず、適切な熟成を妨げる可能性があります。
マニキュアも避けた方が良いでしょう。きれいな色がたくさんあって良さそうに思えるかもしれませんが、マニキュアには樹脂と反応して悪影響を及ぼす溶剤が含まれています。作品が完全に硬化しない可能性もあります。
水性製品は一般的に樹脂と混ざりにくく、完成品に気泡、曇り、分離などの問題を引き起こす可能性があります。油性着色剤も硬化に問題を引き起こすことがあります。
ラベル表示のない安価な顔料には、樹脂に悪影響を与える充填剤が含まれている可能性があります。必ず樹脂専用の高品質な乾燥顔料や着色剤、または少なくとも美術用グレードの材料を購入してください。
エポキシ顔料を取り扱う際は、必ず手袋を着用してください。一部の着色剤は、皮膚に数日間染み付くことがあります。
エポキシ樹脂を染色する手順

エポキシ樹脂の染色は、正しい手順に従えば楽しく簡単にできます。作品に美しく均一な色合いを与えるには、適切な材料と技術を使うことが重要です。
ベース樹脂を混合し、着色剤を加える
始める前に、必要な材料をすべて揃えてください。必要なものは以下の通りです。
- クリア エポキシ樹脂と硬化剤
- 着色剤(液体顔料、アルコールインク、または雲母粉末)
- ミキシングカップとかき混ぜ棒
- 手袋と保護具
まず、樹脂を混ぜて 硬化剤 パッケージの説明書に従ってください。ほとんどの樹脂は1:1の比率ですが、必ずご使用のブランドをご確認ください。両方の溶液を清潔な混合カップに注ぎます。
ベースとなる樹脂が完全に混ざり合うまでは、着色剤を加えないでください!これは非常に重要です。
最良の結果を得るには、食用色素やマニキュアではなく、樹脂専用の着色剤を使用してください。食用色素やマニキュアは、適切な硬化を妨げる可能性があります。
液体顔料が最も扱いやすいが、マイカパウダーを使うと美しいきらめき効果が得られる。
着色料はごく少量から始めましょう。液体なら数滴、粉末ならほんの少しで十分です。後から足すことはできますが、一度入れたものは取り除けません!
均一な色を出すための適切な混合方法
着色料を加える際は、ゆっくりと丁寧に混ぜてください。速く混ぜると泡が発生し、作品の仕上がりが損なわれます。
平たい棒を使って、混ぜながらカップの側面と底をこそげてください。こうすることで、混ざりきっていない樹脂や色が縁に残るのを防ぎます。 色が完全に均一になるまで、3~5分間混ぜてください。
雲母などの粉末状着色剤の場合:
- 少量を混合樹脂に加えてください。
- 一方向に優しくかき混ぜる
- 側面はこまめにこすり洗いする
- 粉末粒子がすべて溶解するまで続ける
塊ができてしまう場合は、まず少量の粉末に少量の樹脂を混ぜてペースト状にしてみてください。その後、このペーストをメインの混合物に加えると、より滑らかに混ざります。
1つのプロジェクトで複数の色を扱う
多色の樹脂作品を作る プロジェクトに驚きと感動を与えましょう!いくつかの方法を試してみてください。
レイヤーを作るには、まず1色目を流し込み、部分的に硬化させます(使用する樹脂によって30~60分程度)。次に、その上に次の色を流し込みます。こうすることで、色が混ざり合うことなく、はっきりとしたレイヤーを作ることができます。
渦巻き模様やパターンを作るには、異なる色の樹脂を並べて注ぎます。つまようじや棒を使って、色を優しく混ぜ合わせると、美しい模様ができます。混ぜすぎると模様が消えてしまうので注意してください。
「ダーティポア」というテクニックを試してみてください。
- 異なる色の樹脂を少量ずつ1つのカップに注ぎ入れる
- 混ぜないでください
- このカップの中身を作業面に注ぎます。
- 自然に形成される驚くべき模様をご覧ください
濃い色は薄い色を簡単に圧倒してしまうことを覚えておきましょう。明るい色を多めに使い、濃い色はバランスを取るためにほんの少しだけ加えるようにしてください。
レジンを正しく着色する方法を学ぶには、こちらのガイド「レジンの着色:鮮やかなDIYクラフトのためのテクニック」をご覧ください。
適切な色の濃さを得る

エポキシ樹脂に加える着色剤の量は、最終製品の見た目と強度に影響を与えます。美しく透明感のある作品を作るには、最適なバランスを見つけることが重要です。
エポキシ樹脂にどれくらいの染料を加えるべきか
着色剤はごく少量から始めてください。樹脂全体の量の約5%で十分です。着色剤が多すぎると、樹脂が適切に硬化せず、強度が低下する可能性があります。
次のテストを試してみてください。混合した樹脂に少量の着色料を加えます。清潔な棒でよくかき混ぜます。着色料を1滴、混合液に戻して色を確認します。
色が薄すぎる場合は、少しずつ色を加えてください。以下の点に注意してください。
- 粉末樹脂8オンスあたり小さじ1/8杯から始めてください。
- 液体染料淡色の場合は8オンスあたり4~6滴
- アルコールインク: 8オンスあたり2~3滴(これは非常に強力です!)
使用量を記録しておきましょう。そうすることで、次回も同じ色を出すことができます!
透明仕上げと不透明仕上げの作成
添加物によって、樹脂を透明にも不透明にもすることができます。
透明色の場合:
- アルコールインクまたは液体樹脂染料を使用してください。
- ごく少量(8オンスあたり2~3滴)加えてください。
- 泡が入らないように、よく混ぜながらも優しく混ぜてください。
不透明な仕上げの場合:
- マイカパウダーやアクリル絵の具を試してみてください。
- 8オンスあたり約1/4ティースプーンの粉末を使用してください。
- 白色顔料粉末は、色をより早く固めるのに役立ちます。
樹脂の透明度は、着色剤の添加量によって変化します。ステンドグラスのような仕上がりを目指すなら、着色剤は控えめにしてください。光を通さないような濃い色に仕上げたい場合は、より多くの顔料が必要になります。
まずは小さなサンプルで色味を試してみてください!硬化すると色が違って見えることがよくあります。
着色樹脂で特殊効果を作り出す

着色樹脂は、作品に目を引く特殊効果を生み出す無限の可能性を秘めています。適切なテクニックを用いれば、シンプルな流し込み作業も、きらめき、渦巻き、見る者を魅了する見事な芸術作品へと変貌させることができます。
渦巻き模様、マーブリング模様、重ね塗り技法
レジンに美しい渦模様を作るには、異なる色のレジンを近くに注ぎます。次に、つまようじや串を使って、色を優しく混ぜ合わせます。混ぜすぎないように注意してください。軽く数回混ぜるだけで十分です。
マーブル模様を作るには、半硬化状態の樹脂にアルコールインクを垂らしてみてください。インクが素敵な模様に広がります!また、上から少量の消毒用アルコールをスプレーすると、セルや気泡を作ることができます。
重ね塗りはとても簡単なのに、驚くほど美しい仕上がりになります。まず、薄く一色の絵の具を流し込み、少し粘り気が出てくるまで(完全に固まる前に)待ち、その上に別の色を重ねます。海の風景を描くのに最適です。白い絵の具の上に透明な青を重ねると、波のように見えますよ!
ちょっとしたコツ: クモの巣のような模様を作るには、型の中央に1色、周囲にそれとは対照的な色を配置します。そして、棒を使って中央から外側に向かって引っ張ります。
レジン作品に深みと立体感を加える
マイカパウダーは、輝きと深みを加えるのに最適なアイテムです。透明な樹脂に少量混ぜれば繊細な輝きを、多めに加えれば大胆なメタリック効果が得られます。これらのパウダーは、光の当たり方によって色が変わります!
立体感を出すには、樹脂の層の間に小さなアイテムを挟み込んでみてください。マイクログリッター、ドライフラワー、小さな貝殻などが最適です。
まず透明な層を流し込み、部分的に硬化させてから、アイテムを配置し、その上にさらに樹脂を流し込みます。
驚くほどの奥行きを出すには、透明な色を重ねて使うのが効果的です。下層に濃い色、上層に薄い色を使うことで、作品に奥行きと空間の広がりが生まれます。
寸法測定用材料:
- マイカパウダー(輝きを出すため)
・アルコールインク(細胞や動きの表現用)
- マイクログリッター(キラキラ感を出すため)
- ヒートガン(細胞を作るため)
よくある着色の問題を解決する
どんなに注意深くレジン作品を制作するアーティストでも、着色の問題に直面することはあります。でもご安心ください。ほとんどの問題には簡単な解決策があり、作品を救えるはずです!
色のムラを修正し、色移りを防ぐ
樹脂の色合いが均一でないと、せっかくの美しい作品が台無しになってしまう可能性があります。
この問題を解決するには、着色剤を樹脂に加える前に、よりしっかりと混ぜ合わせてみてください。
容器の側面と底をこそげながら、少なくとも3分間混ぜてください。
油絵具を使用する場合は、樹脂8オンスに対してエンドウ豆粒程度のごく少量だけを加えてください。多すぎると、適切に硬化しない可能性があります。
色が混ざり合ってしまう場合は、まず透明な樹脂で仕切りを作ってください。
布用染料を使用する場合は、染料を樹脂に加える前に数滴の水で薄めてください。こうすることで、染料がより均一に広がります。
こんな便利な裏技を試してみてください。頑固なムラには、樹脂がまだベタベタしているうちに、つまようじを使って染料を少し混ぜ込んでみてください。
着色樹脂の硬化問題の解決
着色樹脂は、完全に硬化するまでに時間がかかる場合があります。
作品がベタベタする場合は、おそらく着色料を入れすぎたのでしょう。
解決策は?透明な樹脂を薄く上から流し込み、硬化させることです。
マニキュアを使用する場合は、樹脂1オンスあたり1滴以下にしてください。それ以上加えると化学反応を妨げる可能性があります。
必ず、プロジェクト全体に着手する前に、少量のサンプルで硬化テストを行ってください!
ポリエステル樹脂は添加剤に対して非常に敏感です。着色剤は混合物全体の5%未満に抑えてください。
簡単なガイドはこちらです。
|
着色剤の種類 |
最大金額 |
潜在的な問題点 |
|
油絵具 |
体積比で5~10% |
柔らかさ、硬化時間の延長 |
|
ネイルポリッシュ |
1オンスあたり1滴 |
表面の粘着性 |
|
布用染料 |
1オンスあたり2~3滴 |
色のにじみ |
室温も重要です!最適な硬化結果を得るには、作業スペースの温度を70~75°F(約21~24℃)に保ってください。温度が低すぎると、着色樹脂は硬化しにくくなります。
エポキシ樹脂に最適な染料:混ぜて、注いで、驚かせよう!という記事を読んで、あなたのプロジェクトに最適な染料の種類を見つけてください。
結論
エポキシ樹脂に色を加えることで、創造的な可能性がぐっと広がります!マイカパウダー、液体顔料、アルコールインク、さらにはネイルパウダーなど、さまざまな着色剤を使って、作品に美しい効果を生み出すことができます。
着色剤は少量から始め、必要に応じて追加していくようにしてください。こうすることで、材料を無駄にすることなく、最終的な仕上がりをコントロールできます。
木材の研磨粉は、エポキシ樹脂に自然な色合いを加えるための安価な方法であることを忘れないでください。この方法を使えば、費用を節約しながら、作品にユニークでオーガニックな外観を与えることができます。
樹脂と着色剤の両方について、必ず製造元の指示に従ってください。これにより、最良の結果が得られ、着色樹脂が適切に硬化します。
試行錯誤も楽しみの一つ!様々な色を混ぜ合わせたり、渦巻き模様を描いたりして、世界に一つだけの作品を作ってみましょう。もしかしたら、あなただけのシグネチャースタイルとなるテクニックが見つかるかもしれません。
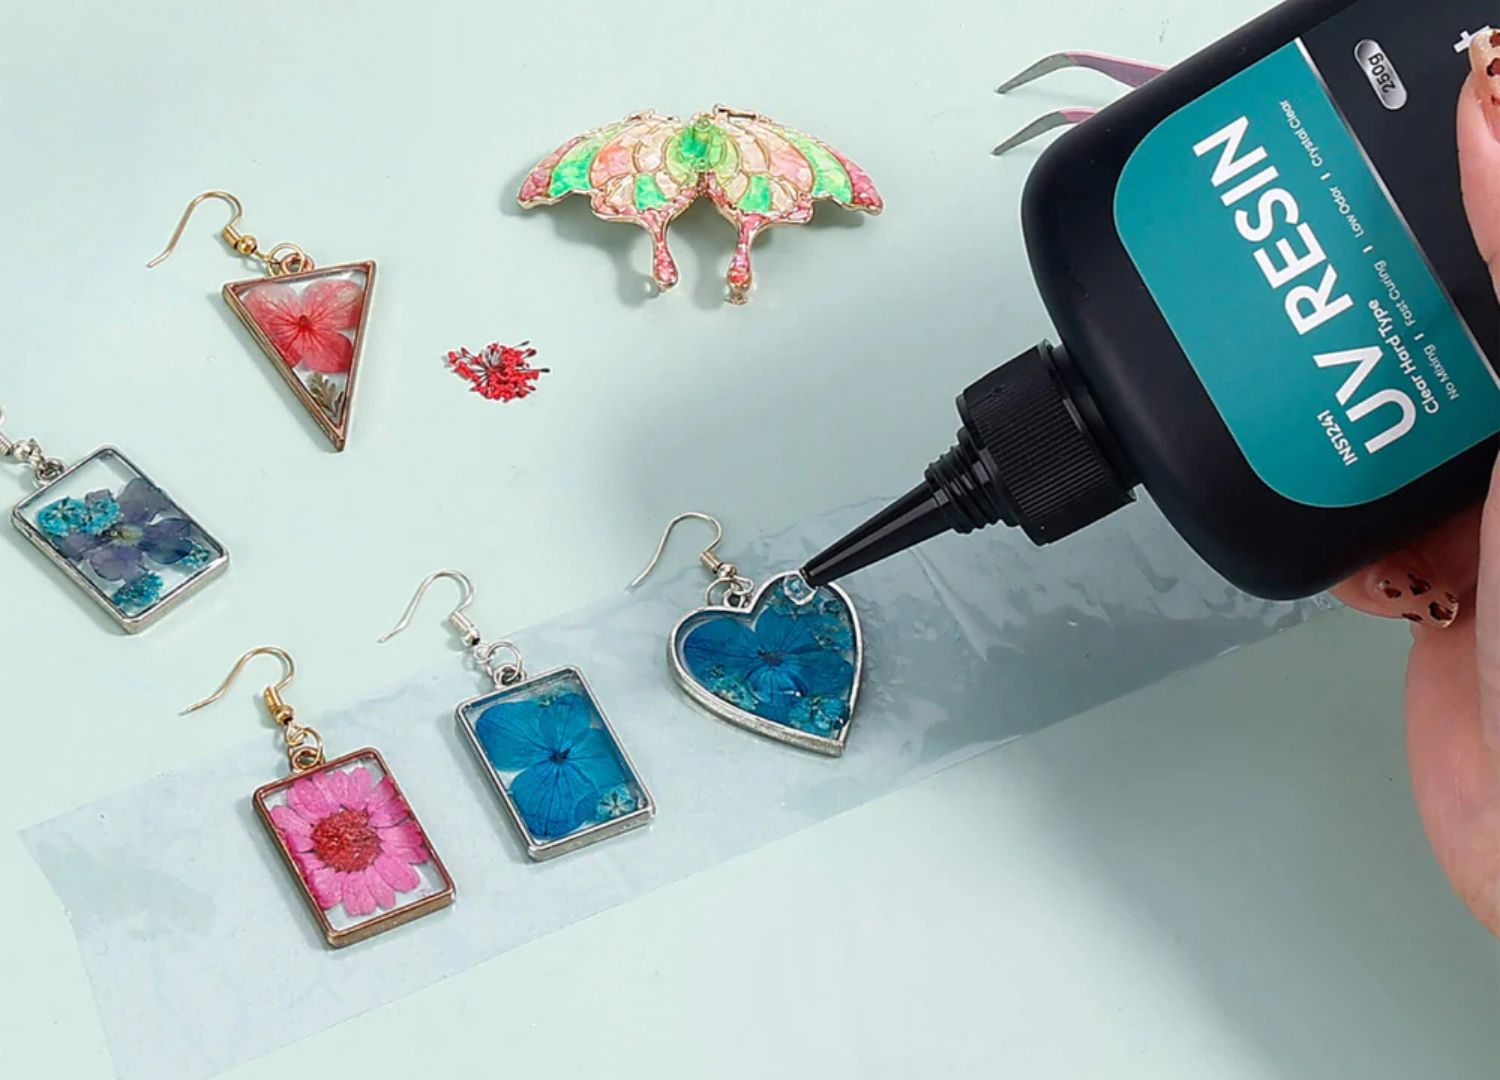
学んだ新しいテクニックを使って、レジンジュエリーを作ってみましょう。ガイドをご覧ください。 初心者向けレジンジュエリー作り:最初から最後までを網羅したガイドもっと詳しく知りたい方はこちら!
よくある質問
エポキシ樹脂を使った作品に鮮やかな色を加える最良の方法は何ですか?
鮮やかな発色を求めるなら、アルコールインクや液体顔料が最適です。これらは樹脂と簡単に混ざり合い、ダマになりません。最初は数滴だけ加え、必要に応じて量を増やしてください。
マイカパウダーは美しい輝き効果ももたらします。メタリックな仕上がりに最適です。樹脂を加える前に、硬化剤に色を混ぜておくことを忘れないでください。
樹脂専用の着色剤を使用すれば、常に最も確実な結果が得られます。樹脂の硬化過程に影響を与えることもありません。
アクリル絵の具を使ってエポキシ樹脂に深みのある色合いを出すことはできますか?
はい、少量であればアクリル絵の具を使用できます。絵の具が多すぎると、樹脂が適切に硬化しなくなる可能性があります。混合液中の絵の具の割合は10%以下に抑えてください。
液状のアクリル絵具は、粘度の高いものよりも扱いやすいです。混色も容易です。最良の結果を得るには、樹脂を加える前に、まず絵具と硬化剤を混ぜてください。
アクリル絵の具を使うと、樹脂が少し濁ってしまうことがあると、クラフト愛好家の中には感じる人もいます。完全に透明な仕上がりを求める場合は、まずテストピースで試してみてください。
エポキシ樹脂を着色する際に、美しい木目調の仕上がりを得るにはどうすればよいですか?
木工品には、透明感のある琥珀色や蜂蜜色の塗料が最も自然な仕上がりになります。これらの色は木目を隠すのではなく、際立たせてくれます。
様々な茶色の色合いを混ぜ合わせることで、特定の木材の種類に合わせた色合いにすることができます。ほんの少し黒を混ぜると、暗くなりすぎずに色味を深めることができます。
川をイメージしたテーブルには、青やターコイズブルーに白を混ぜると、素晴らしい水の表現が生まれます。ほんの少しメタリックパウダーを加えると、繊細な輝きが加わります。
エポキシ樹脂を使ったデザインで、濃い黒色を作り出すことは可能でしょうか?
はい!真の黒色を出すには、樹脂専用の黒色顔料を使用してください。一般的な手芸用染料は、黒ではなく灰色や紫色になってしまうことがよくあります。
想像以上に多くの黒色顔料が必要になります。少量ずつ加えていき、好みの濃さになるまで調整してください。
深みのある立体的な黒色にするには、少量の銀または金を加えてみてください。 雲母粉末これにより、銀河のような効果が生まれます。
手芸に液体樹脂染料を使う際に知っておくべきことは何ですか?
液体染料は樹脂と非常によく混ざります。斑点や色のムラも残りません。少量で十分なので、まずは数滴から始めてください。
液体染料は、涼しく暗い場所に保管してください。光や熱によって、時間の経過とともに色褪せてしまうことがあります。使用後は必ずキャップをしっかりと閉めてください。
エポキシ樹脂アートの着色に食用色素を使うのは良い方法でしょうか?
食用色素は樹脂には最適ではありません。水性なので、樹脂の硬化を妨げる可能性があります。
作品はべたついたり、柔らかいままになるかもしれません。
どうしても食用色素を使う場合は、ごく少量にしてください。ほんの一滴だけをよく混ぜてください。
ジェル状の食用色素は、液体状のものよりも効果的です。
より良い仕上がりを目指すなら、適切な樹脂着色剤に投資しましょう。それほど高価ではありませんし、仕上がりの信頼性も格段に向上します。


コメントを書く
このサイトはhCaptchaによって保護されており、hCaptchaプライバシーポリシーおよび利用規約が適用されます。