ネットでよく見かける、あの美しく艶やかなアート作品を、レジンを使ってどうやって作ればいいのか、気になったことはありませんか?まさにここがぴったりの場所です!レジンはまるで魔法のボトル。シンプルなアイデアを、光と色彩を捉えた息を呑むようなアート作品へと変身させ、きっと友達から「どうやって作ったの?!」と聞かれることでしょう。
さあ、始めましょう!レジンを混ぜたことがない全くの初心者の方も、いくつか作品を作ってみてスキルアップを目指したい方も、ご安心ください。キッチンにレジンが飛び散らないようにする方法から、プロが作ったような魅惑的なセルやエフェクトの作り方まで、すべてを丁寧に解説します。さあ、一緒に素晴らしいレジンアートを作り始めましょう!
自信を持ってレジン作りの旅を始めませんか?当社のレジンスターターキットをご利用ください。 最初のプロジェクトからプロ並みの成果を出すために必要なものをすべて含めましょう。
レジンの使い方:入門編

レジンアートは、始める前に入念な準備が必要です。適切な道具、作業スペース、そしてレジンの種類に関する知識があれば、芸術的な旅を成功に導くことができます。
必要な道具と材料
レジンアートを始めるには、特定の材料が必要になります。 エポキシ樹脂は主成分であり、通常は樹脂と硬化剤の2液性システムとして提供されます。
高品質のものを購入する アートレジンクリエイティブなプロジェクト向けに作られています。その他の必須ツールは以下のとおりです。
- 計量カップ明確な容量表示付き
- 混ぜ棒またはシリコン製スパチュラ
- 肌を保護するニトリル手袋
- 化学蒸気対応の防じんマスク
- ヒートガンまたはトーチで気泡を取り除く
- 作品を飾る平らな面またはキャンバス
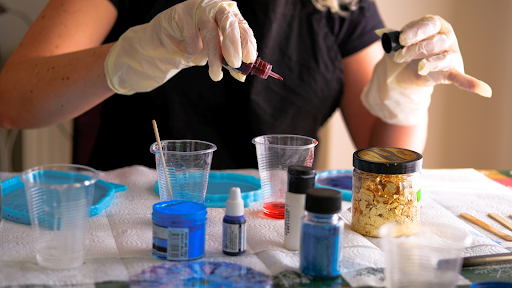
- 着色剤( 雲母粉末)(アルコールインク、または樹脂染料)
- ベースとして木製パネルまたはシリコン型を使用する
作業場所を保護するために、使い捨ての養生シートを使用してください。初心者は、大量の材料を購入する前に、まずは小さなプロジェクトで練習することをお勧めします。
安全な作業スペースの設置
安全第一 樹脂を使った作業・子供やペットの手の届かない、風通しの良い場所を選んでください。
窓を開けるか扇風機を使って空気の流れを良くし、煙を減らしましょう。作業スペースはビニールシートで覆い、こぼれを防ぎましょう。
樹脂は一度硬化すると除去するのが非常に困難です。樹脂が意図しない方向に流れ出ないように、平らで水平な場所で作業してください。
最適な結果を得るには、作業スペースの温度を70~75°F(21~24°C)に保ってください。低温では硬化が遅くなり、高温では樹脂が急速に硬化してしまいます。
こぼれた液体を素早く処理できるよう、ペーパータオルとイソプロピルアルコールを用意した清掃ステーションを常に準備しておきましょう。未硬化の樹脂は有毒なので、取り扱いには十分注意してください。
樹脂にはどのような種類がありますか? ?
いくつかの 樹脂の種類 さまざまなクリエイティブなニーズに対応するユニークな物件を提供します。
- エポキシ樹脂初心者にも扱いやすく、作業時間も十分で、仕上がりも非常にクリアです。ほとんどの初心者向けプロジェクトに最適です。
- アートレジン紫外線安定剤を配合しており、黄ばみを防ぎ、鮮やかな色を長期間保ちます。
- 鋳造用樹脂深めの注型や3D形状の造形に優れ、硬化時の発熱量が少ないため、厚塗り時のひび割れを防ぎます。
- UV樹脂 紫外線に照射された時のみ硬化するため、UVランプの下に置くまで作業時間は無制限です。細かい作業に最適です。
レジンを選ぶ際は、作品の厚み、必要な作業時間、希望する仕上がり(光沢仕上げかマット仕上げか)、そして屋内用か屋外用かを考慮してください。少量の異なるブランドを試してみて、自分の技術や環境に最適なものを見つけましょう。
基本的なレジンアート技法

レジンアートを成功させるには、まずいくつかの基本的なテクニックを習得することから始めましょう。これらのスキルを身につけることで、よくあるミスを避け、プロ並みの仕上がりを実現できます。
適切な混合方法
樹脂を正しく混合することは非常に重要です。樹脂と硬化剤は必ずメーカーの指示に従って計量してください。通常は1:1の比率です。
清潔な計量カップを使用し、硬化剤を樹脂に注ぎ入れます。容器の側面と底をこそげながら、3~5分間、優しく、しかししっかりとかき混ぜます。
8の字を描くように混ぜると、気泡が入りすぎるのを防ぐことができます。温かい環境(約24℃)は樹脂の流れを良くし、混合を容易にします。
気泡のない注ぎ方
気泡はレジンアートの透明な仕上がりを損なう可能性があります。混合後、レジンを5~7分間放置して、大きな気泡が表面に浮き上がってくるのを待ちましょう。
作業台から約15センチほど上の位置から、樹脂をゆっくりと細い流れで注ぎます。こうすることで気泡が分散され、滑らかな流れになります。
ヒートガンまたはトーチを表面に軽く当てて、残っている気泡を消します。熱源を3~4インチ(約7.5~10cm)離し、一箇所が過熱しないように常に動かし続けてください。
白いレジンは気泡が入りやすいので、使用する際は特に注意が必要です。気泡を減らすために、混合する前にレジンボトルをぬるま湯で温めておくと良いでしょう。
顔料と染料の扱い方
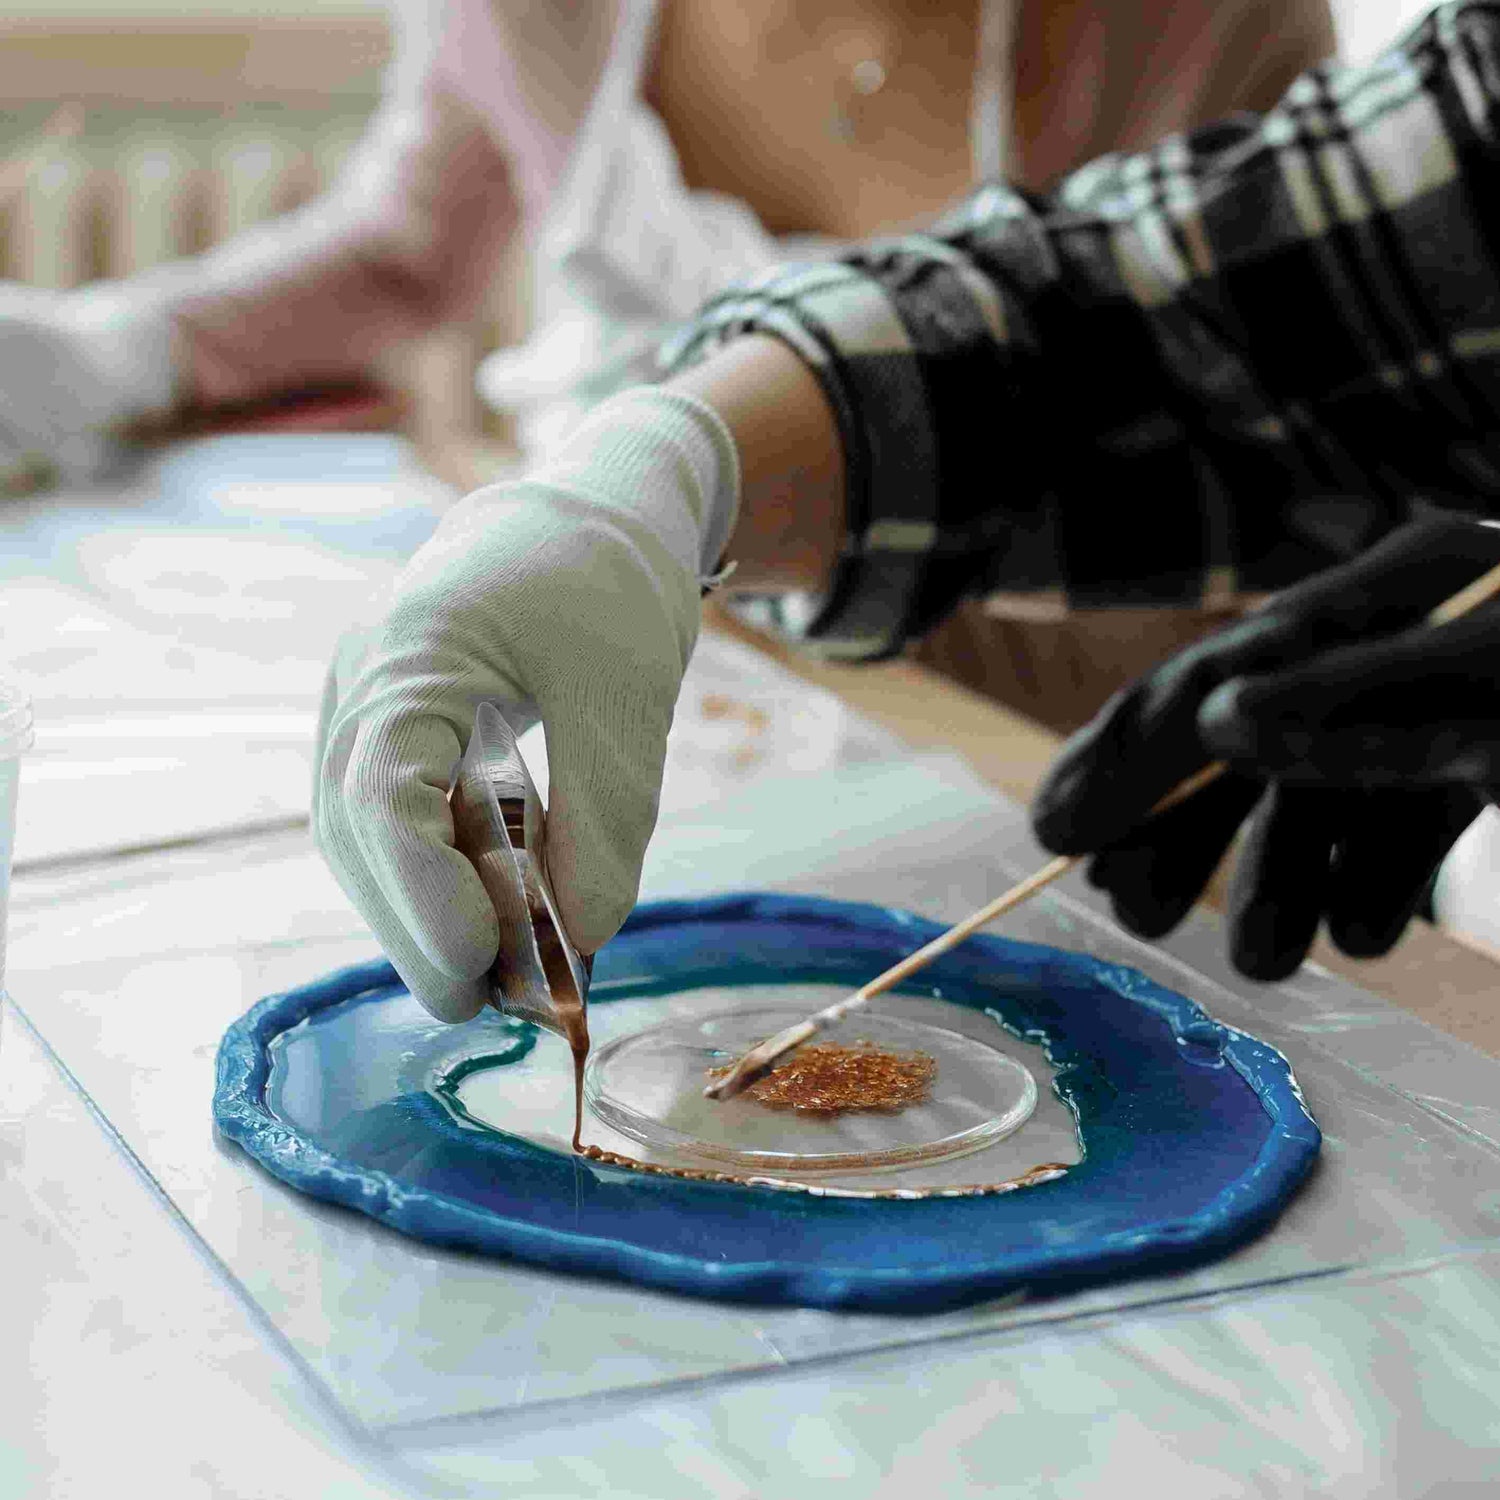
少量の顔料から始めましょう。透明な仕上がりにするには、樹脂1オンスあたり1~2滴の染料を使用します。不透明な仕上がりにするには、さらに量を増やしてください。
まず少量の樹脂に顔料を混ぜ込み、それからこの着色済みの樹脂をメインの樹脂に加えます。こうすることで、顔料の塊を防ぎ、均一な発色が得られます。
樹脂にアクリル絵具を混ぜることもできますが、全体の体積の10%以下に抑えてください。樹脂専用の顔料を使うと、通常はより良い結果が得られます。
さまざまな製品を試して、それらがどのように相互作用するかを確認してください。顔料の中には沈むものもあれば浮くものもあり、重ねると面白い効果が得られます。
今後のプロジェクトのために、色の配合に関するメモを取っておきましょう。
初めてのレジン作品作りに挑戦する

複雑なデザインに挑戦する前に、まずは簡単なプロジェクトから始めて自信をつけましょう。これらの初心者向けのプロジェクトは、最小限の道具で基本的なテクニックを学ぶことができます。
シンプルなコースターとトレイ
コースターやトレイは、基本的な樹脂加工技術を学びながら、実用的で人に贈ることもできるアート作品を作るのに最適な、最初のプロジェクトです。
必要な材料:
- シリコン型
- エポキシ樹脂
- 装飾要素(ドライフラワー、金属顔料)
プロセス:
- 指示に従って樹脂を混合し(通常は1:1の比率)、3~5分間ゆっくりとかき混ぜる。
- 型に薄いベース層を流し込む
- 土台が少しベタベタしてきたら(約30分後)、飾り付けをしてください。
- 残りの樹脂を装飾品の上に注ぎます。
- ヒートガンまたはトーチで気泡を取り除く
- 型から取り出す前に24時間、使用する前に72時間置いてください。
レジンジュエリーの基礎知識
レジンジュエリーは、ミニチュアの世界で創造性を探求することを可能にし、この多用途な素材を使って、あなたの成長していくスキルを披露する身につけられるアート作品を生み出すことができます。
必要な材料:
- シリコン製ジュエリー型
- 紫外線またはエポキシ樹脂
- UVランプ( UV樹脂)
- ジュエリーパーツ
- 装飾要素
プロセス UV樹脂:
- まず型に飾りを入れます
- 完全に覆うためにUV樹脂を数滴加える
- 紫外線ランプ(2~4分)または日光(15~20分)で硬化させる。
- ジュエリー用接着剤で金具を取り付けます。
- 必要に応じて研磨して磨く
エポキシ樹脂の製造工程:
- 同じ配置と注ぎ方の手順に従ってください
- 硬化には24時間以上かかります。
- 金具を取り付け、研磨し、磨き上げて仕上げます。
装飾的な壁掛けアート
壁面アートは、これまでで最も大きなキャンバスとなり、奥行き、動き、そして視覚的なインパクトを備えた、見る人を魅了する素晴らしい作品を生み出すことを可能にします。
必要な材料:
- キャンバスまたは木製パネル
- 白色アクリル絵具/プライマー
- エポキシ樹脂
- アルコールインクまたは樹脂顔料
- ヒートガン
プロセス:
- 表面を白色のアクリル塗料/プライマーで密封する
- 1/8インチの厚さになるように樹脂を混ぜる。
- 複数の色に分けるためにカップに分ける
- カップ1杯につき着色料を2~3滴加える
- キャンバス全体に模様を流し込む
- ヒートガンを使ったり、色を混ぜ合わせたりして効果を生み出す
- 平らで埃のない場所で24時間以上乾燥させてください。
素晴らしいレジンアートの秘訣は、高品質な素材選びから始まります。当社のクリアエポキシ樹脂コレクションをご覧ください。 プロフェッショナルが信頼する、透明度が高く、気泡が入りにくい処方を実現します。
高度な樹脂技術
基本をマスターしたら、これらの高度なテクニックを試して、見事な効果を持つプロ級の作品を作りましょう。これらの方法は練習が必要ですが、あなたの作品のレベルを格段に引き上げてくれるでしょう。
細胞の作成と特殊効果
レジンアートにおけるセルとは、有機的な外観を持つ泡状の模様のことです。セルを作るには、着色レジン1オンスあたりシリコンオイルを2~3滴加えてください。
つまようじで優しく混ぜ、混ぜすぎないように注意してください。トーチまたはヒートガンで表面を素早く加熱し、シリコンが膨らんでセル状の模様が形成されるようにします。
大理石模様を作るには、「ダーティポア」という技法を使います。絵の具をあらかじめ混ぜておき、それらを一つのカップにまとめてからキャンバスに注ぎます。
こうすることで、混ぜすぎずに美しい渦模様を作ることができます。アルコールインクを透明な樹脂に数滴加えると、鮮やかで半透明な効果が得られます。
インクルージョンを扱う
インクルージョンとは、樹脂に埋め込まれた、奥行きと面白みを加えるためのアイテムのことです。人気のあるオプションには以下のようなものがあります。
- 自然要素ドライフラワー、葉、貝殻
- メタリックなアクセント金箔、金属片、グリッター
- 紙製品写真、イラスト、地図
気泡や変色を防ぐため、天然素材のインクルージョンは完全に乾燥させてください。多孔質の素材は、まず薄い樹脂層で密封してください。
薄く樹脂を流し込み、少し粘着性が出てきたら、中に入れ物を配置し、その上から最後の層を流し込みます。
下地が少し乾いて粘着性が出てきたら、金箔を貼り付けます。柔らかいブラシで優しく押さえつけ、別の樹脂層でコーティングします。
異物が浮いてしまう場合があります。つまようじを使って押し下げるか、層の間に挟み込んでください。
多層注型法
樹脂を重ね塗りすることで、作品に深みが生まれます。各層が少し粘着性のある状態になるまで硬化させてから次の層を重ねてください。硬化時間は、使用する樹脂の種類や室温によって異なりますが、通常は4~6時間です。
立体感を出すには、最初の層に小さな水たまりのように樹脂を流し込み、「樹脂の島」を作ります。樹脂が少し固まったら、さらに別の層を重ねて、浮いているような効果を出します。
中心点の周りに異なる色の樹脂をリング状に流し込む「輪郭流し」を試してみてください。色の境目はヒートガンで加熱して滑らかに仕上げましょう。
色の重ね合わせのコツ:
- 一番下に透明なレイヤー、一番上に不透明なレイヤーを配置します。
- 中間層には反射のために白またはメタリックカラーを使用する
- 層の厚さを一定に保つ(約1/8インチ)
晶洞のような効果を出すには、青色と透明の樹脂を薄く重ね塗りし、層の間に白やメタリックなアクセントを加えます。
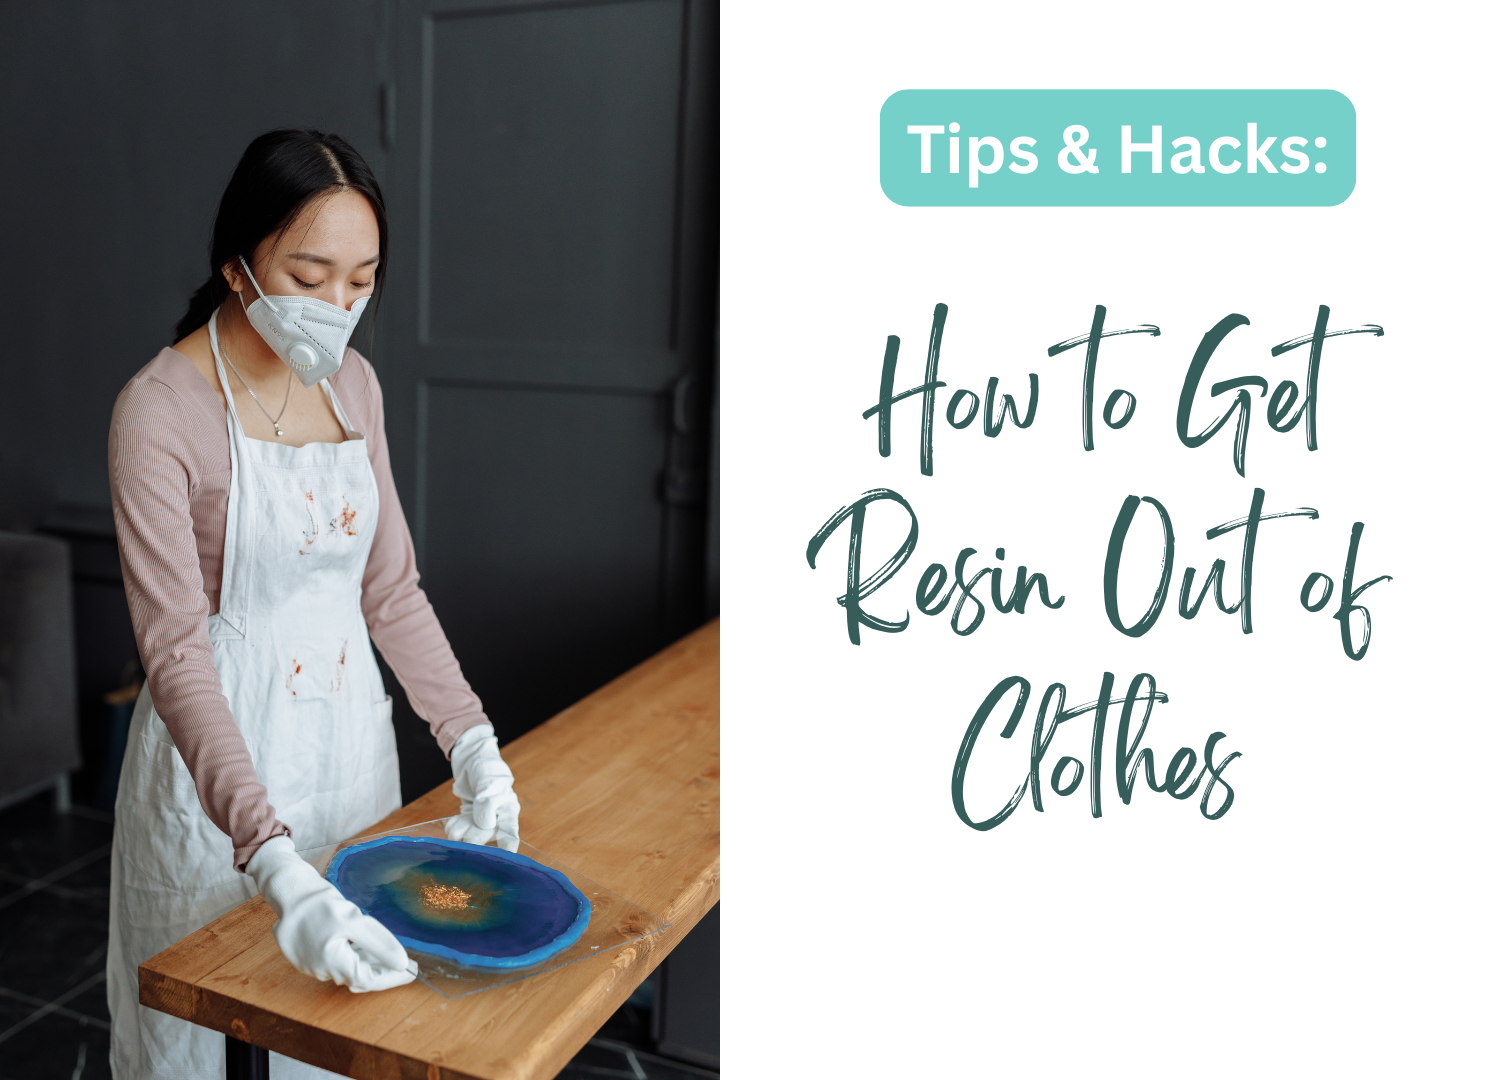
レジンアートの仕上げ方と展示方法
適切な仕上げは、 樹脂製の部品 シンプルな工芸品からプロの芸術作品まで、見た目と耐久性の両方を向上させます。
レジンアートの研磨と磨き方
完璧な仕上がりへの道は、作品の真の可能性を引き出す適切な研磨技術から始まります。
400番の耐水サンドペーパーから始め、徐々に3000番へと番手を上げて研磨します。傷や粉塵の吸入を防ぐため、研磨中は表面を常に湿らせておいてください。研磨後は、柔らかいマイクロファイバークロスに樹脂系研磨剤または自動車用コンパウンドを塗布し、円を描くように磨いてください。
研磨の重要なヒント:
- 目に見える傷跡を避けるため、必ず一方向に研磨してください。
- サンドペーパーの寿命を延ばし、仕上がりを向上させるために、潤滑剤として水を使用してください。
- 休憩を取りながら、さまざまな照明の下で進捗状況を確認しましょう。
大型の作品の場合は、オービタルサンダーを使うと作業効率が上がりますが、熱による損傷を防ぐため、軽い力で研磨するようにしてください。作品によって必要な仕上げ方法は異なります。ジュエリーは、完璧な輝きを得るために、壁掛けアートよりも繊細な仕上げが求められます。
作品を密封して保護する
適切な密封処理を施すことで、特に光にさらされたり、人が触れたりする場合でも、作品の美しさを長年にわたって保つことができます。
紫外線に強いスプレーシーラントは迅速な保護効果を発揮し、最後に紫外線に強い樹脂を薄く塗布することで最大限の耐久性が得られます。作品によっては、より控えめな光沢を出すためにワックスコーティングを好むアーティストもいます。
保護に関する考慮事項:
- 頻繁に扱うアイテムには、追加の保護層を設ける
- 明るい場所に展示する作品には、UV安定剤を使用してください。
- 指紋を防ぐため、塗布時は手袋を着用してください。
- 未使用のシーラントは適切に保管してください。ほとんどのシーラントは使用期限が限られています。
最適な仕上がりと耐久性を実現し、作品の美しさを長年にわたって維持するためには、保護層の間には必ず完全な硬化時間を設けてください。
専門的な機器を使って、レジンアートをアマチュアレベルからプロレベルへと引き上げましょう。当社のレジンマシン 気泡を除去し、毎回完璧な硬化を実現します。
結論:樹脂の使い方
レジンアートを極めることは、技術力と創造性を融合させた、やりがいのある旅です。基本的な作品からより複雑なデザインへと進むにつれて、この多用途な素材に対するあなた独自のスタイルとアプローチが確立されていくでしょう。
レジン作品制作において、忍耐と練習は何よりも大切な味方であることを忘れないでください。一つ一つの作品を通して自信がつき、技術の幅が広がり、最終的にはより素晴らしい作品を生み出すことができるようになります。
友人や家族のために特別なものを作る準備はできていますか? 樹脂製ギフトアイデア究極ガイドあなたの新しいスキルを、相手が大切にしてくれるような意味のあるプレゼントに変えるためのインスピレーション。
よくある質問:樹脂の使い方
樹脂はどのように塗布するのですか?
まず、樹脂と 硬化剤 パッケージの指示に従い、推奨時間、よくかき混ぜてください。混合液を作業台に注ぎ、中心から外側に向かって広げ、全体に均一に塗布してください。立体物の場合は、薄く塗り重ね、各層の間に部分的に硬化させることで過熱を防いでください。
レジン加工は初心者でも簡単にできますか?
レジンを使った工作は初心者にも取り組みやすいですが、細部への注意と説明書の正確な遵守が求められます。コースターや小さなアクセサリーなどのシンプルな作品は、自信をつけるための良い出発点となります。ほとんどの初心者は、基本的なテクニックを練習し、適切な寸法を理解すれば、満足のいく作品を作ることができます。
樹脂に水を混ぜてもいいですか?
いいえ、水は樹脂に混ぜてはいけません。水が混ざると適切な硬化が妨げられ、濁りが発生します。水を加えると気泡や弱点が生じ、完成品の構造的完全性が損なわれます。樹脂加工専用に設計された、互換性のある着色剤と添加剤のみを使用してください。
樹脂を扱うには何が必要ですか?
必要な材料は、エポキシ樹脂、硬化剤、計量カップ、攪拌棒、水平な作業台です。個人用保護具としては、ニトリル手袋、防じんマスク、換気の良い作業スペースが必要です。その他、気泡除去用のヒートガン、シリコン型、着色剤、作業エリア保護カバーなども役立ちます。


コメントを書く
このサイトはhCaptchaによって保護されており、hCaptchaプライバシーポリシーおよび利用規約が適用されます。