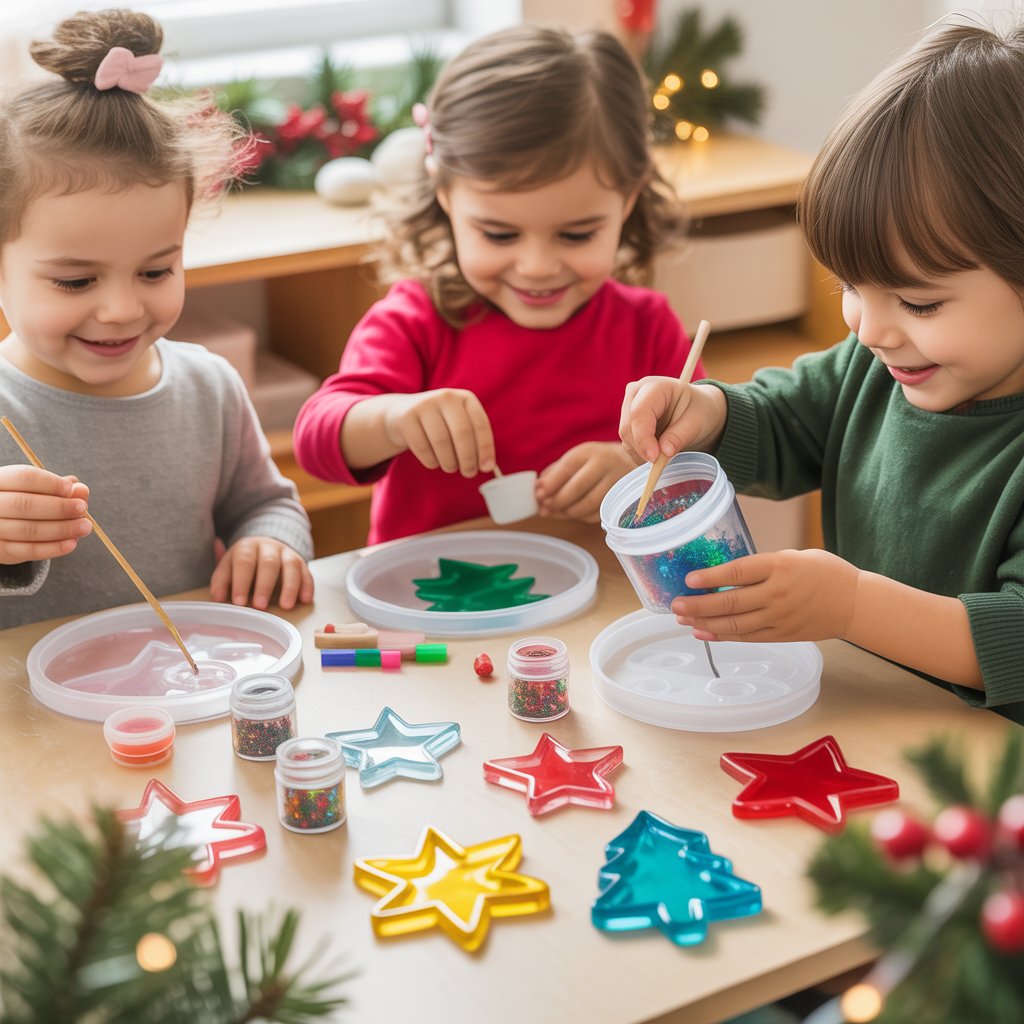
Resin Christmas crafts for adults let you create personalized ornaments, decor, and gifts with a professional finish using simple tools and materials.
You can easily craft unique pieces that add sparkle and warmth to your home or make memorable handmade presents.
With a few key supplies, like epoxy resin, silicone molds, and festive pigments, you can turn creative ideas into glossy coasters or shimmering pendants.
Each project brings a bit of holiday magic to your space while reflecting your own style and creativity.
Essential Supplies and Tips for Resin Christmas Crafts

Working with clear resin lets you create ornaments, coasters, trays, and other Christmas crafts for adults with precision and creativity.
You’ll need to understand your materials, handle them safely, and choose eco-friendly methods to keep your resin art both beautiful and responsible.
Choosing the Right Type of Resin

Resiners® 32 oz Crystal Clear Epoxy Resin Starter Kit
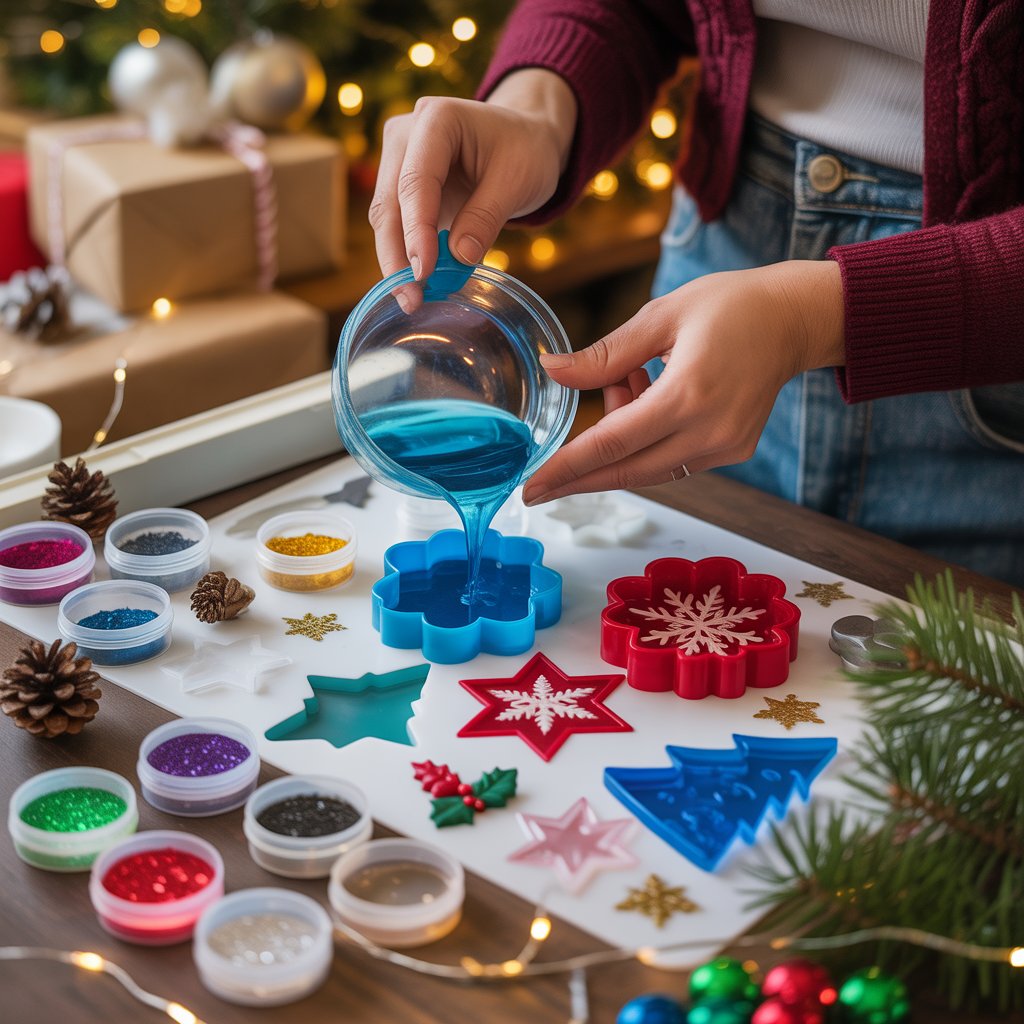
Selecting the right resin affects both the look and durability of your project. Epoxy resin is ideal for beginners because it mixes easily and cures with a glossy finish. It’s great for items like ornaments and coasters.
Polyester resin cures faster and works best for molds that need hardness and scratch resistance but has a stronger smell.

UV resin hardens quickly under UV light, making it useful for smaller decorations or when you need quick results. Check the mix ratio on the product label to avoid sticky or soft finishes. Always measure accurately by weight or volume using a digital scale or mixing cup.
If you plan to add pigments or glitter, choose a resin with a good open time so you can work without rushing. Store your resin in a dry place at room temperature. Cold resin can form bubbles more easily and take longer to cure.
Must-Have Tools and Safety Gear

Resiners® 3D Christmas Resin Molds Set
A few basic tools make resin crafting smoother and safer. You’ll need silicone molds, mixing cups, wooden sticks, and heat sources like a small butane torch or heat gun to remove bubbles.
A silicone mat protects your workspace and makes cleanup simple. Safety matters as much as creativity.
Use nitrile gloves to protect your hands and a respirator mask rated for organic vapors in rooms with poor airflow. Keep a box of baby wipes or rubbing alcohol nearby for quick cleanup before resin cures.
Here’s a simple setup checklist:
|
Item |
Purpose |
|
Silicone molds |
Shape resin into ornaments, coasters, pendants |
|
Mixing cups & sticks |
Measure and mix resin and hardener |
|
Heat gun or torch |
Remove bubbles from surface |
|
Protective gear |
Keep skin and lungs safe during work |
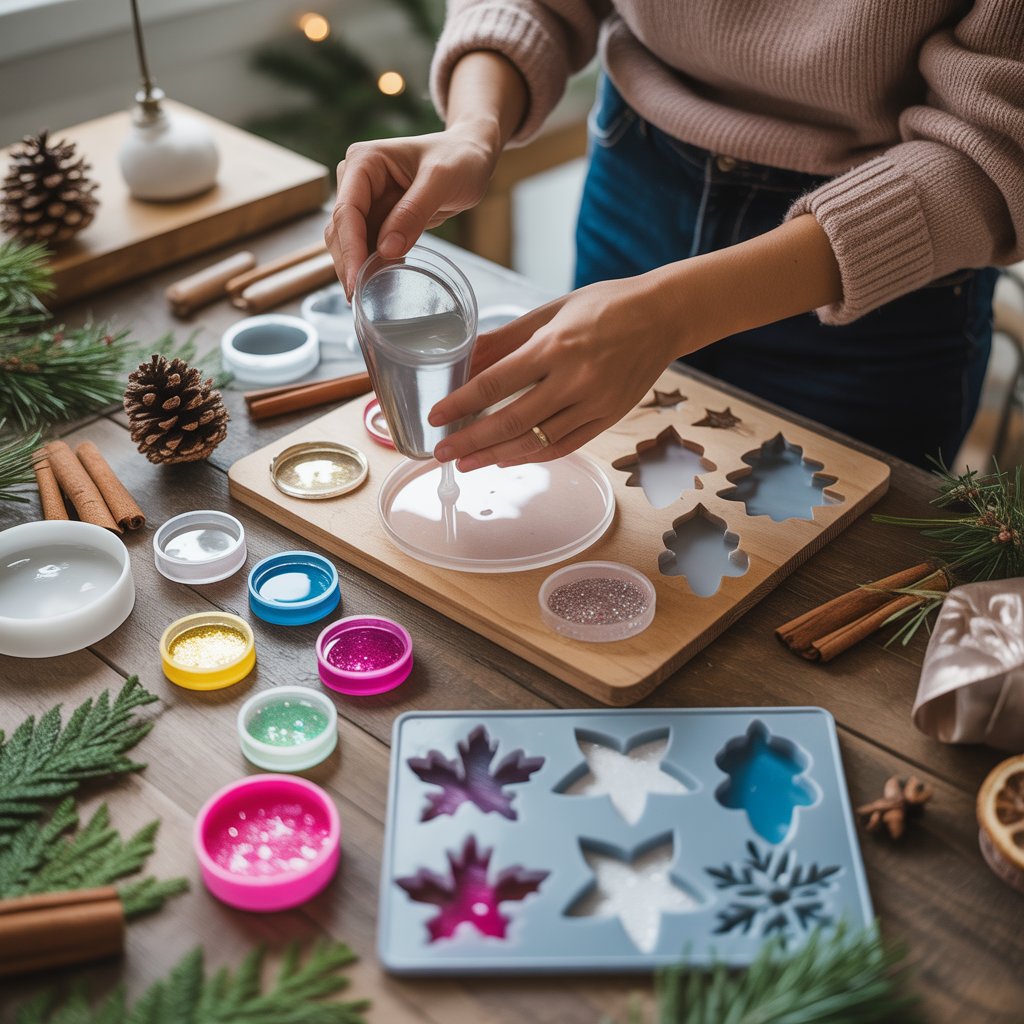
Colorants, Inclusions, and Embellishments

Resiners® 24 Colors Holographic Iridescent Loose Glitter
Adding color and texture turns clear resin into festive art. Use mica powders, resin dyes, or alcohol inks for rich, even tones. Start with small amounts—a little colorant goes far. Stir gently to prevent air bubbles, which can cloud the finish.
For a Christmas touch, embed glitter, metallic flakes, dried flowers, or tiny charms. Layer these items carefully between resin pours to keep them from floating.

Resiners® 100Pcs Dried Pressed Flowers
You can also use translucent pigments for a stained-glass effect or opaque powders for bold contrast. If you mix materials like wood or metal with resin, seal them first to prevent moisture bubbles. Choose decorations that can withstand resin’s curing heat, especially if using UV or fast-curing formulas.
Sustainable Crafting Practices
Creating sustainable holiday decor starts with smart choices. Look for bio-based or low-VOC resins made with plant-derived ingredients when available. These reduce fumes and the use of petrochemical materials.
You can also reuse silicone molds and tools instead of disposable ones. Mix only what you need; leftover resin usually can’t be saved once blended.
Use biodegradable glitter, natural pigment powders, or recycled materials for inclusions. Even small changes, like choosing compostable stir sticks, help reduce waste.
Dispose of resin waste responsibly. Let it cure completely before discarding and never rinse uncured resin down the sink.
DIY Resin Ornaments and Tree Decorations

You can create long-lasting DIY Christmas ornaments using clear resin, color pigments, glitter, and small decorative items. These Christmas crafts let you design festive pieces that reflect your own style while adding a handmade touch to your holiday décor.
Classic Resin Christmas Ornaments
- Start with clear resin and silicone molds in shapes like spheres, stars, or snowflakes.
- Mix resin according to the package directions and pour it slowly to reduce air bubbles.
- Use a 1:1 resin-to-hardener ratio unless the brand suggests otherwise.
- Before pouring, you can mix in metallic flakes, mica powder, or fine glitter. A small stir stick helps spread the shimmer evenly.
- Try layering colors for more depth without making the design too busy. After curing for 24–48 hours, remove the ornaments from the molds.
- Sand the edges lightly and drill a small hole for a hook. Finish with a ribbon or metallic cord.These ornaments look striking when the lights of the Christmas tree shine through the resin.
Quick tip table:
|
Step |
Key Tools |
Notes |
|
Mixing |
Disposable cups, stir sticks |
Mix slowly to avoid bubbles |
|
Coloring |
Mica powder, glitters |
Use small amounts for transparency |
|
Finishing |
Sandpaper, ribbon |
Polish for shine |
Encapsulating Mini Christmas Scenes
You can give your resin Christmas ornaments extra charm by embedding small decorations inside. Use mini trees, snowflakes, beads, or figurines made of plastic or metal. Keep them lightweight to prevent sinking.
Place the items in the mold first, then pour a thin layer of clear resin. Once it sets slightly, pour another layer to seal the scene. This multi-layer approach prevents floating and keeps your tiny objects centered.
Add fine white glitter between layers to mimic falling snow. A round or dome-shaped mold works best for this method. Once hardened, these 3D ornaments become little snow globes that hang beautifully on your tree and make unique Christmas decorations.
Try using color tints sparingly so the inner details stay visible. A touch of pearl pigment can create a frosty background that catches light well.
Personalized Keepsake Decorations
Personalized decorations make thoughtful gifts and memorable keepsakes. Incorporate photos, names, or small trinkets inside DIY resin ornaments.
Print photos on waterproof paper and seal them with clear tape before embedding to prevent smudging. Add initial letter charms, dates, or handwritten notes for a personal touch.
Arrange everything face down in the mold if you want the front to show clearly once set. Pour resin slowly and in stages, pausing between layers to ensure good placement.
You can also include pressed flowers, holiday ribbons, or fabric scraps from family heirlooms. Once cured, these keepsakes preserve meaning and style in one design. Coat the surface with a thin finishing layer of resin for gloss and durability.
To keep everything neat and stress free, check out our article, How to organize art supplies: Easy storage tips for classroom and home setups.
Festive Resin Home Decor for the Holidays

Create holiday decor that feels personal and handmade using resin as your main material. You can build snowy scenes inside mason jars, design resin coasters and trays that sparkle, and turn ordinary wine glasses into snowman or candle displays with simple, beautiful details.
Mason Jar Snow Globes and Snowy Scenes
DIY mason jar snow globes bring a cozy, nostalgic look to your winter decor. You can use painted mason jars or clear ones, depending on your style.
Add miniature trees, small reindeer, or tiny resin ornaments to create a layered winter scene. To make one, place a small resin base inside the jar using epoxy. Anchor your figurines before pouring in artificial snow or glitter.
Add water and glycerin if you want the snow to “fall,” or keep it dry for longer-lasting decor. A red ribbon and tag around the lid finish the look.
Tips for best results:
- Seal the lid tightly to prevent leaks
- Use waterproof glue to hold figures in place
- Choose translucent resin for realistic icy details
Resin Coasters and Holiday Serving Trays
Resin coasters and trays double as decor and useful serving pieces. You can embed dried holly leaves, pine needles, or gold flakes to add a festive touch. These pieces make great handmade gifts, but they also give your table a polished, holiday-ready look.
Pour clear or tinted resin into silicone molds. Add mica or glitter for shimmer, or layer red and green pigments for a cheerful pattern.
When cured, sand the edges for a smooth finish. If you want a cohesive set, use matching inclusions across coasters and trays.
Popular ideas:
|
Item |
Common Add-ins |
Finish |
|
Coasters |
Glitter, holly, snowflake charms |
Glossy |
|
Serving Trays |
Dried citrus slices, evergreen sprigs |
Satin |
Wine Glass Snowmen and Candle Holders
Turning wine glasses into snowmen or candle holders is a quick, creative way to add light and character to your holiday decor.
Paint the glass bowl white for the snowman body, then decorate it with buttons, scarves, and small resin noses.
For candle holders, invert the glass and set a tea light on the base. You can fill the bowl with resin snow or glitter before sealing it for a wintry glow. Group several together in different sizes to create a centerpiece.
Decoration details:
- Use acrylic paint that bonds well with glass
- Add small resin embellishments for texture
- Tie a ribbon around the stem for a finished look
Creative Christmas Gifts and Accessories with Resin

You can use clear resin to design personal, festive gifts that feel both polished and handmade. These projects transform small accessories like jewelry, keychains, and décor items into meaningful keepsakes that show careful effort and creativity.
Resin Jewelry: Necklaces and Earrings
Creating resin jewelry lets you make unique pieces that match any style or color palette.
You can embed glitter, dried flowers, or tiny snowflake charms into clear resin for a winter theme.
Pair gold or silver findings with translucent resin colored in soft reds, whites, or greens to capture the spirit of Christmas without making the design feel overdone. Use silicone molds for pendants and earrings so each shape cures smoothly.
Add pigment drops or mica powder for a shimmer that reflects holiday lights. When the pieces set, sand the edges lightly to get a clean finish, then attach your findings with strong jump rings or earring hooks.
A small resin jewelry kit can help you gather everything you need without much setup.
Combine different molds to create matching necklace and earring sets that make personal, well-finished gifts for friends or coworkers who appreciate practical accessories.
Also read: Resin Jewelry Making for Beginners: Start-to-Finish Guide
Holiday-Themed Keychains and Hairpins
Making holiday keychains and hair accessories offers an easy way to craft small but thoughtful gifts. Use festive glitter, metallic flakes, or microbeads inside clear resin molds shaped like stars, trees, or snowflakes.
The size makes these projects beginner-friendly and quick to finish. For keychains, pour resin into flexible molds and add initials, short names, or small charms before the resin cures. Once hardened, attach the finished piece to a key ring using small screw eyes or keychain hooks.
For resin hairpins or clips, use flat metal bases and layer thin resin pours over decorative inclusions to keep them lightweight yet sturdy. You can create sets of three to five coordinated pieces as a low-cost Christmas craft fair item.
Small accessories like these are also great for stocking stuffers that balance charm with everyday usefulness.
Handmade Gift Ideas for Adults
Resin art opens endless ways to craft handmade gifts suited for adult recipients. You can pour resin over coasters, trays, or candle holders to make polished home décor.
Using clear or tinted resin with mica powder gives each item a professional yet simple finish that works in any home style. Try mixing resin with wood slices for rustic coasters or pouring it into silicone molds for decorative bowls.
Add pressed leaves, small ornaments, or color swirls for a winter design. Once cured, protect the surface with an extra topcoat to extend the life and shine of the piece.
For more creative ideas, try reading our guide, Creative pressed flower art ideas for kids & adults to turn nature into festive classroom projects.
Frequently Asked Questions
What are some easy resin projects to create festive Christmas decorations?
Start with simple items like resin ornaments, coasters, and gift tags. These projects require only basic molds and a small amount of resin.
You can also make resin keychains, jewelry, or small tray decorations to use as stocking stuffers. Try adding glitter or metallic flakes for a little sparkle that feels festive without a lot of effort.
How do I safely mix and pour resin for homemade Christmas ornaments?
Always work in a well-ventilated area and wear gloves and eye protection. Follow the resin instructions carefully, measuring equal parts of resin and hardener.
Stir slowly for a few minutes to avoid bubbles, then pour the mixture into your mold. Use a heat gun or toothpick to pop any surface bubbles before letting it cure.
Can you suggest any creative molds for epoxy resin Christmas crafts?
Use silicone molds shaped like snowflakes, trees, Santa hats, or stars to fit the season. Coaster or jewelry molds also make great reusable gifts.
You can even make your own molds with silicone putty to cast holiday figurines or family keepsakes. This adds variety to your designs and makes each piece feel personal.
What are the best techniques to add colors or embed items in resin for holiday gifts?
Use mica powders, alcohol inks, or resin dyes to add color. Mix them in small amounts so you keep a transparent or pearly finish.
To embed items, place mini ornaments, dried flowers, photos, or glitter into the resin after pouring a thin base layer. Gently pour more resin to cover and seal them in place.
How long does it take for resin crafts to cure before I can hang them on the Christmas tree?
Most epoxy resins need 24 to 72 hours to fully cure. Thicker pieces or cooler temperatures can extend that time.
Avoid touching or moving your ornaments until they’re no longer flexible. Once cured, they should feel smooth and solid.
What’s the best way to finish and display resin crafts for the holiday season?
Sand the edges gently if needed. Use a soft cloth to polish the surface. You can apply a thin layer of clear resin or resin polish for extra shine. Add ribbons, hooks, or stands to show off your creations around the home.
Hanging them near light sources makes their colors and shimmer stand out beautifully.


Lämna en kommentar
Denna webbplats är skyddad av hCaptcha och hCaptchas integritetspolicy . Användarvillkor gäller.