The best way to clean silicone molds depends on what you’ve used them for and the type of residue left behind. In most cases, warm, soapy water is enough, but for stubborn stains or grease, you can try rubbing alcohol, a gentle scrub with a magic eraser, or even a baking soda and vinegar paste.
Keeping your molds clean not only makes them last longer but also keeps your creations looking perfect. Want to know the best tricks for spotless, long-lasting molds? Keep reading for easy tips that actually work!
Key Takeaways
- Wash molds with mild soap and warm water for regular care
- Use gentle methods for stains and stuck resin
- Keep molds dry, clean, and stored safely to make them last longer
Creative designs start with the right tools. Explore our unique resin molds collection and find shapes that inspire.
Essential Steps for Cleaning Silicone Molds

Clean molds give you smooth resin casts and help your tools last. A little routine goes a long way—removing leftover resin, dust, and oils makes a difference in the final result.
Rinsing and Pre-Cleaning Techniques
Start by picking out any loose resin bits or dust from the mold. Rinse the mold under lukewarm running water to wash away surface debris.
Skip very hot water—it can wear down silicone over time. If resin has cured inside, flex the silicone gently to pop it out.
For stubborn residue, use a piece of tape to lift small particles without scratching. This step stops buildup before you get into deeper cleaning.
Lint and hair love to stick to silicone. A quick rinse helps cut down on static and clears away those annoying bits.
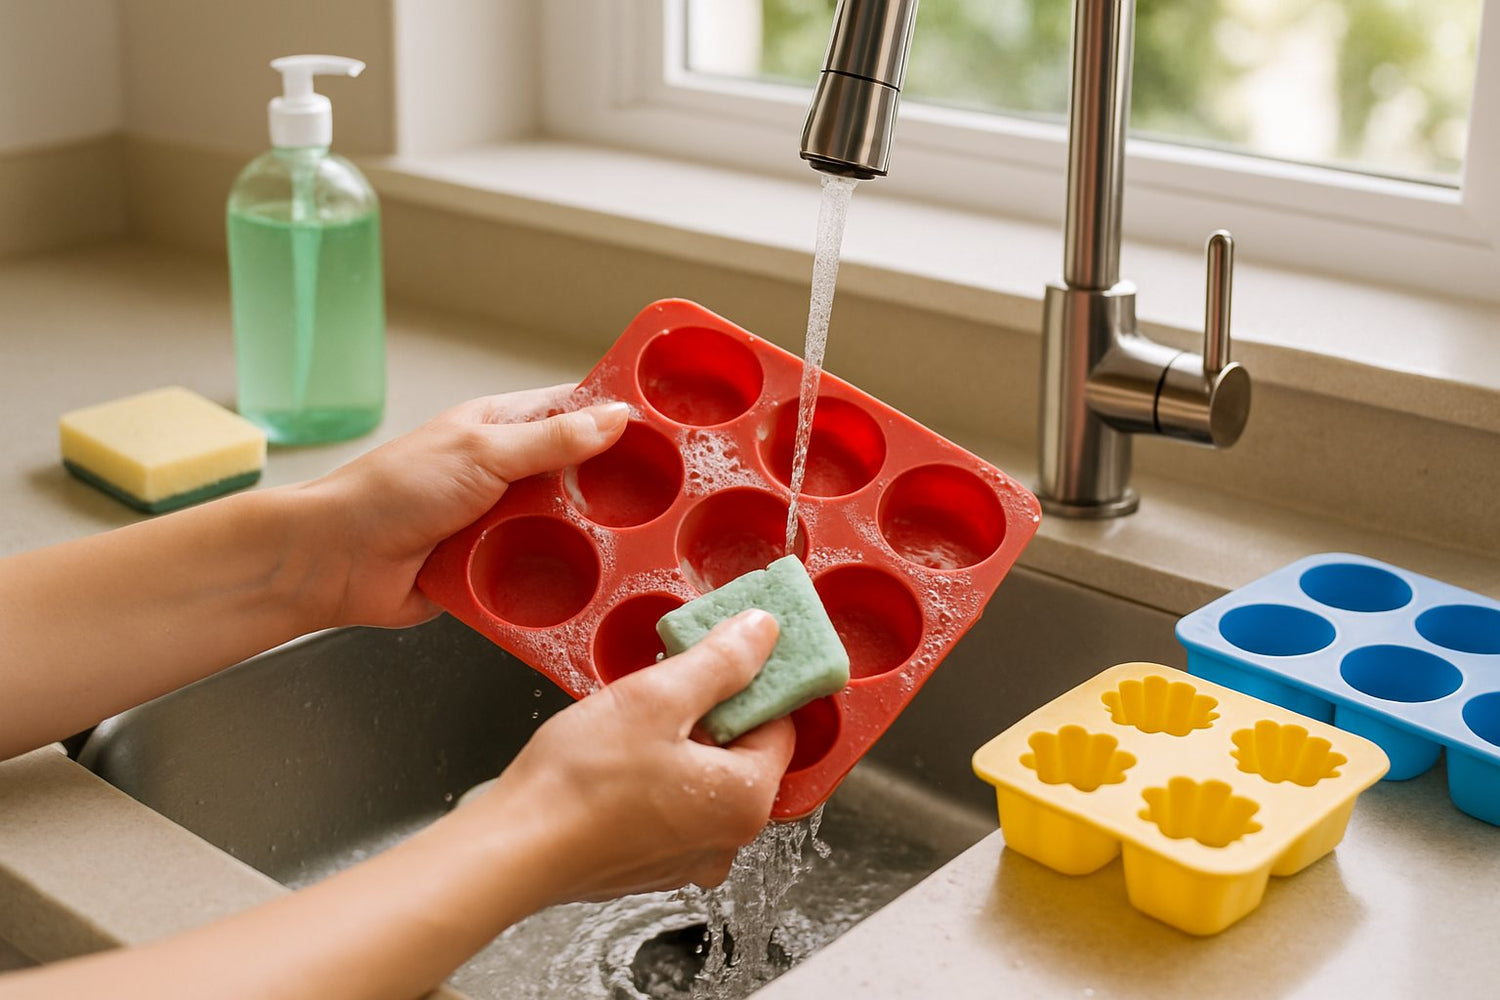
Using Warm Soapy Water and Dish Soap
Fill a small basin with warm soapy water. Go for a mild dish soap—nothing harsh or packed with chemicals.
Let the mold soak a few minutes to loosen leftover resin or pigment. Dish soap breaks down oils from your hands and any release agents, which helps keep molds non-stick.
After soaking, move the mold gently in the water so it gets into every corner and detail. Rinse well with clean water so there’s no soap film left behind.
Gentle Scrubbing with a Soft Sponge
If you see stuck-on resin or color, grab a soft sponge or non-abrasive cloth. Don’t use steel wool or rough pads—those will scratch the silicone and ruin fine details.
Work in small circles with light pressure, especially on edges and textured spots where resin likes to cling. Usually, a soft foam sponge is enough to lift residue.
If pigment stains hang on, repeat the process with fresh soapy water instead of scrubbing harder. Gentle care keeps your molds flexible and your resin casts smooth.
The right mold saves time and effort. Explore Best Mold for Silicone Casting for DIY and Pro Projects to find the perfect fit.
Advanced Methods for Stain and Odor Removal

Resin can leave behind cloudy spots or weird smells, and sometimes soap and water just don’t cut it. You can try a few targeted tricks that break down stains and neutralize odors—without hurting your molds.
Applying Baking Soda Paste
Baking soda’s great because it’s gently abrasive but safe for silicone. Mix 3 parts baking soda with 1 part water until you get a thick paste.
Spread the paste on stained spots inside the mold. Let it sit for 15–20 minutes, then scrub gently with a soft cloth or toothbrush.
Rinse with warm water and dry completely. For deeper stains, just repeat as needed. Unlike harsh cleaners, baking soda won’t scratch or weaken your molds, so it’s a solid go-to.
Isopropyl Alcohol for Tough Residue
Sticky resin that won’t budge? Isopropyl alcohol does the trick. Use 70–91% alcohol—lower is too weak, higher evaporates too fast.
Dampen a cotton pad or cloth with alcohol, press onto the residue, and wait a minute. Wipe away, and use a cotton swab for tight corners.
Afterward, wash the mold with mild soap and water to clear away alcohol traces. It’s strong stuff, so only use it on problem spots, not for a full wash.
Vinegar and Other Natural Solutions
White vinegar’s handy for light stains and smells. Mix equal parts vinegar and warm water, and soak the mold for 30 minutes.
If the smell’s stubborn, add a teaspoon of lemon juice. It boosts cleaning power and leaves a fresher scent.
Rinse well so the vinegar smell doesn’t linger. For yellowing, try a lemon juice paste, or do a quick soak in diluted hydrogen peroxide for tough discoloration. These gentle fixes keep your molds ready for resin without harsh chemicals.
Every crafter benefits from strong fundamentals. Read Resin Casting Basics: Everything Newbies Need To Know and build your skills with confidence.
Best Practices for Maintaining Silicone Molds

Keep your silicone molds in good shape and you’ll get smoother resin pieces, avoid damage, and save money by not having to replace them too soon. Drying, storing, and handling with care actually matter more than most folks think.
Proper Drying and Storage
Dry molds fully after washing—any leftover water can leave cloudy spots or weaken the silicone. Pat dry with a soft, lint-free cloth, then let them air dry for good measure.
Store molds flat in a cool, dust-free spot. Heat and sunlight will warp or stiffen silicone, so a drawer or closed container is ideal.
If you’ve got a bunch of molds, don’t stack them right on top of each other. Slip parchment paper or plastic between them to stop sticking or bending.
Avoiding Common Mistakes
Never reach for sharp tools to pry resin out. That’ll scratch or tear the silicone and you’ll see those marks in every future casting. Instead, flex the mold gently to pop pieces out.
Skip harsh cleaners like bleach, alcohol, or abrasive scrubs. They dry out silicone and make it brittle. Stick to mild soap and warm water—honestly, it’s all you need.
Don’t use cooking sprays or oils as a release agent. They leave a greasy film that’s tough to clean and can mess with resin curing. If you need help with release, get a product made for resin casting.
Extending Mold Lifespan
Handle molds gently if you want them to last. Stretching or pulling too much will wear out silicone faster than you’d think. Take your time when demolding.
Keep molds away from heat sources—ovens, heat guns, radiators. High heat warps silicone for good. Room temperature storage is best.
If resin starts sticking, spray a thin layer of silicone-safe mold release before pouring. That cuts down on wear and helps your molds last.
If you use the same shape a lot, rotate between several molds. That way, no single mold gets worn out too quickly.
Looking to create something wearable? Check out How To Make Resin Beads: A Step-by-Step Guide for Creative Crafters and start making your own beads.
Better Molds, Easier Cleaning: Try Resiners Silicone Molds
Resiners® Touch of Love Handheld Silicone Mold DIY Kit
Cleaning is only part of the process—starting with quality molds makes everything easier. Low-grade silicone can tear, warp, or lose flexibility after just a few uses, no matter how carefully you clean them. That’s why investing in durable, professional-grade molds is worth it.
Resiners Silicone Molds are made from premium, flexible silicone that resists sticking and holds fine details beautifully.
They come in fun and versatile shapes like frog, heart, and photo frame, giving you creative options for every project. Designed for repeated use, they produce crisp, smooth resin casts every time and are much easier to clean than cheaper alternatives.
With the right tools and proper care, your molds will last longer, save you money, and keep your resin art looking professional.
Add beauty and detail to your creations. Discover how in Resin Flowers: How to Create Beautiful Craft Decorations.
Final Thoughts
So, what’s the best way to clean silicone molds? Start with warm, soapy water for everyday messes, and use baking soda or vinegar for tougher stains.
For oils or sticky spots, rubbing alcohol or a gentle scrub works well. With proper care, your molds stay flexible, nonstick, and long-lasting. Clean molds mean better results every time.
Use quality molds for the best outcome, check out Resiners silicone molds and pair them with the Resiners curing machine for flawless projects.
Start your projects with the right foundation. Read our article, Best Resin Molds That Guarantee Perfect Creations to discover molds that deliver flawless results.
Frequently Asked Questions
What's the best thing to clean silicone with?
Warm water and mild dish soap. Use a soft sponge or cloth to wipe away resin dust, pigments, and oils. Rinse well and let the mold air-dry before you stash it away.
What is the best thing to clean mould off silicone?
If you spot mold, scrub gently with soap and water first. For stubborn spots, make a baking soda paste and work it in. Rinse and dry completely to keep mold from coming back.
How to clean dried resin off silicone?
Once resin cures, it usually peels right off since silicone is nonstick. Flex the mold to pop off the hardened resin. For tiny bits, use tape instead of scraping—don’t risk damaging the surface.
Will vinegar damage silicone?
White vinegar won’t hurt silicone if you use a small amount. It cuts through mineral buildup or soap film. Just rinse really well so you don’t get vinegar smell or residue in your next pour.
What should you not clean silicone with?
Don’t use abrasive pads, acetone, or harsh cleaners with bleach. They can scratch, weaken, or discolor silicone. Stick with gentle cleaners to keep your molds flexible and long-lasting.
How should I deal with sticky residue on silicone craft molds?
Sticky spots usually happen when resin doesn't cure all the way or if there's leftover release agent. Try washing the mold with warm, soapy water and rinse it well.
If it still feels sticky, dust a little cornstarch or baby powder inside the mold before your next pour. That usually helps cut down on stickiness.


اترك تعليقًا
This site is protected by hCaptcha and the hCaptcha Privacy Policy and Terms of Service apply.