تعلم كيفية خلط الإيبوكسي بشكل صحيح أسهل مما تتخيل! عندما يتم ذلك بشكل صحيح، سيتصلب الإيبوكسي الخاص بك ليتحول إلى طبقة نهائية قوية وشفافة تمامًا، مثالية للأعمال اليدوية أو الإصلاحات أو تغليف الأسطح.
السر يكمن كله في الخلط—دمج الراتنج و المصلب بالنسبة الدقيقة المذكورة على العبوة والتحريك جيدًا لمدة 2-3 دقائق على الأقل. لا تعتمد على التقدير البصري أو تتعجل في الخلط، وإلا ستنتهي ببقع لزجة لا تتصلب أبدًا!
ارتدِ دائمًا القفازات لحماية بشرتك، ولا تقلق بشأن المعدات الفاخرة. حتى الكرتون يعمل بشكل رائع كسطح للخلط. هل أنت مستعد لتصبح محترفًا في الإيبوكسي؟ استمر في القراءة للحصول على جميع التفاصيل!
كيفية خلط الإيبوكسي: دليل خطوة بخطوة
يعتبر خلط الإيبوكسي بشكل صحيح أمرًا بالغ الأهمية لنجاح مشروعك. دعنا نستعرض الخطوات للحصول على نتائج صحيحة!
الخطوة 1: اجمع مستلزماتك
- راتنج إيبوكسي ومصلب
- أوعية خلط نظيفة
- أعواد تحريك
- أدوات قياس
- قفازات ونظارات واقية
- مساحة عمل جيدة التهوية
الخطوة 2: قم بالقياس بعناية
تتطلب معظم أنواع الإيبوكسي نسبة 2:1 (جزئين راتنج إلى جزء واحد مصلب) حسب الحجم. قد تحتاج بعض العلامات التجارية إلى نسب مختلفة، لذا تحقق دائمًا من تعليمات العبوة.
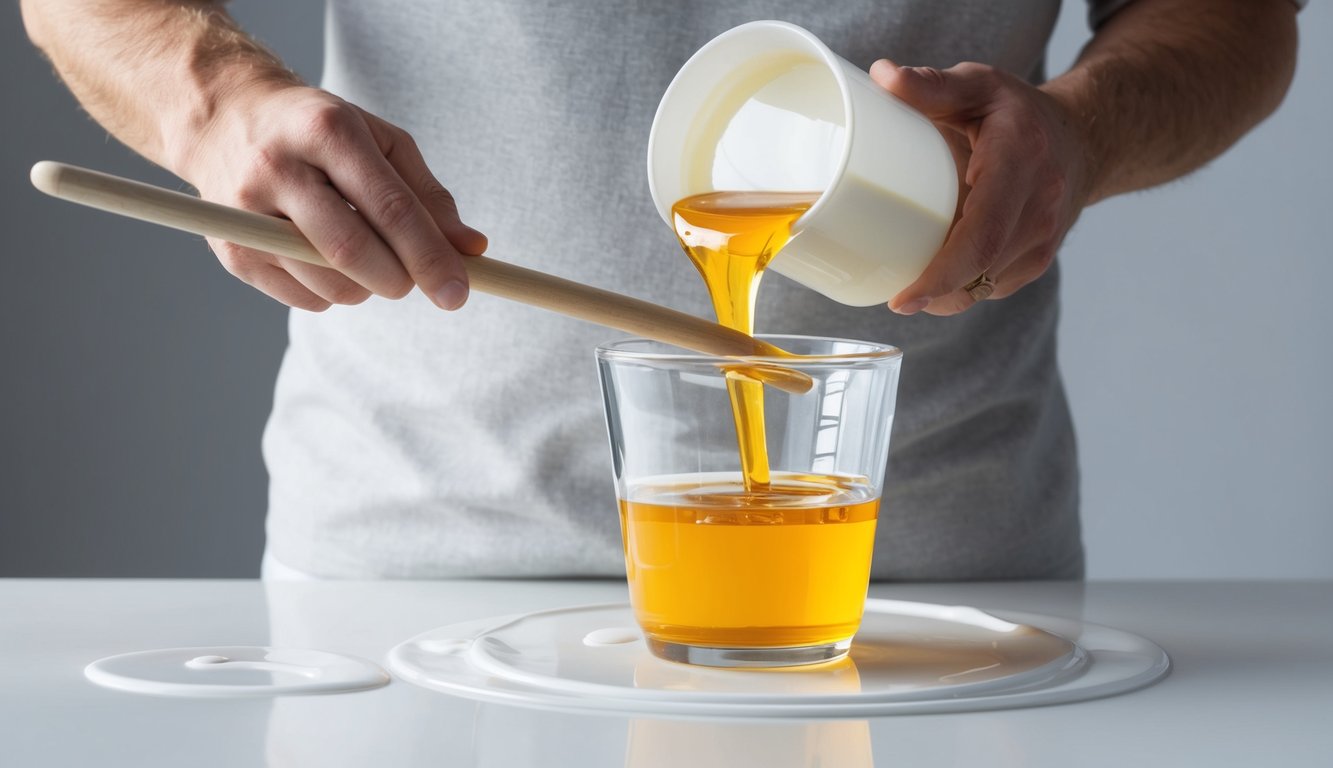
الخطوة 3: اسكب وادمج
اسكب الراتنج أولاً، ثم أضف المصلب. كن دقيقًا في القياسات! حتى الأخطاء الصغيرة يمكن أن تدمر خليطك.
الخطوة 4: حرك جيداً
اخلط ببطء لتجنب تكون الفقاعات. حرك لمدة 4-5 دقائق تقريبًا للتأكد من أن كل شيء ممزوج جيدًا.
اكشط الجوانب والقاع من الوعاء أثناء الخلط.
الخطوة 5: السلامة أولاً!
ارتدِ دائمًا القفازات للحفاظ على الإيبوكسي الرطب بعيدًا عن بشرتك. اعمل في منطقة جيدة التهوية وفكر في ارتداء قناع أيضًا.
إذا كنت بحاجة إلى إضافة لون أو حشوات، قم بخلطها بعد دمج الإيبوكسي بالكامل. اسكب الإيبوكسي المخلوط بسرعة لأنه سيبدأ في التصلب.
تذكر أن درجة الحرارة تؤثر على سرعة تصلب الإيبوكسي. الغرف الأكثر دفئًا تسرع العملية، بينما الأماكن الأكثر برودة تبطئها.
وسع معرفتك بقراءة مقالنا راتنج الإيبوكسي للمبتدئين: دليل أساسي للمبتدئين للارتقاء بمهاراتك في الأعمال اليدوية إلى المستوى التالي.
أساسيات الإيبوكسي التي تحتاج إلى معرفتها

العمل بالإيبوكسي يعني فهم بعض المبادئ الأساسية. إن خلطه بشكل صحيح ومعرفة المواد التي تعمل بها يمكن أن ينجح مشروعك أو يفشله.
مكونات الإيبوكسي ونسب الخلط
يتكون الإيبوكسي من جزئين: راتنج ومصلب. عندما تخلط هذين الجزئين معًا، تبدأ تفاعل كيميائي يحول السائل إلى مادة صلبة.
يجب عليك اتباع نسبة الخلط الدقيقة الموجودة على ملصق منتجك. تستخدم بعض أنواع الإيبوكسي نسبة 1:1، بينما قد تحتاج أنواع أخرى إلى 2:1 أو 3:1.
غالبًا ما يكون القياس بالوزن أكثر دقة من القياس بالحجم. يساعدك الميزان الرقمي في الحصول على الخليط المثالي.
على سبيل المثال، إذا كان الإيبوكسي الخاص بك بنسبة 2:1 بالوزن، فستستخدم 100 جرام من الراتنج مع 50 جرامًا من المصلب.
ارتدِ دائمًا القفازات عند خلط الإيبوكسي! يمكن أن تسبب المواد الكيميائية تهيجًا لجلدك. اخلط جيدًا لمدة 3-5 دقائق على الأقل، مع كشط الجوانب والقاع من وعاء الخلط.
درجة الحرارة مهمة أيضًا. تعمل معظم أنواع الإيبوكسي بشكل أفضل عند 70-75 درجة فهرنهايت (21-24 درجة مئوية). إذا كان الجو باردًا جدًا، فقد لا يتصلب الإيبوكسي بشكل صحيح.
يُعد فهم كيفية خلط الإيبوكسي أمرًا ضروريًا، ولكن معرفة أي راتنج تختاره لا يقل أهمية. استكشف أنواع الراتنج: دليل صانع الحرف اليدوية للعثور على السكب المثالي لمطابقة الراتنج المناسب لاحتياجات مشروعك.
احتياطات السلامة عند خلط الإيبوكسي
يتطلب العمل بالإيبوكسي اهتمامًا دقيقًا بالسلامة. حماية نفسك من المواد الكيميائية الضارة وتهيئة مساحة عمل مناسبة هي خطوات أساسية قبل البدء بالخلط.
الحماية المطلوبة وإعداد مساحة العمل
ارتدِ دائمًا قفازات واقية عند التعامل مع راتنج الإيبوكسي والمصلب. يمكن أن تسبب هذه المواد الكيميائية تهيجًا للجلد وحساسية.
قفازات النتريل أفضل من اللاتكس لهذه المهمة. احمِ عينيك بنظارات السلامة.
تحدث الرشاشات حتى عندما تكون حذرًا! ارتدِ ملابس قديمة أو مريلة تغطي ذراعيك. من المستحيل تقريبًا إزالة الإيبوكسي من القماش بمجرد أن يلتصق به.
تأكد من أن مساحة عملك جيدة التهوية. افتح النوافذ أو استخدم المراوح للحفاظ على تدفق الهواء النقي.
يمكن أن تسبب أبخرة الإيبوكسي المرض. غطِّ سطح عملك بغطاء بلاستيكي أو ورق شمع. هذا يجعل التنظيف أسهل ويحمي طاولتك.
احتفظ بمنطقة الخلط بعيدًا عن الطعام والحيوانات الأليفة والأطفال. لا تستخدم أبدًا أوعية المطبخ لخلط الإيبوكسي - استخدم أوعية بلاستيكية أو معدنية مخصصة لهذا الغرض.
اعمل في غرفة ذات إضاءة جيدة حتى تتمكن من رؤية ما تفعله وتجنب الانسكابات.
الأدوات والمواد المطلوبة

قبل البدء في خلط الإيبوكسي، اجمع كل ما ستحتاج إليه. فامتلاك الأدوات المناسبة سيجعل مشروعك يسير بسلاسة ويساعدك في الحصول على نتائج أفضل.
معدات القياس والخلط
ستحتاج إلى أكواب قياس شفافة بعلامات حجم للقياس الدقيق. تعمل الأكواب البلاستيكية بشكل جيد، ولكن تأكد من أنها نظيفة وجافة.
ابحث عن أكواب تظهر الأوقية أو المليلتر بوضوح. أعواد التحريك مهمة جدًا! تعمل أعواد الحرف الخشبية أو أعواد الخلط البلاستيكية بشكل رائع.
لا تستخدم أدوات المطبخ الجيدة الخاصة بك - فإزالة الإيبوكسي صعبة. كما يلزم وعاء خلط. اختر واحدًا أوسع من طوله لتسهيل التحريك.
يفضل بعض الأشخاص استخدام حاويات بلاستيكية ذات قاع مسطح. لا تنسَ القفازات لحماية يديك! تعمل قفازات النتريل بشكل أفضل من اللاتكس مع الإيبوكسي.
احضر أيضًا بعض المناشف الورقية للتنظيف السريع. إذا كنت تعمل مع إيبوكسي ويست سيستم، فإنهم يبيعون مضخات خاصة تقيس النسبة الصحيحة تلقائيًا. يمكن لهذه المضخات أن توفر لك الوقت وتقلل من الأخطاء. يساعدك المؤقت في تتبع وقت الخلط.
تحتاج معظم أنواع الإيبوكسي إلى 2-4 دقائق من الخلط الشامل.
عملية خلط الإيبوكسي
يُعد خلط الإيبوكسي بشكل صحيح أمرًا بالغ الأهمية لنجاح المشروع. عندما تتبع الخطوات والتقنيات الصحيحة، ستحصل على نتائج قوية وواضحة بدون بقع لزجة أو فقاعات غير مرغوب فيها.
تقنيات القياس الدقيق
ابدأ بجمع مستلزماتك: أوعية خلط نظيفة، أكواب قياس، وعصي تحريك. ارتدي دائمًا القفازات لحماية بشرتك من المواد الكيميائية.
اقرأ التعليمات الموجودة على عبوة الإيبوكسي بعناية. تختلف العلامات التجارية المختلفة في نسب الخلط.
تستخدم معظم أنواع الإيبوكسي نسبة 1:1 أو 2:1 من الراتنج إلى المصلب. هذه النسبة مهمة جدًا!
إذا أخطأت، فقد يصبح الإيبوكسي الخاص بك:
- لزجًا ولا يتصلب أبدًا
- يتحول إلى اللون الأصفر بشكل أسرع
- أضعف مما ينبغي
للمشاريع الصغيرة، استخدم أكوابًا ذات خطوط قياس. للمشاريع الكبيرة، يعمل الميزان الرقمي بشكل أفضل.
اسكب كل جزء على حدة وتحقق من الكميات مرتين قبل الخلط.
طرق ومدة الخلط الصحيحة
بمجرد الانتهاء من القياس بشكل صحيح، حان وقت الخلط! استخدم عصا تقليب مسطحة لدمج الراتنج والمصلب.
قلّب ببطء في البداية لتجنب حبس فقاعات الهواء. اكشط جوانب وقاع الوعاء أثناء الخلط.
يجب أن تخلط لمدة 2-3 دقائق على الأقل. هذا ليس مجرد تقليب - إنه يساعد على حدوث تفاعل كيميائي!
ابحث عن هذه العلامات للخلط الجيد:
- لا توجد خطوط أو دوامات
- مظهر متساوٍ وشفاف
- سمك ثابت
بعض النصائح لنتائج أفضل:
- اخلط في غرفة دافئة (70-75 درجة فهرنهايت مثالي)
- استخدم حجم الوعاء المناسب - ليس واسعًا جدًا ولا عميقًا جدًا
- صب في وعاء جديد واخلط مرة أخرى للحصول على نتائج فائقة الوضوح
إذا رأيت الكثير من الفقاعات، اترك الخليط لمدة بضع دقائق قبل الصب. يمكنك أيضًا استخدام مسدس حراري خفيف فوق السطح.
إتقان كيفية خلط الإيبوكسي هو مجرد الخطوة الأولى — ستحتاج إلى الشكل المثالي لمشروعك. تحقق من مجموعتنا من قوالب الإيبوكسي للعثور على الأوعية المثالية للراتنج المخلوط بشكل صحيح.
مشاكل الخلط الشائعة

حتى أكثر محبي الإيبوكسي حرصًا يواجهون تحديات في الخلط. يمكن أن يساعدك الوعي بهذه المشكلات في تحقيق نتائج أفضل وتجنب إهدار المواد.
إصلاح الفقاعات والتعكر ومشاكل المعالجة
الفقاعات مشكلة متكررة عند خلط الإيبوكسي. تتشكل عندما تخلط بسرعة كبيرة أو بقوة.
اخلط ببطء وشاملًا لمنع الهواء من الانحباس. إذا ظهرت فقاعات، يمكنك استخدام مسدس حراري أو شعلة على بعد 6-8 بوصات لإزالتها.
عادة ما يحدث التعكر عندما لا تخلط الراتنج والمصلب بشكل صحيح. استخدم دائمًا طريقة الخلط بكوبين لضمان المزج الشامل.
اخلط في كوب واحد أولاً لمدة دقيقتين تقريبًا، ثم اسكب في كوب نظيف ثانٍ واخلط مرة أخرى. هذا يساعد على إنشاء خليط موحد بدون خطوط.
غالبًا ما تنتج مشكلات المعالجة عن نسب غير صحيحة. تأكد من القياس بالضبط كما هو موضح على العبوة.
الكثير من المصلب أو القليل منه سيمنع المعالجة السليمة، مما يترك مشروعك لزجًا أو مرنًا بدلاً من أن يكون صلبًا. درجة حرارة الغرفة مهمة أيضًا! يتصلب الإيبوكسي بشكل أفضل بين 70-75 درجة فهرنهايت.
إذا بقي الإيبوكسي طريًا بعد المعالجة، فعادة ما يكون ذلك بسبب عدم خلط المكونات جيدًا بما فيه الكفاية. تذكر أن الخلط الشامل هو مفتاح التفاعلات الكيميائية التي تخلق الصلابة.
العمل بالإيبوكسي المخلوط
بمجرد خلط الإيبوكسي بشكل صحيح، فإن معرفة كيفية التعامل معه بكفاءة أمر بالغ الأهمية. التوقيت والتعامل الصحيح سيحدثان الفرق بين مشروع ناجح وفوضى لزجة.
فهم العمر العملي وتوقيت التطبيق
تتمتع خلائط الإيبوكسي بوقت عمل محدود يسمى "العمر العملي". هذا هو الوقت الذي يبقى فيه الإيبوكسي قابلاً للعمل قبل أن يبدأ في التصلب.
تمنحك معظم أنواع الإيبوكسي بين 20-40 دقيقة من وقت العمل. يبدأ العد التنازلي بمجرد الخلط!
تؤثر درجة الحرارة على العمر العملي بشكل كبير. الغرف الدافئة تجعل الإيبوكسي يتصلب بشكل أسرع، بينما الأماكن الباردة تبطئ من تصلبه.
إذا كنت تعمل مع الألياف الزجاجية، انشر الإيبوكسي بسرعة بعد الخلط للحصول على أقصى وقت عمل.
راقب علامات بدء تغلظ الإيبوكسي. عندما يصبح نشره أصعب، توقف عن العمل بهذه الدفعة.
محاولة استخدام الإيبوكسي المعالج جزئيًا تؤدي إلى روابط ضعيفة وتشطيب سيء. للمشاريع الكبيرة، اخلط دفعات أصغر. يمنحك هذا إيبوكسي طازجًا طوال فترة عملك.
التنظيف والتخزين
نظّف أدواتك فورًا قبل أن يتصلب الإيبوكسي! استخدم الكحول المحمر أو الأسيتون أو الخل على الأدوات المعدنية. لا تنتظر لاحقًا - الإيبوكسي المعالج صعب جدًا إزالته.
لبشرتك، استخدم منظف اليدين بدون ماء أو منظف يعتمد على الحمضيات. تجنب المذيبات القوية على بشرتك لأنها يمكن أن تسبب تهيجًا.
قم بتخزين الراتنج والمصلب غير المستخدمين في حاويات منفصلة ومحكمة الإغلاق. احتفظ بها في مكان بارد وجاف بعيدًا عن أشعة الشمس المباشرة.
معظم مكونات الإيبوكسي لها عمر افتراضي يتراوح بين 6-12 شهرًا. تخلص من الإيبوكسي المعالج مع القمامة العادية. ومع ذلك، فإن الإيبوكسي السائل هو نفايات خطرة ويتطلب التخلص الخاص.
تحقق من اللوائح المحلية الخاصة بك لأساليب التخلص الصحيحة. ضع ملصقات على حاويات التخزين الخاصة بك مع التواريخ حتى تعرف مدى حداثتها.
بمجرد إتقان مهارات خلط الإيبوكسي، حان الوقت لوضعها في الاستخدام الإبداعي. اقرأ مقالنا، أفكار فن الراتنج الفريدة: مشاريع إبداعية لكل مبدع للإلهام حول ما يمكنك صنعه بالإيبوكسي المخلوط بشكل مثالي.
نصائح متقدمة لخلط الإيبوكسي

عند إضافة الملونات إلى الإيبوكسي، ابدأ بكمية صغيرة جدًا. قد تمنع الكمية الزائدة من اللون المعالجة السليمة.
اخلط الملون في جزء واحد (عادة الراتنج) قبل إضافة المصلب. هذا يساعد على تجنب الخطوط في القطعة النهائية.
تؤثر درجة الحرارة على لزوجة الإيبوكسي كثيرًا. يمكن أن يكون الإيبوكسي البارد سميكًا (لزوجة عالية) ويصعب خلطه. قم بتدفئة الراتنج والمصلب إلى حوالي 75 درجة فهرنهايت قبل الخلط للحصول على أفضل النتائج. يمكنك وضع الزجاجات في ماء دافئ لمدة 10-15 دقيقة.
في الظروف الرطبة، اعمل بسرعة واخلط جيدًا. يمكن أن تسبب الرطوبة تعكرًا أو فقاعات. حاول العمل في مكان تقل فيه الرطوبة عن 50% قدر الإمكان.
نصيحة احترافية: بالنسبة للإيبوكسي السميك (اللزوجة العالية)، استخدم طريقة الطي. حرّك عصا الخلط بحركات على شكل رقم ثمانية بينما تكشط جوانب وقاع الوعاء. هذا يلتقط المواد غير المخلوطة دون حبس فقاعات الهواء.
للمشاريع التفصيلية للغاية، قم بتصفية الإيبوكسي المخلوط عبر شبكة دقيقة لإزالة الجزيئات الصغيرة غير المخلوطة. هذه الخطوة الإضافية تستحق العناء للحصول على نتائج واضحة تمامًا!
الخلط الصحيح للإيبوكسي يساعد على منع فقاعات الهواء، ولكنها قد تظهر أحيانًا. اكتشف السبب في مقالنا المفصل: لماذا توجد فقاعات هواء في مشروع الراتنج الخاص بي؟ للحصول على نتائج خالية من الفقاعات في كل مرة.
أفكار أخيرة
أنت تعرف الآن كيف تخلط الإيبوكسي باحترافية! تذكر، أن الخلط المثالي يعتمد على القياسات الدقيقة والتقليب الشامل - لا توجد اختصارات! بهذه الخطوات البسيطة، ستتجنب الفوضى اللزجة وتخلق نتائج قوية وواضحة في كل مرة.
لا تنسَ القفازات وخذ وقتك أثناء عملية الخلط. سواء كنت تصنع مجوهرات، أو تغلف طاولة، أو تصلح شيئًا ما في المنزل، فإن خلط الإيبوكسي بشكل صحيح يحدث فرقًا كبيرًا. جربه في مشروعك التالي، وستندهش من مدى احترافية نتائجك.
الآن بعد أن عرفت كيفية خلط الإيبوكسي بشكل مثالي، أضف ألوانًا نابضة بالحياة إلى إبداعاتك. تحقق من مجموعتنا من صبغات راتنج الإيبوكسي لتحويل الإيبوكسي المخلوط بشكل مثالي إلى روائع ملونة مذهلة.
هل أنت مستعد للانتقال بمهاراتك في الإيبوكسي إلى المستوى التالي؟ تحقق أيضًا من مقالنا حول كيفية صبغ راتنج الإيبوكسي للحصول على أفكار مشاريع ملونة!
الأسئلة المتداولة
هل يختلط الإيبوكسي بالماء؟
لا، الإيبوكسي لا يختلط بالماء. الإيبوكسي مقاوم للماء بطبيعته. إذا أضفت الماء إلى الإيبوكسي، فلن يمتزج بشكل صحيح. سيخلق الماء فقاعات ونقاط ضعف في منتجك النهائي.
يمكن أن يتسبب الماء أيضًا في إفساد التفاعل الكيميائي اللازم لتصلب الإيبوكسي. حافظ على منطقة الخلط والأدوات جافة تمامًا عند العمل بالإيبوكسي.
هل سيتصلب الإيبوكسي إذا تبلل؟
معظم أنواع الإيبوكسي لن تتصلب بشكل صحيح إذا تبللت أثناء عملية المعالجة. يتداخل الماء مع التفاعل الكيميائي بين الراتنج والمصلب.
إذا تبلل مشروع الإيبوكسي الخاص بك قبل أن يتصلب تمامًا، فقد تلاحظ تعكرًا أو بقعًا ناعمة أو سطحًا لزجًا.
يمكن لبعض أنواع الإيبوكسي البحري المتخصصة أن تتصلب تحت الماء، لكن الإيبوكسي العادي يحتاج إلى بيئة جافة.
ماذا يحدث إذا خلطت الإيبوكسي بشكل خاطئ؟
يمكن أن يتسبب خلط الإيبوكسي بشكل غير صحيح في مشاكل كبيرة. إذا لم تستخدم النسبة الصحيحة من الراتنج إلى المصلب، فقد يظل الإيبوكسي لزجًا أو طريًا إلى الأبد.
يمكن أن تؤدي تقنية الخلط السيئة أيضًا إلى ظهور خطوط أو بقع غير متساوية. إذا لم تقم بالخلط جيدًا بما فيه الكفاية، فقد لا تتصلب أجزاء من مشروعك بالكامل أبدًا.
اتبع دائمًا النسبة الدقيقة المذكورة على العبوة واخلط جيدًا جدًا.
ما هي تركيبة الإيبوكسي؟
التركيبة النموذجية للإيبوكسي هي نسبة 1:1 أو 2:1 من الراتنج إلى المصلب بالحجم. هذا يعني أجزاء متساوية أو ضعف كمية الراتنج مقارنة بالمصلب.
تختلف العلامات التجارية المختلفة في تركيباتها. تستخدم بعض أنواع الإيبوكسي المتخصصة نسبًا مختلفة.
تحقق دائمًا من تعليمات المنتج الخاص بك. لا تخمن أو تقدر - قم بالقياس بعناية للحصول على أفضل النتائج.
ما نوع الوعاء الموصى به لخلط الإيبوكسي؟
أكواب الخلط البلاستيكية ذات علامات القياس هي الأفضل لخلط الإيبوكسي. ابحث عن أكواب مصنوعة من البولي بروبيلين (غالبًا ما تكون موسومة برقم 5 للبلاستيك). هذه لن تتفاعل مع المواد الكيميائية للإيبوكسي. تجنب الأكواب الورقية، حيث يمكن أن تحتوي على رطوبة.
لا تستخدم أكواب الفوم أيضًا - يمكن للإيبوكسي أن يذيبها! يمكن أن تعمل الأوعية المعدنية ولكن قد يكون تنظيفها أصعب. استخدم دائمًا وعاءً أكبر مما تعتقد أنك ستحتاجه لمنع الانسكابات عند الخلط.


اترك تعليقًا
This site is protected by hCaptcha and the hCaptcha Privacy Policy and Terms of Service apply.