Christmas projects for preschoolers using resin turn simple craft time into lasting holiday keepsakes.
You can create safe, colorful, and easy resin ornaments that sparkle on any tree while helping children practice creativity and fine motor skills.
With the right materials and a few basic steps, you’ll guide little hands through fun, hands-on learning that feels festive and rewarding.
You’ll explore beginner-friendly ornament ideas, mix resin with kid-safe materials, and discover helpful tips to keep each project stress-free and mess-minimized.
To simplify your setup, explore our resin craft kit collection, designed for quick and stress-free holiday crafting.
Essential Materials for Preschool Resin Christmas Projects

Organizing a resin craft session for preschoolers means choosing materials that are simple, colorful, and safe to handle.
The right supplies let children explore creativity while keeping the process manageable for adults guiding the activity.
Kid-Friendly Resin Supplies
When crafting with resin and preschoolers, focus on using non-toxic, low-odor resin formulas designed for classrooms or supervised home projects.
Always work in a well-ventilated area and teach children to avoid direct skin contact. Pair the resin with small silicone molds shaped like trees, stars, or ornaments. These flexible molds make removal easy and reduce breakage.
Keep a few basic tools ready, such as wooden stir sticks, paper cups, and disposable gloves sized for kids. You can also line the workspace with construction paper or a plastic mat to catch spills.
For short craft times, a UV-curing resin can help the pieces set quicker, avoiding long drying periods that test preschool patience.
Decorative Add-Ons and Embellishments
Once you have the resin base, you can make the projects more festive with simple, child-safe decorations. Popular items include poms, pipe cleaners, googly eyes, and small sequins.
Let kids design miniature ornaments, gift tags, or simple figurines by embedding these decorations in the resin before it hardens. You can also add glitter glue or fine washable paint to tint the resin or the surface once cured.
Small additions like these bring vibrant color and texture without complicating the process.
Encourage children to mix materials creatively, such as wrapping pipe cleaners around a resin ornament or gluing pom-poms as noses, buttons, or wreath berries.
Here’s a quick list of safe embellishments to keep on hand:
- Soft pom-poms (cotton-based or felted)
- Pipe cleaners in holiday colors
- Eco-friendly glitter flakes
- Reusable googly eyes for character crafts
Safe Adhesives and Coloring Tools
Preschool crafts often rely on reliable, easy-to-handle adhesives. Stick with glue sticks or washable liquid glue for attaching light materials like paper or felt. Reserve hot glue for adult use only, such as sealing larger decorations or assembling layered projects.
To color resin pieces, water-based paints work well since they clean up quickly and avoid harsh fumes. Washable paint, markers, and small amounts of glitter glue add detail once the resin project has fully cured.
For painted touches, short-bristled brushes give better control for small hands. Keep all adhesives and color tools within reach but monitor use closely. A few simple materials used thoughtfully will help your preschool crafters focus on fun, not frustration.
Fast-curing materials help save time, so check out the fast drying epoxy collection for efficient Christmas projects.
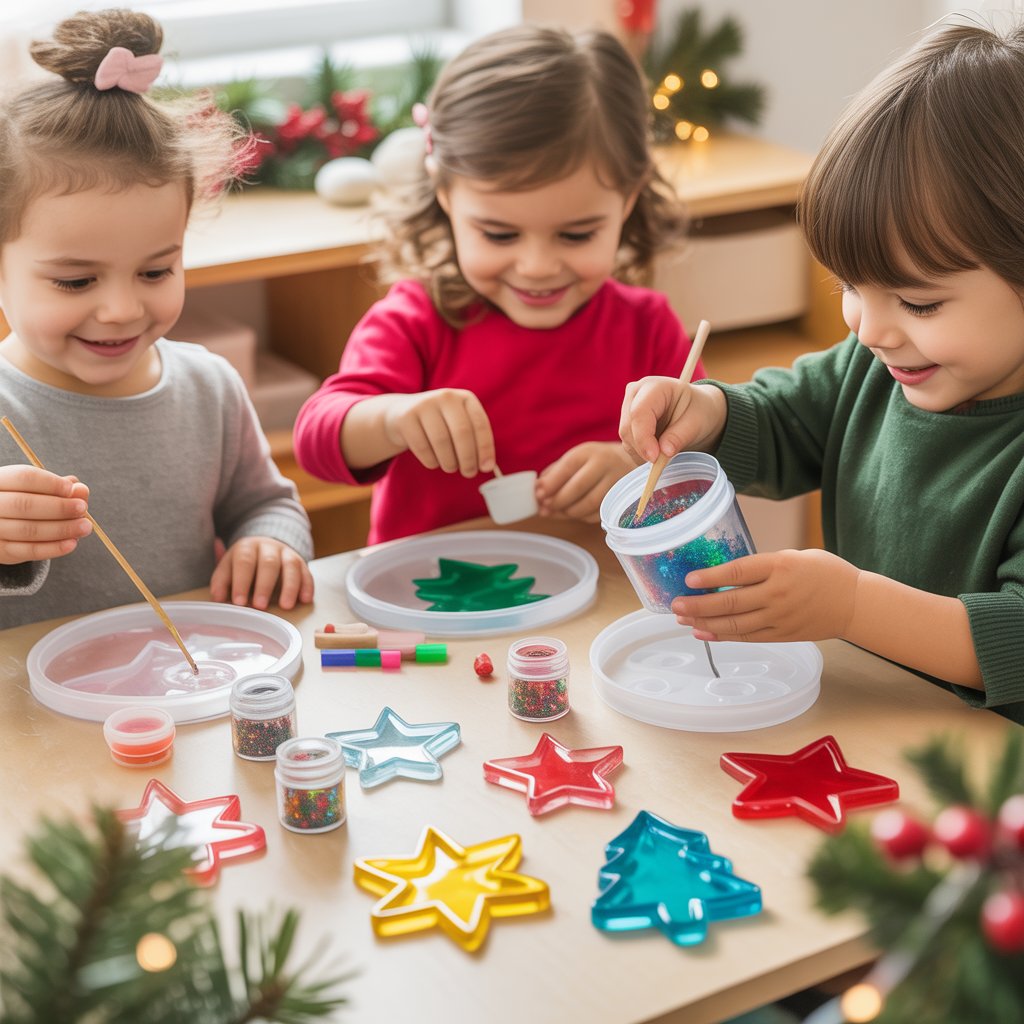
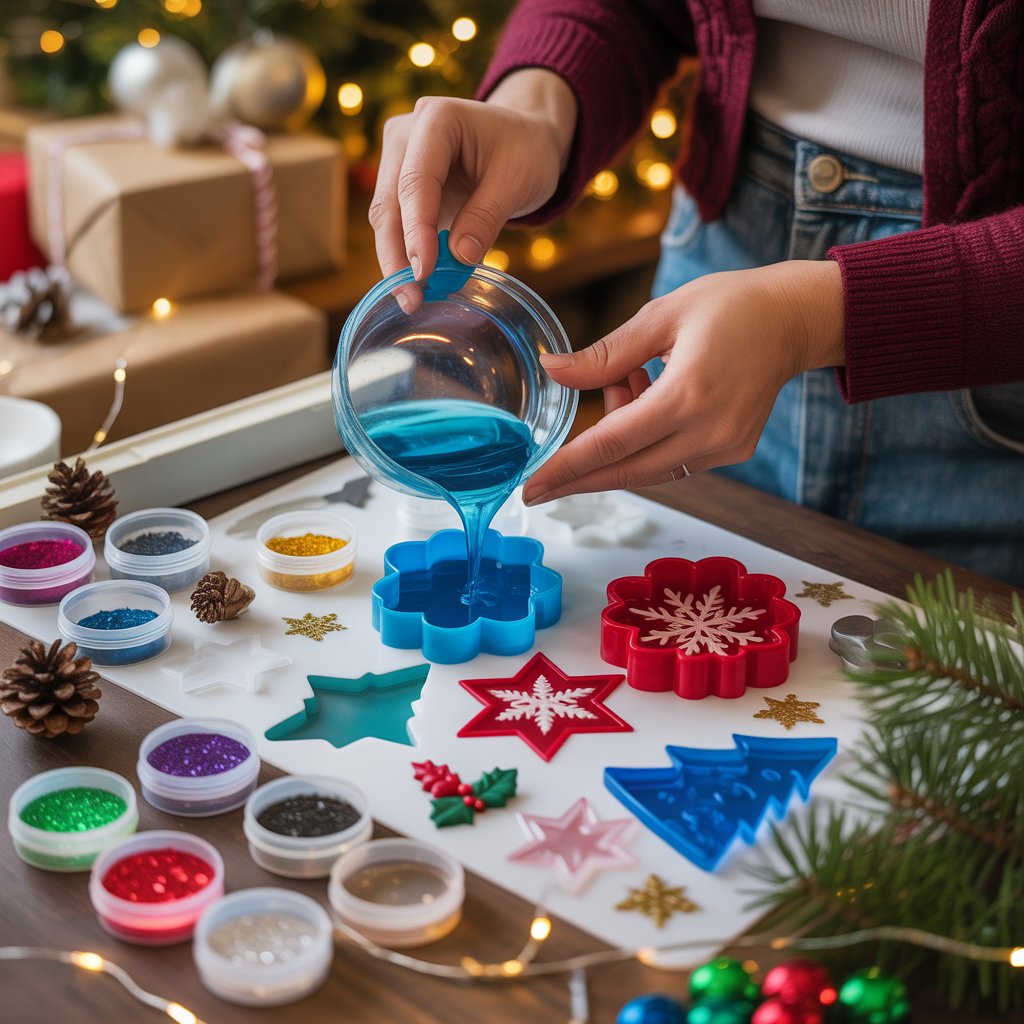
Creative Resin Christmas Ornament Ideas for Preschoolers

You can make simple resin crafts that look colorful and feel smooth to the touch. Using molds, glitter, and safe resin products, you can help children create small keepsakes that add sparkle to any holiday tree.
Easy Resin Christmas Tree Ornaments
Start with flexible silicone molds shaped like Christmas trees. Pour a small amount of mixed resin into each mold, then let children add tiny sequins, foil stars, or bits of ribbon. These light touches give the ornaments color and texture without making them heavy.
Add a few drops of green, red, or gold resin dye to fit traditional holiday colors. For a more natural look, mix in clear resin with just a hint of shimmer.
When the resin cures, use a small metal hook or thread to turn the solid shape into a resin Christmas tree ornament ready to hang.
Try making several ornaments at once so little hands stay busy decorating while others harden.
Tips:
|
Step |
Key Action |
Safety Focus |
|
1 |
Pour small resin batches |
Adult supervision |
|
2 |
Add color and glitter |
Use non-toxic materials |
|
3 |
Let resin cure flat |
Avoid spills or tipping |
Personalized Resin Snowflake Decorations
Use snowflake-shaped molds to create clear resin decorations that capture the sparkle of winter. You can place a tiny photo, bead, or piece of colored paper in the center before the resin cures. This personal touch makes each piece special, especially when they’re given as holiday decorations or gifts.
Press a child’s initials into the soft resin using alphabet beads or small stamps. This simple step turns a plain snowflake into a personalized resin ornament that feels meaningful to both child and parent.
For contrast, combine white pigment powder with a few drops of blue dye. The mix produces a frosty glow that works well under tree lights or in window displays. Keep molds level so shapes come out even and easy to hang with satin ribbon.
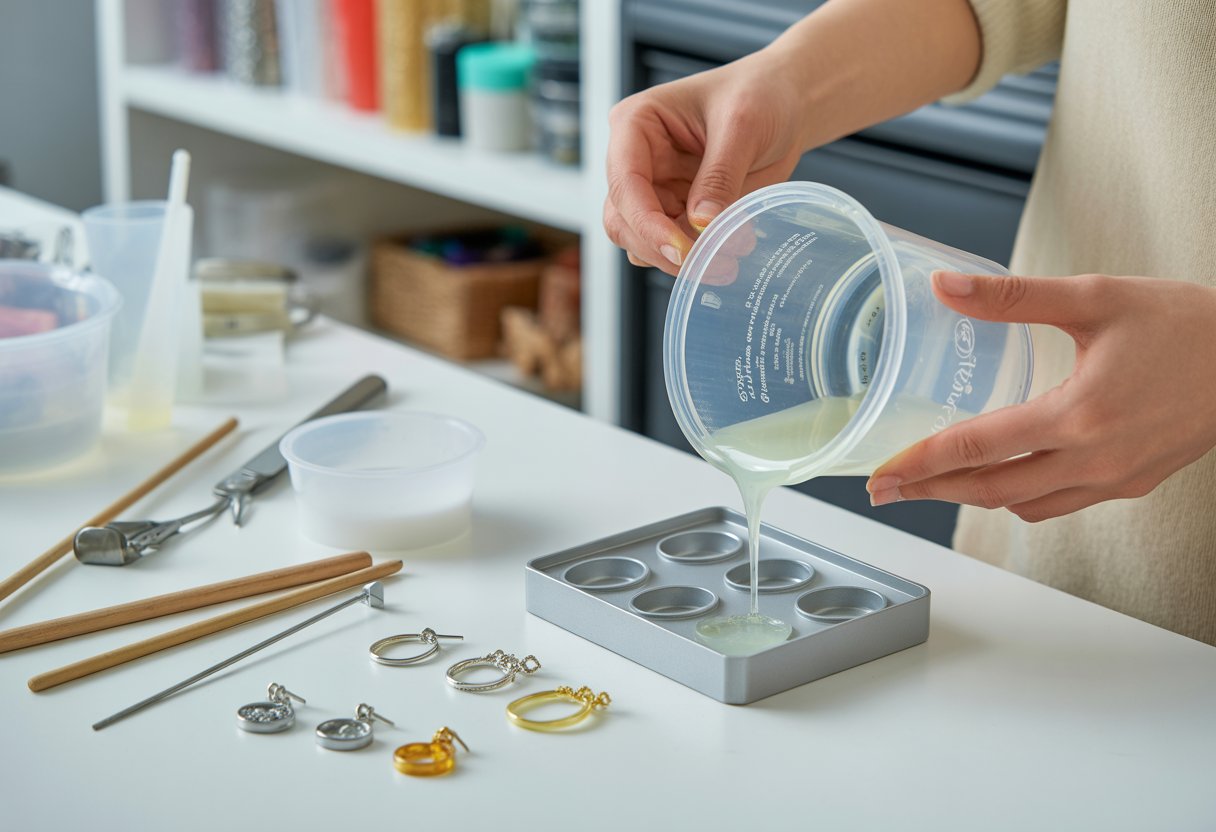
Vibrant Resin Pendant and Necklace Crafts
You can turn extra resin from larger projects into small resin pendants or necklaces. Pour leftover resin into tiny round or oval molds. Add mini Christmas charms or glitter flakes so the pieces match the rest of your holiday decorations.
Once hardened, attach each pendant to a soft cord or ribbon. You now have a simple Christmas tree pendant that can be worn or used as a small present tag. Children love choosing colors and seeing how clear resin makes each design pop.
Encourage them to mix shades carefully instead of blending fully—this creates swirls that look festive but easy to achieve. Keep tools clean, and let the pendants cure completely before wearing or gifting.
The finished pieces sparkle like ornaments yet remain sturdy enough for small hands to handle.
Protecting your workspace is essential, which makes the large silicone mat collection a smart choice for easy cleanup.
Fun and Festive Mixed-Material Projects with Resin

You can make simple preschool Christmas crafts more exciting by pairing resin with basic art materials.
Mixing paper, paint, glitter, and soft textures lets you and your group create colorful decorations that shine and last longer than traditional crafts.
Construction Paper and Resin Combinations
Start with construction paper cutouts in shapes like stars, snowmen, or Christmas trees. Have children color them with washable paint or glitter glue, and let the designs dry fully before adding resin.
Once dry, pour a thin layer of clear resin over the paper on a lined tray. Encourage kids to press in small sequins or bits of tinsel for sparkle.
After the resin cures, you’ll have bright, durable decorations that still show the original paper’s color. For preschoolers, use shallow molds or pre-cut paper pieces to keep it simple. This project teaches layering, color blending, and shape recognition without needing advanced tools.
Each piece makes a good ornament, bookmark, or hanging tag.
Gleaming Pom-Pom Resin Trees
Gather pom-poms in different sizes and shades of green to form mini Christmas tree crafts. Let kids arrange the poms on a waxed board or around a small paper cone base. Add dots of glitter glue between poms for color and structure.
You can drizzle resin slowly over the tree shape once the base is steady. Use just enough to coat and hold the poms together while keeping their texture visible. When the resin hardens, the trees stand on their own as soft, shiny holiday decorations.
For extra fun, provide small gold poms or beads as “ornaments.” Preschoolers love placing these on top before the resin sets, creating a tree that gleams without sharp or heavy parts.
Pipe Cleaner and Resin Animal Crafts
Pipe cleaners bend easily, making them perfect for shaping simple animals like reindeer, birds, or candy canes. Twist a few together to form the body or frame.
Young kids can help choose colors and add accents with washable paint or a touch of glitter glue. Set the finished shapes in shallow molds or small trays.
Pour a thin layer of resin to secure details while keeping the fuzzy pipe cleaner texture on display. Once cured, each figure is sturdy enough for display or light play. This mix of materials strengthens fine motor skills while encouraging creativity and storytelling.
You can even turn these into magnets or mini ornaments with a drop of glue after the resin cures.
Layered Resin Coasters with Preschool Flair
Cut small circles or squares from thick construction paper to create coasters. Have the children paint bright designs or stamp simple prints using washable paint.
When dry, place the artwork into a coaster mold. Pour a thin resin layer, let it cure, then add small bits like poms, foil stars, or paper cutouts for layering. Finish with another pour to seal.
The layering effect creates color depth and keeps each child’s design visible beneath a glossy finish. These coasters are functional keepsakes families can use during the holidays. They combine art, texture, and early exposure to 3D crafting in a safe, guided way.
For quick inspiration, check out our article, Small epoxy resin projects: Easy DIY ideas for beginners, and get started right away.
Tips for Success and Safety in Resin Crafting with Preschoolers

Work with resin in a way that keeps young children engaged but protected. Plan a safe workspace, use proper tools and supervision, and finish up carefully to keep the area clean and ready for another project.
Setting Up a Kid-Friendly Craft Space
Create a work area that keeps materials contained and easy to manage. A flat, well-ventilated surface is essential for safe resin use.
You can cover the table with disposable plastic, wax paper, or silicone mats to protect it from spills. Keep all resin bottles and mixing tools out of reach until you’re ready to use them.
Use non-toxic, washable paint or child-safe glitter when adding color. Provide small plastic cups and wooden sticks for mixing to reduce mess.
Lay out wet wipes or a damp cloth nearby so you can quickly clean drips before they spread. A small table near a window or an open door is ideal for airflow.
Keep pets and food away from the space. Having dedicated “kids-only” crafting aprons or smocks helps keep clothing clean and reduces stress about stains.
Supervision and Safe Usage
Resin should always be handled by an adult, especially during mixing and pouring. You can let preschoolers take part by choosing colors or decorations, not by touching liquid resin.
Use gloves, and if possible, wear a light mask to minimize exposure to fumes. Label all containers clearly so nobody mistakes them for food or drink.
If you use hot glue for attaching pieces, keep the gun unplugged and out of reach until needed. Show children how it works using a cool-tip glue stick to spark their curiosity safely.
Talk through each step out loud so kids understand what’s happening. This turns supervision into a learning moment. Encourage patience as resin sets—many children enjoy checking on their crafts as they harden.
Cleaning Up After Resin Projects
Once crafting time ends, focus on a careful cleanup. Let the resin cure fully before disposing of leftover material.
Never wash uncured resin or mixing tools in the sink—it can harden and cause clogs. Instead, wipe tools with paper towels and dispose of them in sealed bags.
Use warm, soapy water for hands, tables, and any surfaces that touched non-toxic supplies like glitter or washable paint. Keep a small cleanup kit ready with wipes, gloves, and paper towels for easy access.
Organize and label tools so you can reuse them next time. Teach kids that cleaning up is part of crafting, not a separate job.
If you want faster results, read our guide, How to make resin dry faster: 10 proven tips for time-saving holiday crafting.
Frequently Asked Questions
What are some safe resin craft ideas for little hands this holiday season?
Try using non-toxic, low-odor resin kits or pre-mixed UV resin that cures quickly under a small light. You can guide kids in making glitter snowflakes, star-shaped charms, or flat ornaments using small, shallow molds.
For extra safety, have children wear gloves and work on a covered surface. Keep curing and pouring steps for adults only.
How can I create festive resin ornaments with my preschool class?
Start with simple silicone molds shaped like trees, bells, or snowmen. Add kid-friendly touches such as small beads, sequins, or bits of ribbon before you pour the resin.
Label each ornament with a child’s name using a marker or sticker once it cures. Attach a string or hook and you’ll have ready-to-hang classroom creations.
What's the best way to supervise preschoolers during a resin crafting project?
Set up a clear crafting area with defined work zones—one for resin pouring and another for decorating. Give each child their own space and tools to reduce spills or crowding.
Stay nearby to handle resin steps while allowing kids to choose colors or decorations. Keeping groups small promotes focus and safety.
Can you suggest any quick-setting resin options for short attention spans?
Use UV-cure resin or fast-cure epoxy that hardens in minutes under a light or warm lamp. These formulas limit waiting time and reduce the chance of accidental smudges.
Small batches work best since the resin sets quickly and remains easy to control in tiny molds.
What Christmas-themed molds are perfect for a preschool resin project?
Look for silicone molds with simple outlines—trees, stars, candy canes, and snowflakes. Avoid molds with deep or narrow spaces that make unmolding difficult. You can also use silicone muffin cups or cookie-cutters lined with parchment as easy, festive alternatives.
How do I ensure a mess-free resin crafting session with young children?
Cover tables with plastic or disposable paper to protect surfaces. Provide shallow trays or cookie sheets to catch drips as kids decorate their pieces.
Use individual mixing cups and wipes for quick cleanup. When finished, seal leftover resin and toss used supplies safely out of reach.


コメントを書く
このサイトはhCaptchaによって保護されており、hCaptchaプライバシーポリシーおよび利用規約が適用されます。