Nyfiken på hur man får felfri, professionellt utseende på hartskonst? Värmepistolens tips kan göra hela skillnaden. Använd en värmepistol för att få bubblor att sprängas, släta ut ytor och skapa fantastiska effekter utan att bränna ditt harts.
Oavsett om du är nybörjare eller en erfaren hantverkare, kommer rätt tekniker att hjälpa dig att få bästa resultat varje gång.
Vill du lära dig alla hemligheter för perfekta resinprojektLäs mer för enkla, expertgodkända tips för värmepistoler!
Vad är en värmepistol och hur fungerar den?
Om du är nybörjare på resinhantverk kanske du undrar vad en värmepistol egentligen är. Detta praktiska verktyg är ett måste för konstnärer som vill ha släta, bubbelfria resinprojekt.
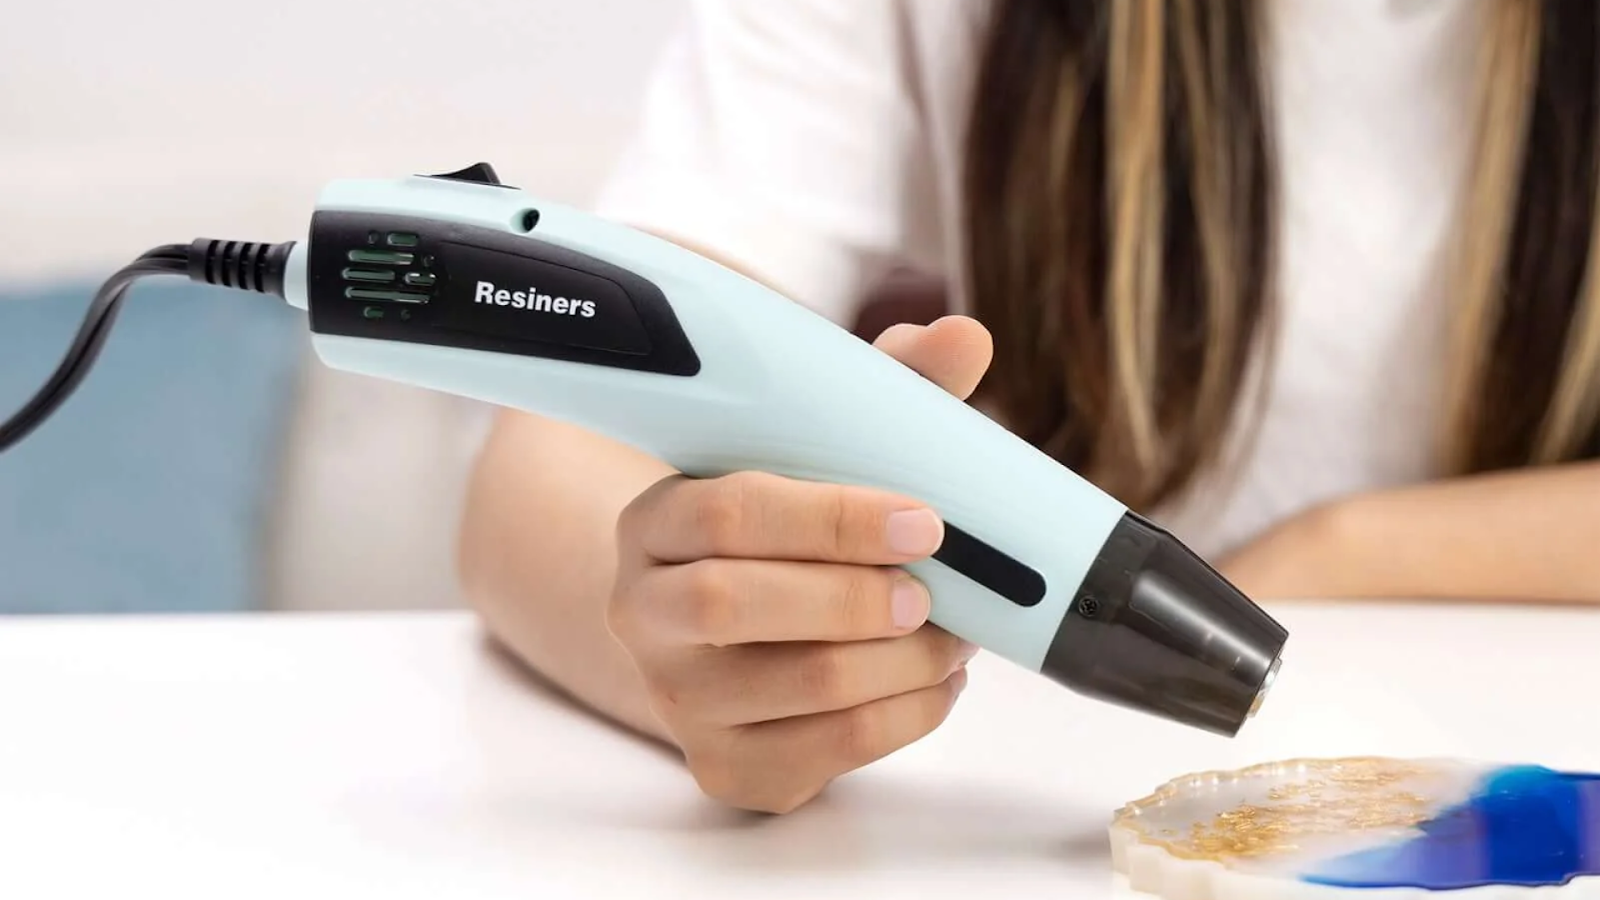
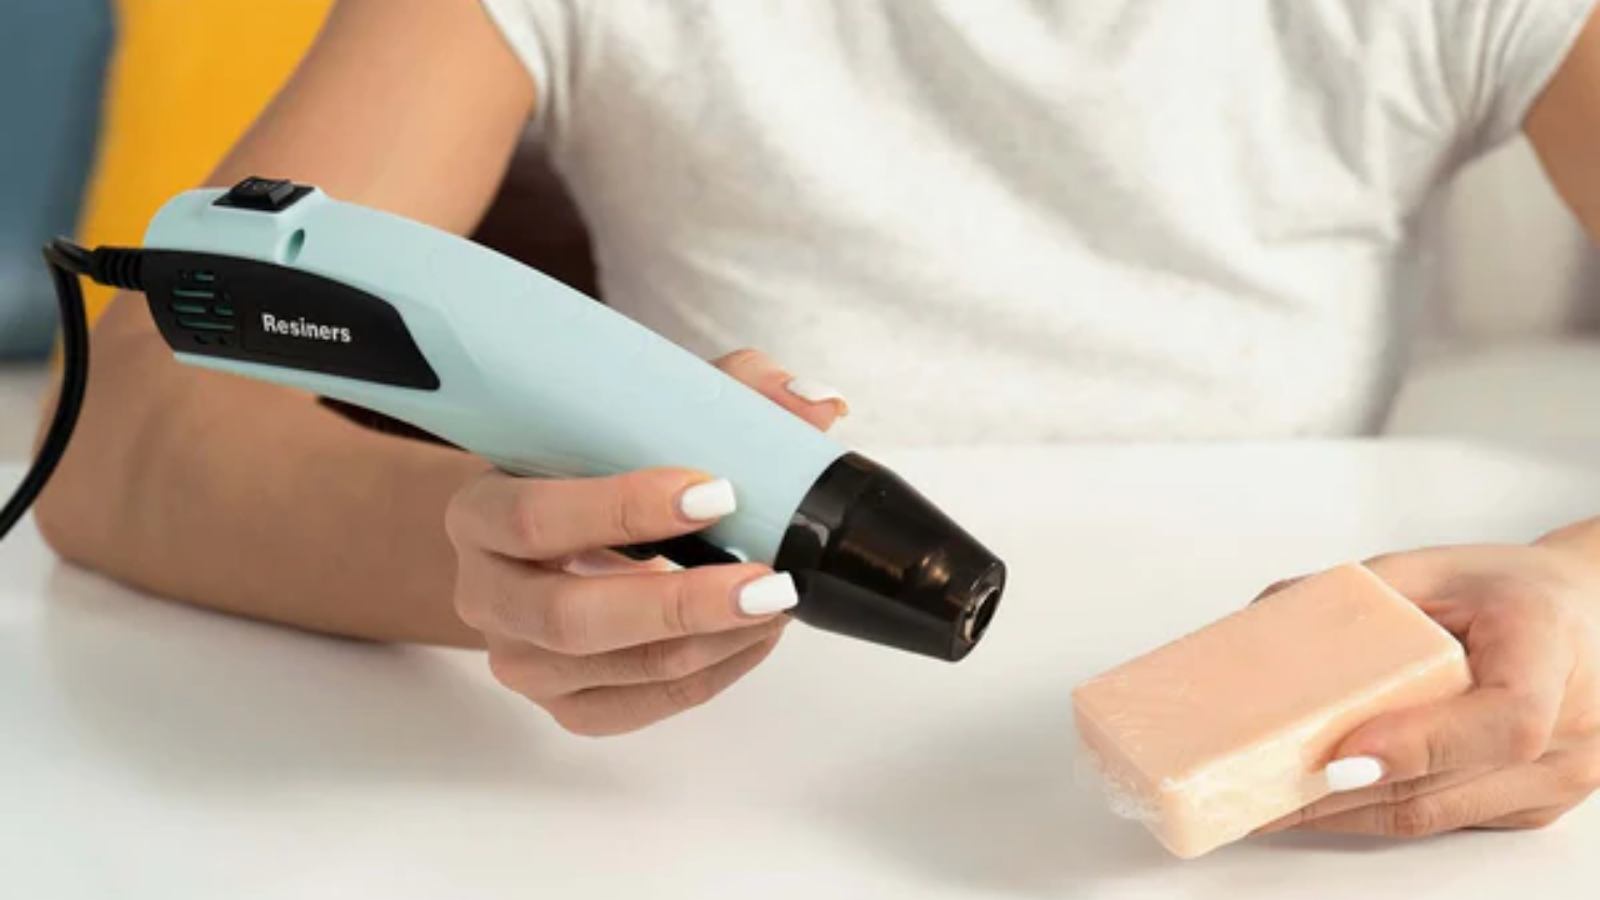
En värmepistolär en handhållen apparat som blåser varmluft med justerbara temperaturer. Den ser ut som en hårtork men blir mycket varmare, vilket gör den perfekt för att poppa bubblor och skapa specialeffekter inom resinkonst.
Till skillnad från en ficklampa har en värmepistol inte öppen låga, så den är säkrare för nybörjare.
Varför använda en värmepistol för resinhantverk?
En värmepistol är ett av de mest användbara verktygen inom resinkonst. Den hjälper dig att lösa vanliga problem och låsa upp kreativa tekniker som tar dina projekt till nästa nivå.
Här är varför resinhantverkare älskar att använda en värmepistol:
- Tar bort bubblorTar bort luftbubblor som bildas under blandning och hällning.
- Skapar effekterHjälper till att skapa vågor, celler och snörningsmönster.
- Säkert och enkeltMindre risk att bränna ditt harts jämfört med en brännare.
- MångsidigFungerar för underlägg, brickor, smycken, väggkonst med mera.
Att välja rätt värmepistol för resinkonst
Att välja rätt värmepistol kan göra stor skillnad för dina resinresultat. Det finns några funktioner du bör leta efter för att göra ditt hantverk enklare och säkrare.
Tänk på dessa funktioner när du köper en värmepistol:
- Justerbar temperaturLåter dig kontrollera värmen så att du inte bränner ditt harts.
- Utbytbara munstyckenUtmärkt för att växla mellan stora och små projekt.
- Sladdbunden kontra sladdlösSladdbundna modeller är kraftfullare, sladdlösa är lättare att flytta runt.
- Bekvämt greppViktigt för långa hantverkssessioner.
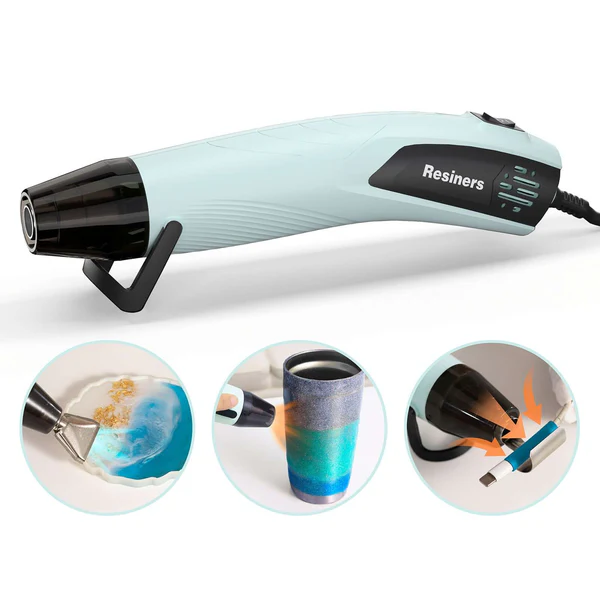
Resiners® Mini värmepistol för hantverk
📌Behöver du mer information om härdnings- och torktider? Kolla in den här guiden för att epoxihärdningstid.
Viktiga tips för värmepistoler för nybörjare med harts
Att använda en värmepistol för första gången kan kännas lite skrämmande, men med några enkla tips får du fantastiska resultat. Dessa steg hjälper dig att undvika misstag och skapa vacker resinkonst.
Följ dessa tips för värmepistoler för nybörjare:
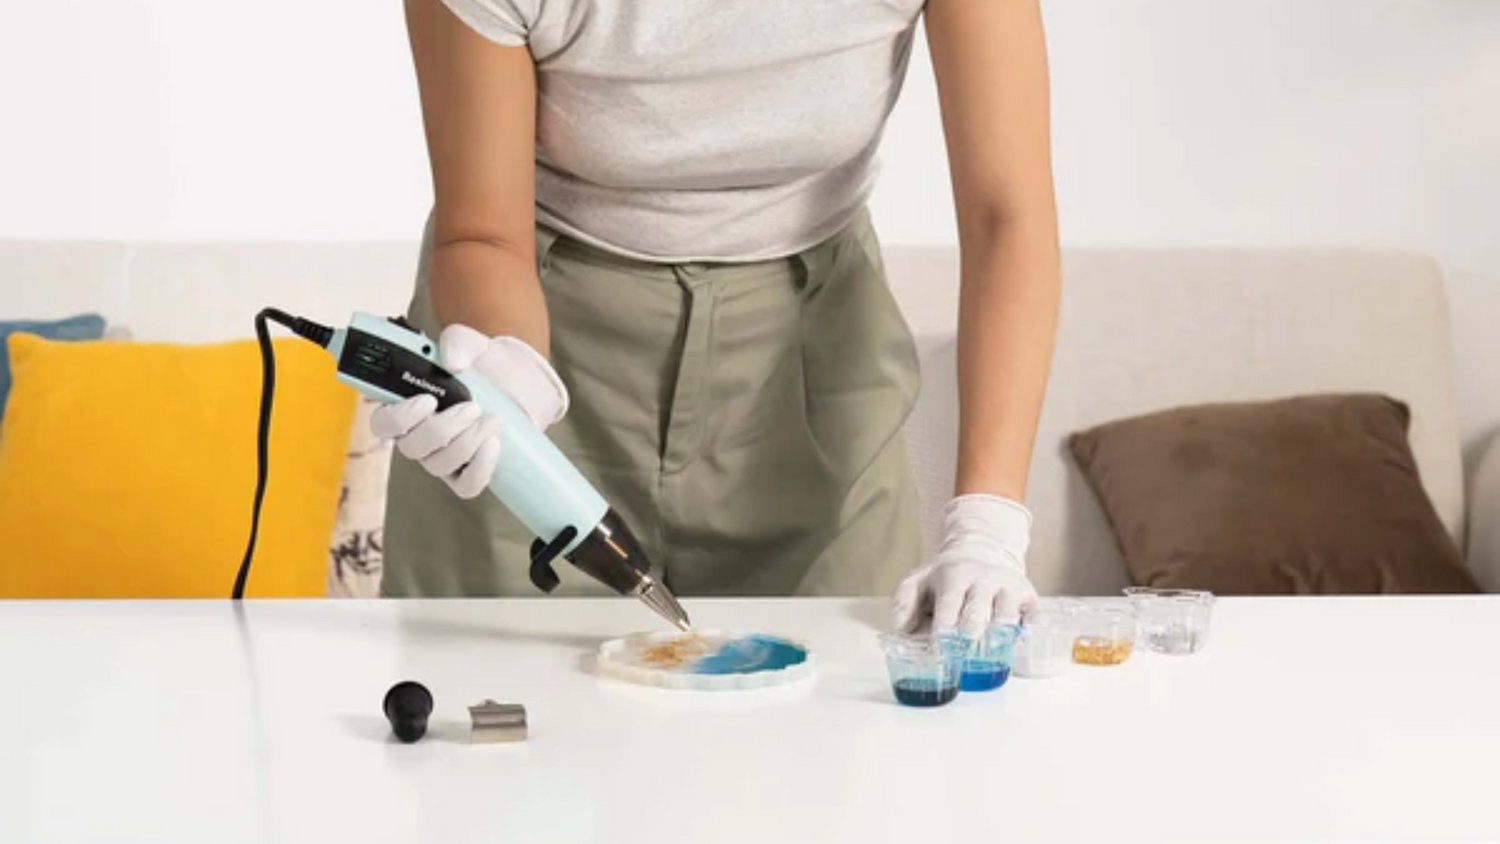
- ✅ Håll värmepistolen cirka 15 till 20 cm ovanför din hartsyta.
- ✅ Flytta den långsamt och stadigt för att få bubblor att spräckas utan att en enda punkt blir överhettad.
- ✅ Förvara inte pistolen på ett ställe för länge, eftersom det kan bränna eller buckla hartset.
- ✅ Börja alltid med den lägsta värmeinställningen som får jobbet gjort.
- ✅ Öva på en testbit om du inte har använt en värmepistol tidigare.
⚠️ Obs!Värmepistoler är mest effektiva för att ta bort ytliga bubblor. För djupa bubblor som är fångade i tjocka lager av harts kan en brännare vara mer effektiv.
Bästa munstycken och tillbehör för hartsprojekt
Alla munstycken till varmluftspistoler är inte likadana. Att välja rätt tillbehör gör det enklare att kontrollera dina resultat och arbeta med projekt av olika storlekar.
Här är vad varje typ av munstycke gör:
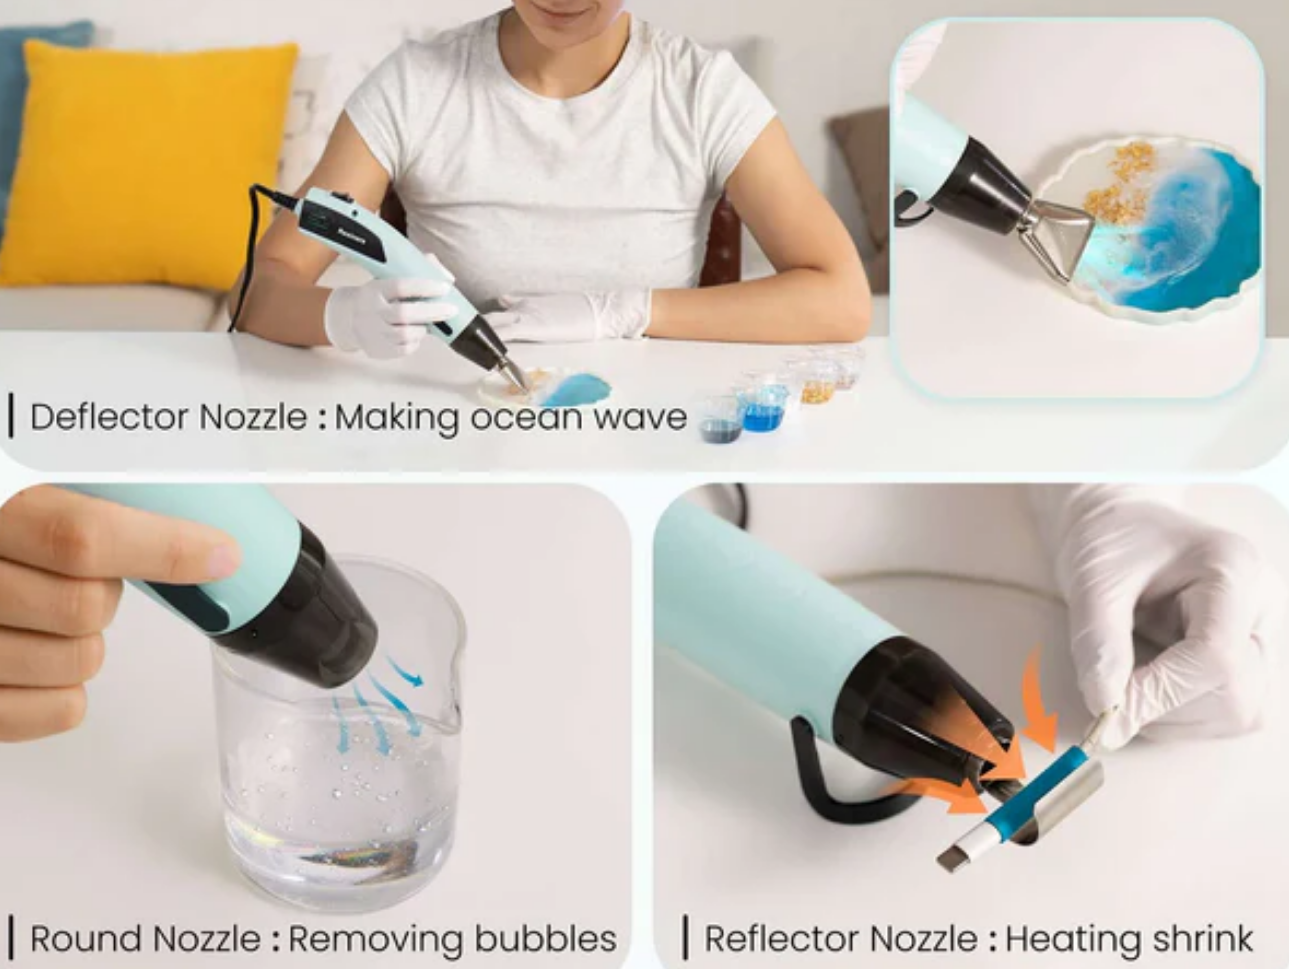
- Brett munstyckeSpridar värme över ett stort område, perfekt för stora hartspaneler.
- Smalt/reducerande munstyckeFokuserar värmen på en liten fläck, perfekt för detaljarbete.
- ReflektormunstyckeVärmer jämnt upp böjda ytor, praktiskt för rundade formar eller kanter.
💡 TipsRengör munstyckena efter varje projekt för att förhindra hartsavlagringar och för att hålla värmepistolen i optimal drift.
De bästa tipsen för värmepistol för vanliga problem med resinhantverk
Alla resinhantverkare stöter på bubblor, ojämna ytor eller andra små problem. Som tur är kan din värmepistol hjälpa till att åtgärda de flesta av dem om du använder den på rätt sätt.
Prova dessa tips för att lösa vanliga problem:
- ✅ Använd din värmepistol direkt efter att du har hällt för att få bubblor på ytan.
- ✅ Rör pistolen i en svepande rörelse och stanna inte på ett ställe.
- ✅ För havsvågor eller snörning, tryck försiktigt vit harts över blå lager med din värmepistol.
- ✅ Om du ser bucklor eller ojämna fläckar kan en snabb dragning med värmepistolen hjälpa till att jämna ut det.
⚠️ VarningFör mycket värme kan göra att hartset härdar för snabbt eller gulnar. Övervaka alltid ditt projekt noggrant och undvik att överhetta något område.
📌Har du problem med klibbigt eller klibbigt harts? Det kan vara ett problem med blandning eller härdning. Läs den här guiden för att Vanliga problem med epoxiharts.
Säkerhetstips för värmepistoler för resinkonstnärer
Värmepistoler är kraftfulla verktyg, så det är viktigt att vara säker när du använder dem. Några enkla steg hjälper dig att skydda dig själv och din arbetsplats.
Tänk på dessa säkerhetstips:
- Använd handskar och skyddsglasögon för att skydda dina händer och ögon.
- Arbeta i ett välventilerat utrymme för att undvika att andas in ångor.
- Håll brandfarliga föremål och löst sittande kläder borta från din arbetsplats.
- Låt värmepistolen svalna innan du förvarar den.
- Lämna aldrig en värmepistol utan uppsikt medan den är påslagen.
Underhåll av värmepistol för resinhantverkare
Att ta hand om din värmepistol innebär att den håller längre och fungerar bättre för varje projekt. Lite underhåll efter varje användning räcker långt.
Så här håller du din värmepistol i toppskick:
- Rengör munstyckena efter varje användning, särskilt om harts droppar på dem.
- Torka av med en fuktig trasa medan munstycket är varmt, men inte hett.
- Kontrollera om det finns blockeringar eller avlagringar inuti munstycket och rensa ut dem.
- Förvara din värmepistol på en torr, säker plats borta från damm och fukt.
- Kontrollera sladden och kontakten regelbundet för tecken på skador.
Felsökning: Vanliga problem med värmepistoler i resinkonst
Om dina resultat inte är perfekta, oroa dig inte. De flesta problem med värmepistoler inom resinkonst är enkla att åtgärda med lite kunskap.
Prova dessa snabba lösningar:
-
Värmepistolen får inte bubblor?
-
Håll den lite närmare eller använd en högre värmeinställning, men inte för nära.
-
Brännande eller gula fläckar?
-
Flytta pistolen snabbare eller sänk temperaturen.
-
Klibbigt eller ojämnt harts?
-
Blanda noggrannare eller låt det härda längre.
-
Hartsstänk på din värmepistol?
-
Låt dem svalna och dra sedan försiktigt av dem med ett mjukt verktyg.
📌För mer information om torkning och härdning, kolla in den här guiden hur lång tid det tar för epoxiharts att torka.
Slutliga tips för värmepistol för felfri resinkonst
Redo att få bästa möjliga resultat varje gång? Dessa sista tips om värmepistol hjälper dig att slutföra dina resinprojekt som ett proffs.
Ha den här checklistan till hands:
- ✅ Börja med den lägsta värmeinställningen.
- ✅ Håll pistolen 15–20 cm ovanför ytan.
- ✅ Håll pistolen i rörelse i långsamma, jämna svep.
- ✅ Använd rätt munstycke för din projektstorlek.
- ✅ Öva på ett klippstycke innan du arbetar med din slutgiltiga konst.
Vill du utforska mer avancerade resintekniker? Bläddra bland online-handledningar och experimentera med dina egna idéer för unika effekter!
Slutsats
Att bemästra tipsen för en varmluftspistol är nyckeln till felfria resultat, professionellt utseende hartskonst.Använd bara rätt värme, fortsätt röra på dig och välj det bästa munstycket för ditt projekt.
För fler guider och expertråd, besök HartsareDu kan också köpa värmepistoler, hartsprodukter, och alla dina hartsutrustning från Resinersoch ta dina kreativa projekt till nästa nivå!
Vanliga frågor
Vad används olika munstycken på värmepistoler till?
Olika munstycken från värmepistoler hjälper dig att kontrollera flödet och riktningen på varmluften. Breda munstycken täcker stora ytor snabbt, medan smala eller reducerande munstycken fokuserar värmen på små fläckar. Reflektormunstycken är formade för att jämnt värma upp böjda eller runda ytor, vilket är utmärkt för detaljerat hartsarbete.
Vilka pyssel kan jag göra med en värmepistol?
En värmepistol kan användas för resinkonst, smyckestillverkning, färgborttagning, prägling, krympning av plast och till och med böjning av PVC-rör. Inom resinhantverk är den perfekt för att få bubblor att sprängas, skapa vågor och göra coola effekter. Du kan också använda den för ljustillverkning och andra gör-det-själv-projekt.
Hur långt bort bör jag hålla en värmepistol?
Håll värmepistolen cirka 15 till 20 cm ovanför hartsytan. Detta avstånd hjälper till att få bubblor att sprängas utan att hartset överhettas eller bränna det. Håll alltid pistolen i rörelse för bästa resultat.
Kan man använda en hårtork istället för en värmepistol?
En hårtork blir inte tillräckligt varm för de flesta resinprojekt och kan blåsa ut för mycket luft, vilket orsakar damm eller att resinet flyttar sig. En värmepistol är mycket bättre för att få bubblor att sprängas och skapa effekter. Även om en hårtork kan fungera för vissa små hantverk är den inte idealisk för resinkonst.
Vad är skillnaden mellan en ficklampa och en värmepistol?
En ficklampa använder öppen låga och blir väldigt varm snabbt, vilket är bra för att få bubblor att sprängas snabbt men kan lätt bränna harts. En värmepistol blåser varm luft och är säkrare, särskilt för nybörjare. Värmepistoler är också bättre för att skapa effekter som vågor och snörningar i hartskonst.
Relaterade artiklar:


Lämna en kommentar
Denna webbplats är skyddad av hCaptcha och hCaptchas integritetspolicy . Användarvillkor gäller.