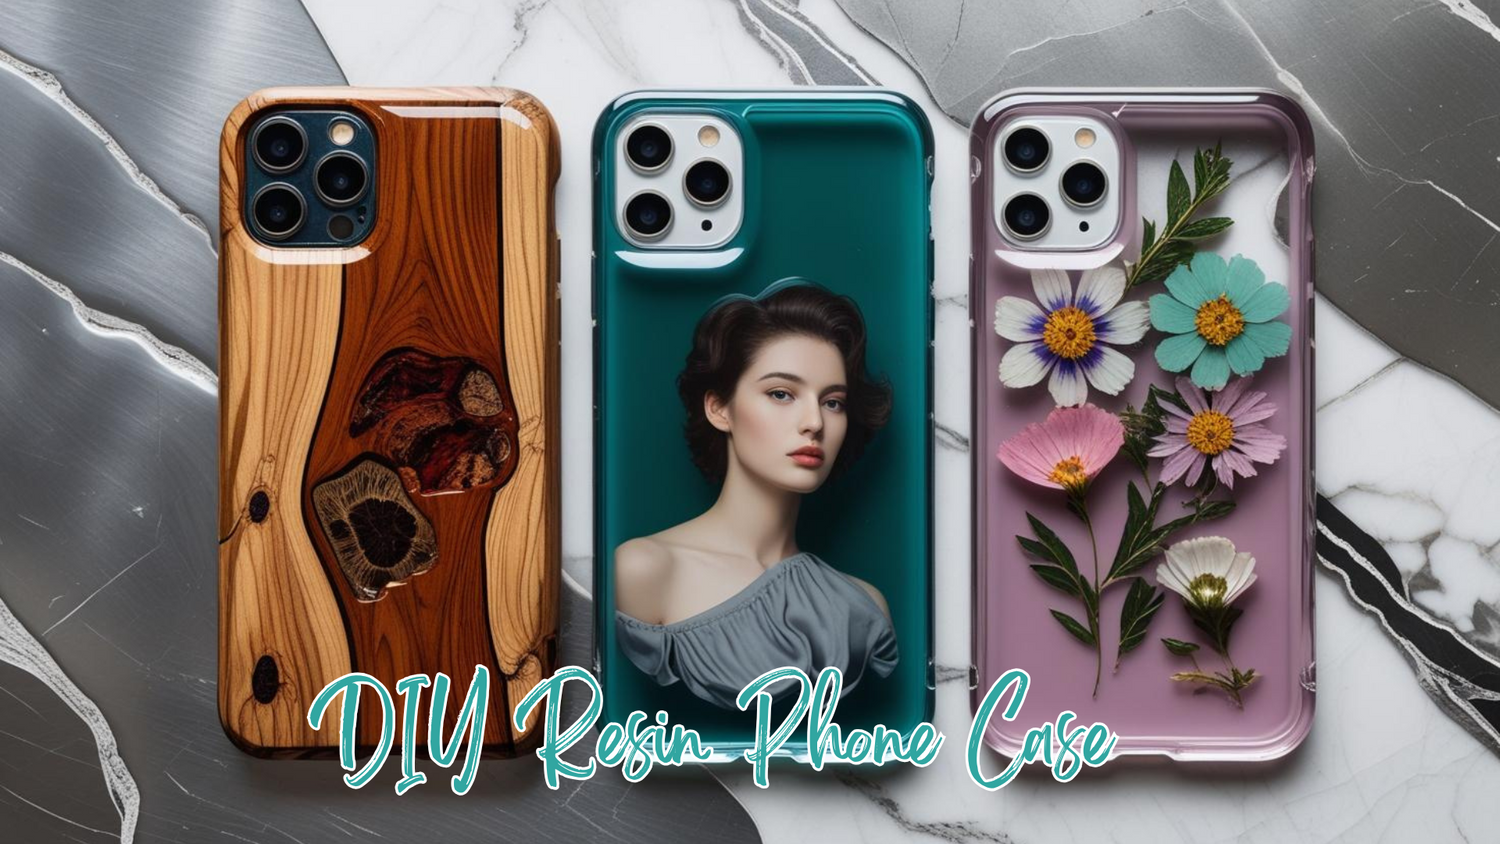
Making your own phone case is one of the most fun and creative resin projects you can try.
A DIY resin phone case lets you design something unique, personal, and stylish while protecting your device at the same time.
If you are curious about how to start, what materials to use, and how to avoid common mistakes, keep reading because this guide covers everything you need to know.
What is a DIY Resin Phone Case?
A DIY resin phone case is a custom phone cover made by pouring and curing resin over a plain case base.
Resin hardens into a glossy, durable surface that can hold decorations like flowers, glitter, or photos.
It is a craft that combines creativity with function, giving you a phone case that is both protective and one-of-a-kind.
Materials and Tools You’ll Need for a DIY Resin Phone Case
Before starting, it helps to gather all the right supplies. Using the correct resin and tools makes the process smoother and helps you achieve a polished finish.
- ✅ Resin options: epoxy resin for durability or UV resin for quick curing
- ✅ Phone case base: clear silicone or plastic case
- ✅ Protective gear: gloves, apron, safety glasses, and a mask
- ✅ Decorations: pressed flowers, glitter, beads, photos, or pigments
- ✅ Tools: mixing cups, stir sticks, tweezers, and a heat gun or lighter
You May Shop
|
Resiners® 24 Colors Chameleon Mica Powder Set - 0.175oz(5g)/Bottle |
Resiners® 1 gallon/2 gallon Crystal Clear Epoxy Resin with Tailored Diversion Port |
Resiners® 174Pcs Dried Pressed Flowers |


📌 If you love experimenting with resin projects, check out cool resin art for more inspiration.
Step-by-Step Guide: How to Make a DIY Resin Phone Case
Learning how to make your own resin phone case is easier than it looks. Follow these steps carefully to create a design that feels professional and long-lasting.
Step 1 – Prepare Your Phone Case and Workspace
Choose a clean, clear case that fits your phone. Cover your workspace with parchment paper or plastic to protect it from spills.
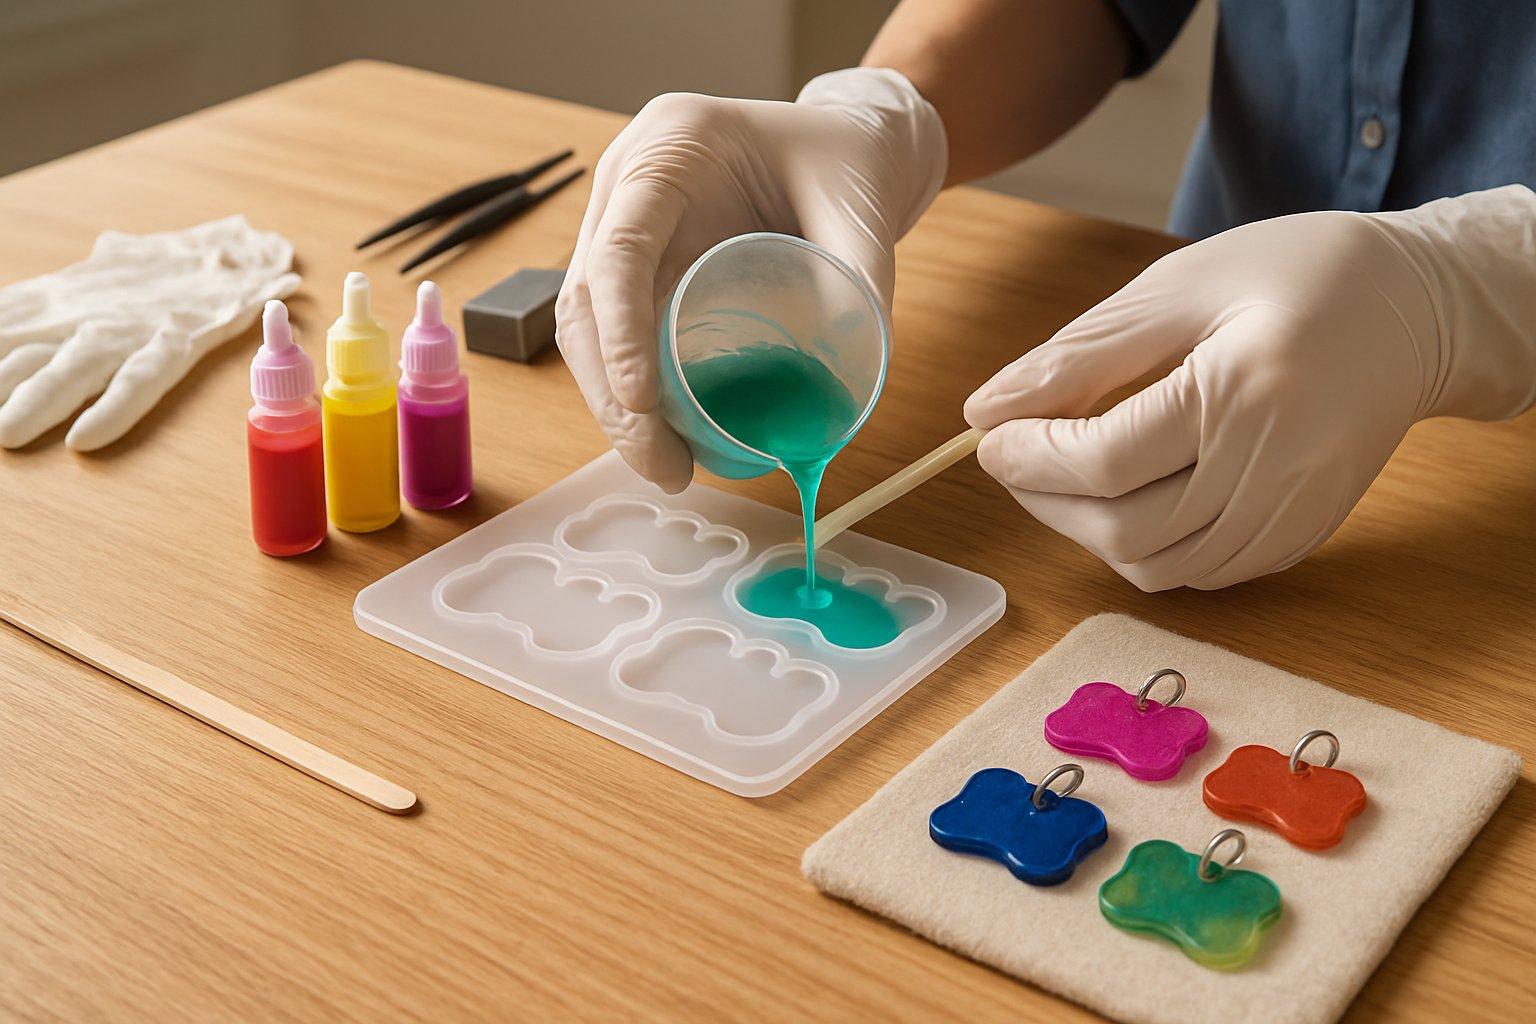
Step 2 – Mix and Color Your Resin
Measure and mix your resin according to the instructions. Add pigments, mica powders, or dyes if you want to give your case a splash of color.
📌 For tips on coloring resin, you can also browse painting with mica powder.
Step 3 – Add Decorations
Place your decorations inside the case mold or directly on the phone case base. Pressed flowers, glitter, and small charms work especially well.
📌 If you like floral designs, you might want to discover resin flowers for more creative ideas.
Step 4 – Pour and Spread the Resin Evenly
Slowly pour the resin over your case, making sure it spreads evenly. Use a stir stick to guide the resin into corners and edges.
Step 5 – Cure and Finish for a Smooth Surface
Epoxy resin usually takes 12–24 hours to cure fully, while UV resin can harden in just a few minutes under a UV lamp. Once hardened, sand any rough edges for a smooth finish.
Don’t forget to take your time during each step. A little patience goes a long way in achieving a case that looks polished and professional.
Creative Ideas for Your Resin Phone Case
Adding your personal touch is what makes this craft exciting. Here are some fun design ideas to try with your DIY resin phone case.
📱 Pressed Flower Phone Case
Pressed flowers sealed in resin create a natural, delicate, and timeless look. Each bloom adds a soft, artistic touch that makes your phone case feel like a piece of nature you can carry everywhere.

📱 Beach-Inspired Design
A resin case with blue waves, sand, and tiny shells brings the ocean to your fingertips. It is a calming design that reminds you of summer days and beach vacations.

📱 Glow-in-the-Dark Effect
Glow powders mixed into resin make your phone case shine in the dark. For safety, always choose powders labeled non-toxic and designed for resin projects.

📱 Photo Resin Case
Adding a favorite photo under the resin layer makes your phone case truly personal. This design also makes a thoughtful gift for friends and family.

📱 Wood and Resin Hybrid
Combining natural wood with glossy resin gives your phone case a unique and modern look. The contrast between earthy textures and shiny resin creates a design that stands out.

📌 Looking for more inspiration? Browse these unique resin art ideas to spark your creativity.
Safety Tips for Working with Resin
Resin is safe to use when handled correctly, but you should always take precautions. Protect yourself and your space before you start crafting.
- ✅ Work in a well-ventilated area to avoid strong fumes
- ✅ Wear gloves and safety glasses to protect your skin and eyes
- ✅ Keep food and drinks away from your workspace
- ✅ Allow resin to cure fully before handling your phone case
Proper ventilation and protective gear are essential when working with epoxy resins. Liquid resin can irritate skin and lungs, but once fully cured, resin is considered non-toxic and safe to handle.
📌 Safety first. Always check out guides like resin ideas to sell for more tips on working with resin responsibly.
Common Problems and How to Fix Them
Even with care, small issues can pop up when making a DIY resin phone case. Here are some common problems and how to solve them.
- ✅ Resin not curing: This usually happens if the mix ratio is off. Double-check your measurements next time.
- ✅ Bubbles in resin: Use a heat gun or lighter to gently pop bubbles right after pouring.
- ✅ Resin peeling off: Make sure the base case is clean and free of dust before pouring.
- ✅ Sticky finish: If resin feels tacky, it may need more curing time or a thin top coat.
Pros and Cons of Making Your Own Resin Phone Case
Crafting your own resin phone case has plenty of benefits, but there are also a few challenges to keep in mind.
Pros
- ✅ Completely customizable designs
- ✅ Fun and rewarding DIY project
- ✅ Makes a thoughtful personalized gift
Cons
- ✅ Requires time and patience
- ✅ Resin supplies can be a small investment
- ✅ Safety precautions are necessary
Final Thoughts
Creating a DIY resin phone case is a fun way to combine art with something you use every day.
With the right tools, a little patience, and some creativity, you can design a case that is both protective and stylish.
For more creative and stunning resin art crafts, explore Resiners for ideas and tutorials that will inspire your next project.
Ready to get started? Shop Resiners for quality resin supplies, accessories, resin machines, and more to bring your DIY phone case ideas to life.
Frequently Asked Questions About DIY Resin Phone Cases
Will resin stick to a phone case?
Yes, resin can stick to most clear phone cases, especially silicone or plastic ones. To make sure it bonds well, clean the surface with rubbing alcohol before pouring. A smooth, dust-free surface helps the resin layer stay strong.
Is a resin phone case safe to use daily?
A resin phone case is safe once it has cured completely. Fully cured resin is hard, non-toxic, and durable. Just make sure you allow enough curing time before using the case on your phone.
What materials are best for a DIY phone case?
Clear silicone or plastic cases are the best bases for resin projects. They allow the resin to adhere properly and show off decorations. Avoid cases with textured or rubbery surfaces since resin may not stick well.
What is the best shock-absorbing material for a phone case?
Silicone and TPU (thermoplastic polyurethane) are considered the best for shock absorption. You can use these as base cases and then add resin designs on top. This way, you get both protection and style.
Does wood make a good phone case?
Wood can make a beautiful phone case when combined with resin. It is sturdy and stylish, but it may not absorb shocks as well as silicone and can feel heavier than plastic cases. Many crafters mix wood and resin for a unique hybrid design.


Commenta
Questo sito è protetto da hCaptcha e applica le Norme sulla privacy e i Termini di servizio di hCaptcha.