空間に輝きと彩りを添える、創造的な方法をお探しですか?ジオード樹脂アートは、科学とスタイルの完璧な融合であり、まるで本物のクリスタルや宝石のような、息を呑むほど美しい作品をデザインすることができます。
あなたが全くの初心者であろうと、経験豊富なクラフト愛好家であろうと、このガイドは始めるために必要なすべての情報を提供します。
あなただけのまばゆいばかりの晶洞を作る準備はできましたか? 樹脂製の傑作ジオード樹脂アートに関するステップバイステップのヒント、インスピレーション、そしてあらゆる疑問への回答については、続きをお読みください!
ジオード樹脂アートとは何か?そしてなぜ今、皆が話題にしているのか?
ジオード樹脂アートは、クリエイティブな世界で一大ブームを巻き起こしています。この技法を使えば、樹脂、顔料、そしてキラキラ輝く石を用いて、天然の晶洞や結晶の見た目を再現し、他に類を見ない作品を生み出すことができます。
ジオード樹脂アートを使えば、本物のジオードの内部そっくりな、カラフルで重層的なデザインを作り出すことができます。光沢があり、大胆で、他に類を見ないユニークな仕上がりになるため、多くの人に愛されています。
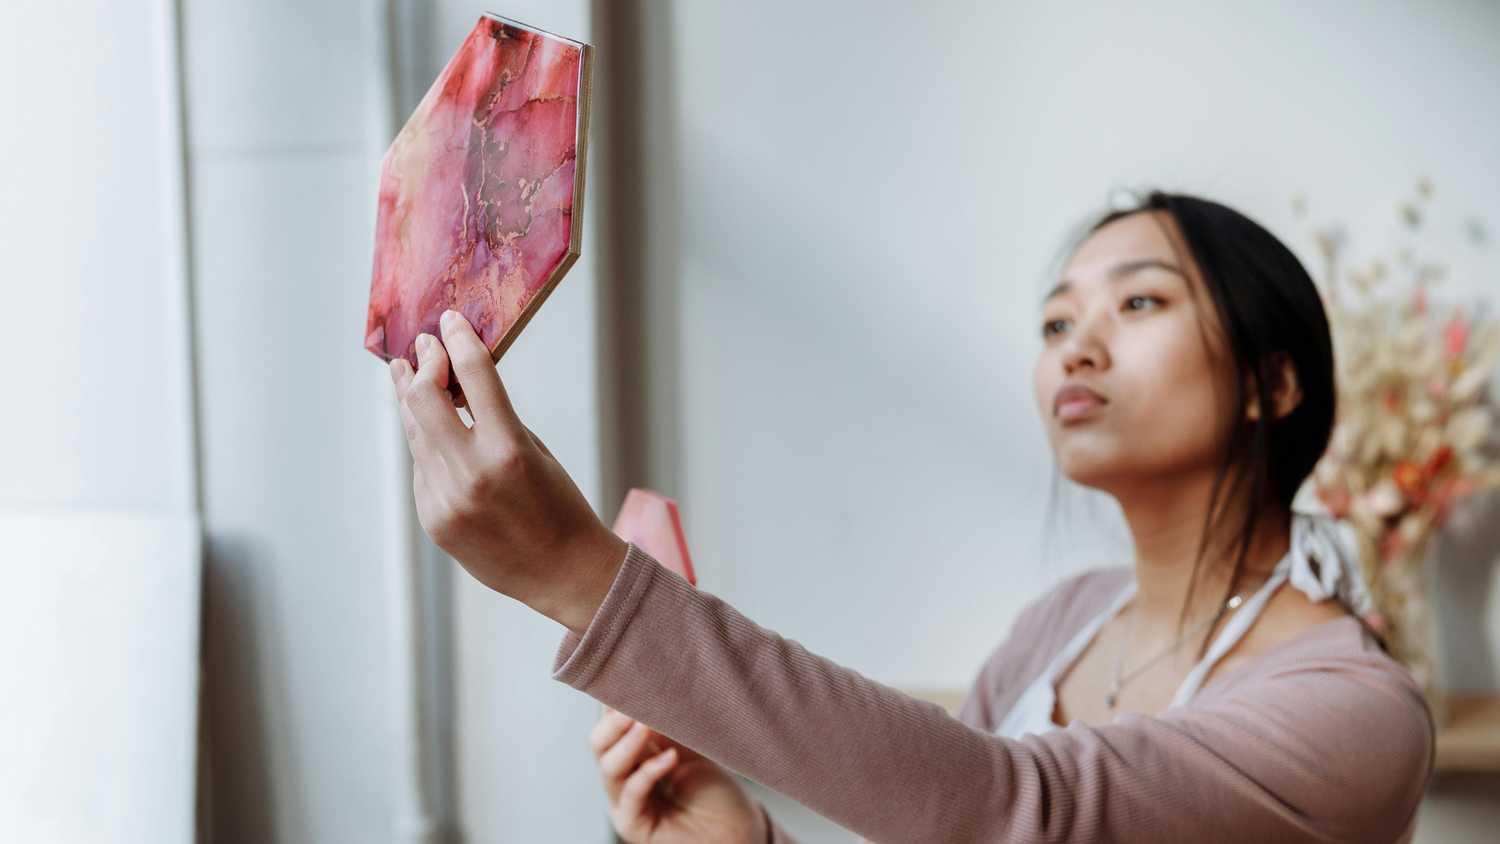
同じものは二つとありません。印象的な壁掛け、きらびやかなセットなど、 コースターあるいは、まばゆいばかりのトレイなど、ジオード樹脂アートはどんな空間にも瞬時に驚きをもたらします。
ジオード樹脂アートに欠かせない材料

ジオード樹脂アートの制作を始める前に、いくつかの必要な材料を揃える必要があります。適切な材料を使うことで、素晴らしい効果が得られるかどうかが大きく変わります。
樹脂、顔料、キラキラした装飾品
ジオード樹脂アートのスターは エポキシ樹脂透明で、美術用グレードの、硬化すると硬く光沢のあるエポキシ樹脂を探してください。硬化剤も必要ですが、キットに含まれています。
色については、 雲母粉末アルコールインクや樹脂対応顔料が最適です。キラキラ感も忘れずに。砕いたガラス、グリッター、本物または模造のクリスタルなどを加えると、ジオードのような魔法のような雰囲気を演出できます。
💡ヒントプロジェクトで最良の結果を得るには、深めの型には鋳造用樹脂を、平らな面にはコーティング用樹脂を使用してください。

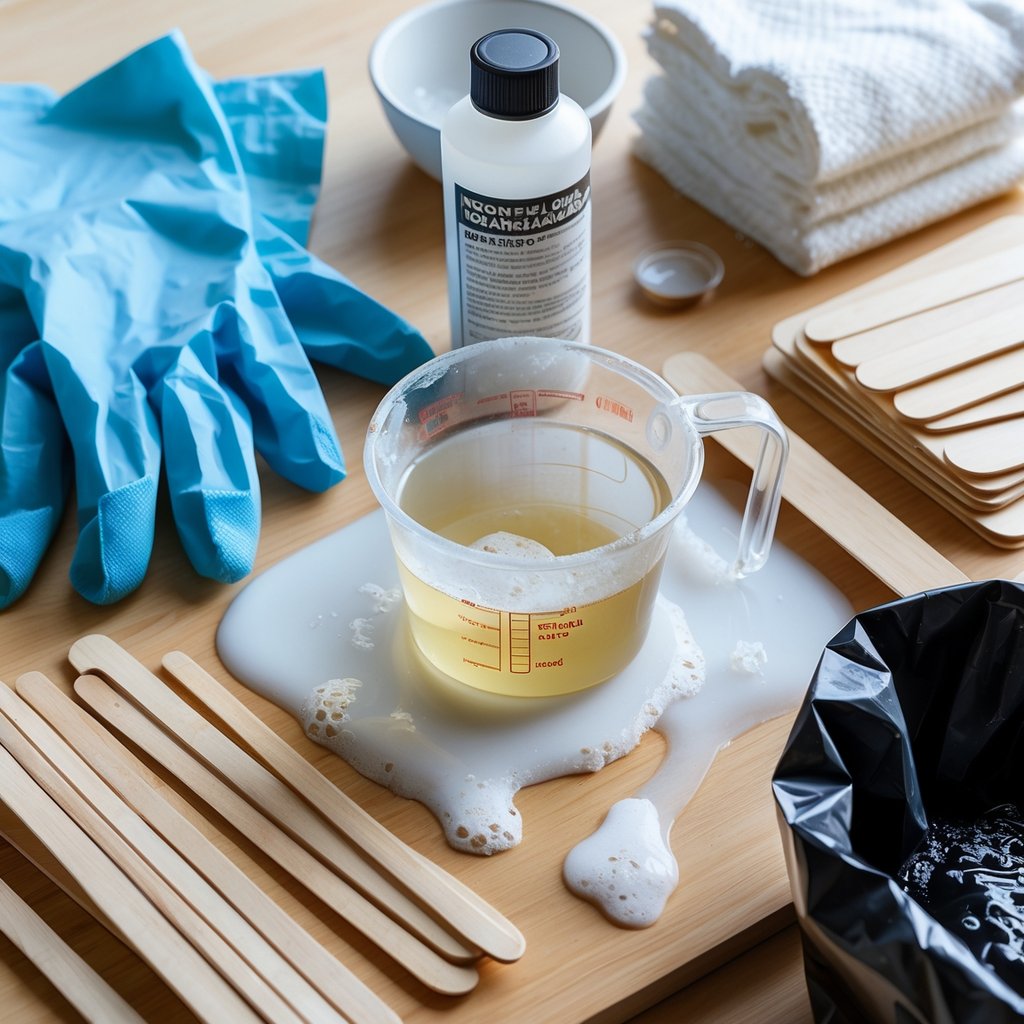
工具と安全装備
まず、必要なものは以下の通りです。
- ミキシングカップ
- かき混ぜ棒
- ヒートガンまたはトーチ(シャボン玉を割るため)
- 平らな作業面
- シリコン型 または、土台として丈夫なキャンバス
- ニトリル手袋
- 安全ゴーグル
樹脂は粘着性があり、臭いもきついため、必ず換気の良い場所で作業してください。長時間作業する場合や、換気の悪い場所で作業する場合は、安全性を高めるために防じんマスクの着用を検討してください。
ジオード樹脂アートの作り方:ステップバイステップガイド
ジオード樹脂を使ったアート作品作りは、思っているよりも簡単です。いくつかの簡単な手順に従えば、あっという間に完成します。ここでは、あなただけの輝く傑作を最初から最後まで作り上げる方法をご紹介します。
✅ 作業スペースと必要な材料を準備する
- テーブルの上にプラスチックシートかシリコンマットを敷いてください。
- 樹脂は混ぜ合わせるとすぐに硬化するので、必要な材料をすべて準備しておきましょう。
- 樹脂が片側に偏らないように、表面が水平であることを確認してください。
✅ 樹脂を混ぜて着色する
- エポキシ樹脂を混ぜる手順に従い、 硬化剤、 通常は1対1の比率で。
- 泡が立たないように、3~5分間ゆっくりとかき混ぜてください。
- 樹脂をカップに分け、お好みの色を加えます。 キラキラ、そして雲母粉末。
✅ ジオード層を流し込んで形を整える
- まず、キャンバスまたは型の中央に下地となる層を流し込みます。
- 外側に向かって、異なる色や質感のリングを加えていく。
- アイスキャンディーの棒か手袋をした指を使って、縁の形を整え、色を混ぜ合わせます。
- 特徴的なジオード(晶洞)のような外観にするには、メタリック顔料や金箔で線を描き加えると良いでしょう。
✅ クリスタルや石を追加する
- プレス 砕いたガラス樹脂がまだ乾いていないうちに、水晶のポイントや模造クリスタルなどを樹脂の中に埋め込む。
- 中央または端に並べると、リアルな晶洞効果が得られます。
✅ 泡を割って、そのまま乾燥させる
- 使用する ヒートガンまたは、表面の気泡を取り除くためにトーチを使用する。
- 作品を少なくとも24時間、または使用する樹脂メーカーの指示に従って、そのまま硬化させてください。特に厚い層で作業する場合は、完全に硬化するまでに最大72時間かかる場合があります。
✅ 仕上げと研磨
- 完全に硬化したら、粗い部分をやすりで磨き、さらに光沢を出すために透明なトップコートを塗布してください。
- ジオード樹脂を使ったアート作品が完成し、展示できるようになりました。
📌チェックするのを忘れないでくださいクールなレジンアートのガイドさらに詳しい手順やヒントについては、こちらをご覧ください!
ジオード樹脂アートのアイデアであなたの創造性を刺激しましょう

ジオード樹脂を使ったアート作品は、ご自宅の装飾やギフトとして、実に様々な活用方法があります。これらのクリエイティブなアイデアは、新しいことに挑戦したり、プロジェクトを刺激的なものにしたりするのに役立ちます。
- ✨ ジオードコースター丸型または不規則な型を使用し、メタリックな線を加え、コルクの裏地で仕上げます。
- ✨ サービングトレイ木製のトレイに樹脂を流し込み、取っ手を取り付け、色とラメを重ねて流し込む。
- ✨ジュエリー皿小さくて自由な形状のものは、指輪やイヤリングを収納するのに最適です。
- ✨ 印象的な壁掛けアート大きなキャンバスとたくさんの色を使って、人目を引く作品を作りましょう。
- ✨ 単色の晶洞石モダンでシックなルックを目指すなら、黒、白、ゴールドの組み合わせを試してみて。
📌もっとアイデアが欲しいですか?こちらをご覧くださいレジンギフトアイデアプレゼントにぴったりのプロジェクトに!
ジオード樹脂アートでよくある間違いとその修正方法
熟練の職人でも、レジンアートで問題に直面することがあります。ここでは、よくある間違いとその回避方法、修正方法をご紹介します。
泡だらけ
樹脂に気泡が入ると、仕上がりが台無しになることがあります。ゆっくりと混ぜ、作業を始める前に樹脂ボトルを熱湯で温め、注いだ直後に必ずヒートガンかトーチで加熱してください。

色がにじんだり、濁って見える
キャンバス上で絵の具を混ぜすぎないようにしましょう。線がくっきりと残るように、絵の具は優しく注ぎ、色ごとに別のスティックを使用してください。くっきりとした輪や模様を作るには、各層が少し乾いてから次の層を重ねるようにしましょう。
ベタベタする部分や柔らかい部分
樹脂がべたつく場合は、配合が間違っていたことを意味します。必ず正確に計量し、規定時間通りに混ぜてください。硬化後にべたつきが残っている場合は、よく混ぜた薄い層を上から流し込んで密封してください。ひどい場合は、べたついた樹脂を取り除いて最初からやり直す必要があるかもしれません。
不均一な表面
作業スペースを水平に保つことが重要です。もし作品が均一に硬化しない場合は、高い部分をやすりで磨き、透明なトップコートを塗って表面を滑らかにしてみてください。
ジオード樹脂アートの安全に関するヒント(見逃し厳禁)
安全は常に最優先されるべきです 樹脂を使った作業これらのヒントに従うことで、あなた自身とあなたの空間を守ることができます。
- ✅ 必ず手袋を着用し、換気の良い部屋で作業してください。
- ✅ 長時間作業する場合や換気の悪い場所で作業する場合は、防じんマスクの着用を検討してください。
- ✅ 作業スペースから食べ物や飲み物を遠ざけてください。
- ✅ お子様やペットが近くにいる環境で工作をする場合は、樹脂が完全に硬化するまで、お子様やペットが近づかないようにしてください。
ジオード樹脂アートのお手入れ方法と見せ方

完成したジオード樹脂アート作品は、適切なお手入れをすることで何年も美しさを保つことができます。ここでは、作品のお手入れ方法と飾り方をご紹介します。
- ✅ レジンアートのお手入れは、柔らかい乾いた布で軽く拭いてください。強力な洗剤は必要ありません。
- ✅ 黄ばみを防ぐため、直射日光を避けて保管してください。
- ✅ 壁掛けアートには、丈夫なフックまたはワイヤーを使用してください。
- ✅ コースターやトレイは湿らせた布で拭いてきれいにできますが、食器洗い機には入れないでください。
📌さらにユニークなレジンプロジェクトをお探しですか?このガイドをお見逃しなく樹脂製のピラミッドを作る古典的なジオードアートに独創的なひねりを加えた作品です!
ジオード樹脂アートの価格設定と販売方法
ジオード樹脂アートをビジネスにしたいなら、作品の価格設定や販売は想像以上に簡単です。ここでは、その始め方をご紹介します。
ジオード樹脂アートは、副収入を得る素晴らしい方法です。樹脂の費用を合計し、 顔料クリスタル、そしてあなたの時間。オンラインで販売する場合は、梱包と発送も忘れずに。
手作りのアート作品は価値があるので、安売りしてはいけません。オンラインで類似品を調べて、作品の競争力のある価格を設定するのに役立てましょう。
ジオード樹脂アートは以下の場所で販売できます:
- Etsy
- 地元の工芸品フェア
-
ソーシャルメディア
良い写真は大きな助けになります。自然光で撮影し、シンプルな背景を使うことで、作品がより際立ちます。
📌情熱を利益に変える準備はできていますか?もっと見る 樹脂を使った販売アイデアそして、インスピレーションを得ましょう!
結論
ジオード樹脂アートは、楽しくやりがいのある趣味であり、どんな家にも高級感と創造性をもたらします。必要な材料と適切なテクニックさえあれば、美しく個性的な、真に輝く作品を作り出すことができます。
さらに多くのガイド、ヒント、クリエイティブなレジンアートのアイデアについては、Resinersをご覧ください。レジンアートを次のレベルに引き上げる準備はできていますか?ショップをご覧ください。 Resinersの高品質樹脂製品あなたの次の素晴らしいプロジェクトのために!
ジオード樹脂アートに関するよくある質問
なぜ レジンアートは高価ですか??
レジンアートは、高品質のエポキシ樹脂、顔料、クリスタルなどの装飾品といった高級素材を使用するため、高価になる場合があります。さらに、作品一つひとつを丁寧に準備し、時間と技術をかけて制作する必要があるため、その価値が高まります。手作りならではの個性的な仕上がりも、大量生産された装飾品に比べて価格が高くなる要因となっています。
初心者でもジオード樹脂アートを作れますか?
もちろん、適切な材料と手順さえあれば、初心者でもジオード樹脂アートを上手に作ることができます。コースターやジュエリー皿のような小さな作品から始めるのが、基本的なテクニックを学ぶのに最適な方法です。根気強く練習を重ねれば、誰でも美しい作品を作ることができ、徐々に複雑なデザインにも挑戦できるようになります。
樹脂製のジオードアートと本物のジオードの違いは何ですか?
本物の晶洞は、何千年もの歳月をかけて形成された、結晶が詰まった空洞を持つ自然の岩石です。一方、樹脂製の晶洞アートは、エポキシ樹脂、顔料、結晶を用いて本物の晶洞の外観を模倣した手作りの工芸品です。これにより、アーティストは色、形、そして全体的なスタイルを自由にカスタマイズし、個性的でユニークな作品を生み出すことができます。
ジオード樹脂アートの制作にはどれくらい時間がかかりますか?
樹脂の混合と注入の工程は、デザインの複雑さにもよりますが、通常1~2時間かかります。ただし、樹脂の硬化には最低24時間が必要で、厚みのあるものや多層構造のものは完全に硬化するまでに最大72時間かかる場合があります。最良の結果を得るためには、必ず使用する樹脂メーカーの説明書で正確な硬化時間を確認してください。
どれでも使えますか 樹脂の種類 ジオードアート用ですか?
すべての樹脂が美術作品に適しているわけではないため、最高の透明度と硬度を得るには、美術用エポキシ樹脂を選ぶことが重要です。鋳造用樹脂は深めの型を作るのに最適で、コーティング用樹脂はトレイや壁掛けアートなどの平らな表面に最適です。ホームセンターなどで販売されている樹脂は、時間の経過とともに黄変したり、べたつきが残ったりして、見た目と耐久性の両方に悪影響を与える可能性があるため、避けてください。
関連記事:


コメントを書く
このサイトはhCaptchaによって保護されており、hCaptchaプライバシーポリシーおよび利用規約が適用されます。